Custom Screening Adapter Configuration Walkthrough
To implement the screening adapter pattern - follow the steps outlined below. Using the below referenced APIs. The API pattern used for an adapter is asynchronous, so calls sent to a client adapter reply with just HTTP 200 and then clients call the Receptor to respond.
| APIs Referenced |
|---|
| Screening Receptor API |
| Screening Command |
| Screening Query |
Sample Use Case for External Screening Provider
  AS: an Fenergo SaaS Platform consumer:

      GIVEN: Our organization has an existing Screening Provider which meets our requirements

      AND: I want to use that provider on the Fenergo SaaS Platform

      WHEN: I invoke the Screening Functionality through the Fenergo UI or APIs

  THEN: I want FenX to use my Provider as a Screening source
How to Set Up an External Adapter?
There are some steps for a client to follow when implementing an External Adapter for a custom screening provider, some infrastructure is required along with the management of that resource and the configuration of that Adapter on the Fenergo platform.
- Hosting and Availability: A client must deploy their custom adapter in the internet at a URL where the Fenergo SaaS application can reach it. Fenergo will be looking to call specific interfaces (as outlined in the API contract).
- Adapter Callbacks: All the messages in the contract are asynchronous, so after you process the method, your external adaptor will need to send messages back to the Fenergo “Receptor” to update a status.
- Implementation Permanence: The contract (payload for sending Legal entities for screening) cannot be modified, meaning the external adapter must implement the contract or the screening functionality will not work.
The configuration options available are illustrated below.
The call to create the configuration is typically not required, and will result in a response as below if the configuration already exists.
  {
      "data": null,
      "messages": [
          {
              "message": "ScreeningConfiguration for tenant 45bf62ac-e4b1-4c16-ae32-d774cd18db6d already exists",
              "type": "Error"
          }
      ]
  }
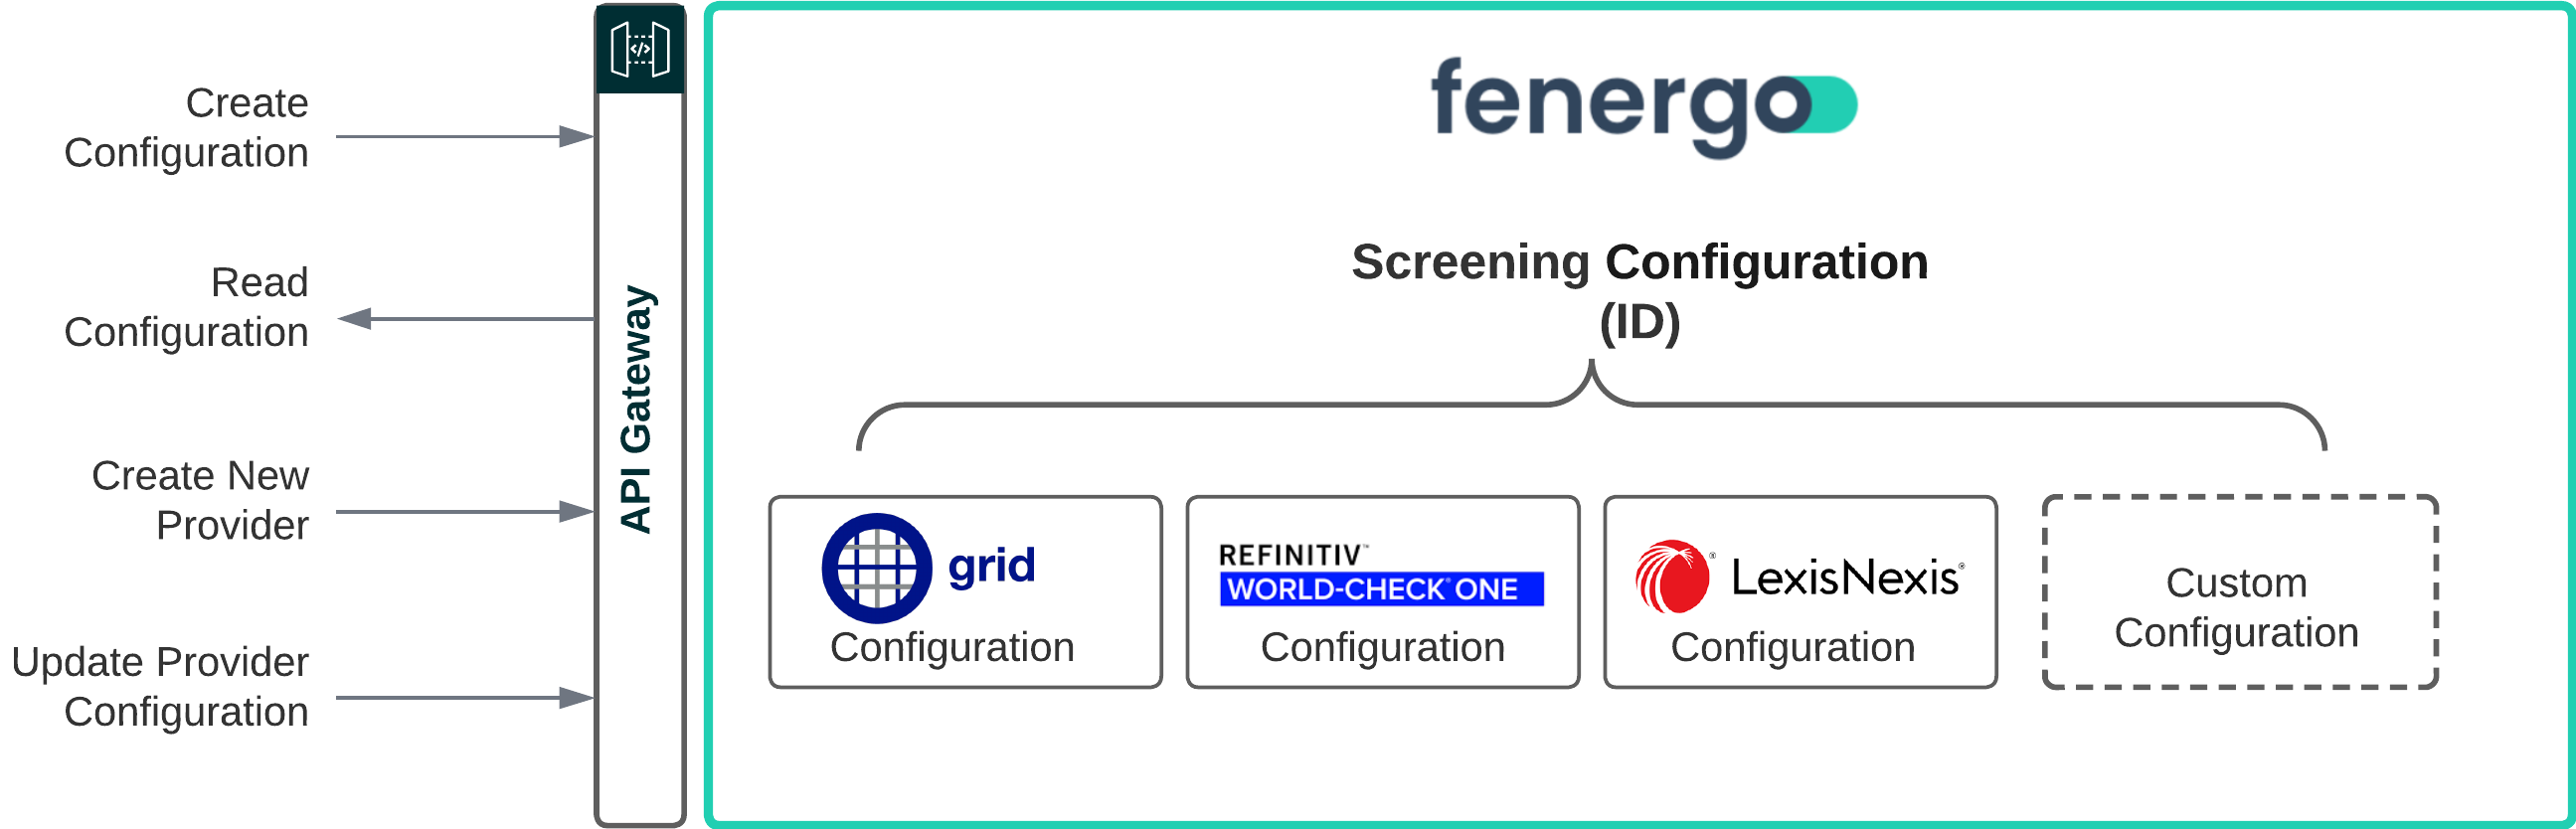
- Read Configuration: This call can be made to retrieve the configuration for the tenant. By default all of the Out of The Box Providers will be disabled. This is also where your new provider will be listed after you create it.
- Create a New Provider: This call allows you to add a new provider to the Screening Configuration.
- Update Provider: The configuration for your Provider can be updated via an API call.
Get Current Screening Configuration
The call to retrieve the configuration of Screening from a tenant can be made with a GET API call to the following URL {{baseURL}}/screeningquery/api/v2/configuration
{
  "data": {
    "tenant": "1646d0ca-4050-4fa4-b515-f21cb9f74f48",
    "providers": [
      {
        "id": "LN",
        "name": "LexisNexis",
        "isOutOfTheBox": true,
        "active": false,
        "status": "...",
        "adapterConfiguration": {
          "url": "https://api.fenergonebula.com/lnadaptercommand",
          "credentialProperties": [
            .
            .
            . . . . {Specific Provider Config} . .
            .
            .
          ],
          "ongoingScreeningConfiguration": {
            "active": false,
            "ongoingScreeningProperties": [
                .
                .
                . . . . {Specific Provider Config} . .
                .
                .
            ]
          },
          .
          .
          . . .  {Other Provider Configurations}  . . . .
          .
          .
        },
        "secondaryIdentifiers": {
          "firstName": true,
          "middleName": true,
          "lastName": true,
          "fullName": false,
          "dateOfBirth": false,
          "gender": false,
          "address": {
            "addressLine1": false,
            "addressLine2": false,
            "city": false,
            "postalCode": false,
            "country": false,
            "stateProvince": false,
            "type": false
          },
          "nationality": false,
          "placeOfBirth": false,
          "citizenship": false,
          "registeredCountry": false,
          "uniqueId": false
        },
        "configurationSets": [
          {
            "id": "f52677f2-56b7-4289-a18b-d11cff3ad338",
            "name": "Default",
            "description": "Default description",
            "additionalSettings": [
                .
                .
                . . . . {Specific Provider Config} . .
                .
                .
            ]
          }
        ],
        "defaultConfigurationSetId": "f52677f2-56b7-4289-a18b-d11cff3ad338",
        "additionalSettingsSchema": [
          {
            .
            .
            . . . . {Specific Provider Config} . .
            .
            .
          }
        ]
      }
    ]
  },
  "messages": null
}
Understanding the Get Screening Configuration Response
The above partial configuration response contains all the configured details for the OOTB and (if created) any custom adapters.
- Inside the
"providers"element is the name & value"id": "LN". This is a unique string used to identify the provider. Also the name of the Provider, this will be displayed in the UI under the screening configuration. - The
"isOutOfTheBox"element will only be true for providers LN, RDC (Grid) and WCO. Providers created through the API will always have isOutOfTheBox set to false. This will also restrict some configurations that are not available for custom providers. Non Out Of The Box providers cannot have"credentialProperties"or"ongoingScreeningProperties"as this type of configuration should live on the custom provider itself. - The
"credentialProperties"and"ongoingScreeningProperties"elements are the various configuration options for the screening provider. This sample has removed the specifics and details as this is the config for Lexis Nexis and won't be available for custom providers. - As the main
"providers"node in the response is an array, this is where the other providers in the array would be listed, shortened for clarity on screen here. "secondaryIdentifiers"lists the configured additional data points for searching that can be included in screening requests if the provider supports them."configurationSets"allows the clients to have different sets of configurations so for different journeys or batches different configuration can be used. More details can be found in the Screening User Guide. Note that for most custom providers these settings are not needed."additionalSettingsSchema"is used to configure which fields can be added in a configurationSet. For more details about restrictions and what can be configured, check the description of the endpoint/screeningcommand/api/v2/configuration/provider/{providerId}/settings-schemain our APIs."defaultConfigurationSetId"points to the configuration set that will be used when creating batches if no configuration set is specifically configured for the journey or sent in the batch creation call if using the APIs directly
Create Custom Screening Provider
The call to create a new Custom Screening Provider can be made with the a POST call to the following URL {{baseURL}}/screeningcommand/api/v2/configuration/provider
{
  "data": {
    "id": "TestScreening",
    "name": "Test Bank Custom Screening Provider",
    "adapterConfiguration": {
      "url": "https://test.endpoint.com",
      "authenticationActive": false,
      "authenticationKey": {
        "key": "HgyUHIO81m0FcZfPS1lnUw=="
      },
      "encryptionKey": {
        "key": "HgyUHIO81m0FcZfPS1lnUw=="
      },
      "ongoingScreeningConfiguration": {
        "active": false
      }
    },
    "secondaryIdentifiers": {
      "firstName": true,
      "middleName": false,
      "lastName": true,
      "fullName": false,
      "dateOfBirth": false,
      "gender": false,
      "address": {
        "addressLine1": false,
        "addressLine2": false,
        "city": false,
        "postalCode": false,
        "country": false,
        "stateProvince": false,
        "type": false
      },
      "nationality": false,
      "placeOfBirth": false,
      "citizenship": false,
      "registeredCountry": false,
      "uniqueId": false
    },
    "additionalSettingsSchema": [],
    "defaultConfigurationSet": {
      "name": "Default",
      "description": "Default Configuration Set",
      "additionalSettings": []
    }
  }
}
Understanding the Create Custom Screening Provider Request
The above configuration request contains the details required to add a new custom adapter to your Tenant Configuration. Once Added you should receive a HTTP 202 Accepted response.
- The
"id"the reference your screening provider. This is just a string (no spaces or special characters). This Id is required when making updates to your configuration. - The
"name"is a friendly display name for your Screening Configuration. This will be displayed in the User Interface - The
"url"within the"adapterConfiguration"is the URL for where your adapter is located. This URL will be called by Fenergo when interacting with your screening provider.
Updating a Custom Screening Provider
The call to update an existing Custom Screening Provider can be made with the PATCH API call to the URL {{baseURL}}/screeningcommand/api/v2/configuration/provider/{providerId}. If Required the configuration can be deleted.
Deleting a Custom Screening Provider
The call to Delete an existing Custom Screening Provider can be made with the DELETE API call to the URL {{baseURL}}/screeningcommand/api/v2/configuration/provider/{providerId} The provider and any configuration will be removed.
Securing a Custom Screening Provider
To protect the content of data sent for screening, the message body content is first encrypted using the AES-CBC algorithm. This uses both an Encryption Key and a Random Initialization Vector (IV). A separate Authentication Key is used to calculate a hash on the encrypted message body. The random IV and the Hash are sent along with the message as a header. This allows the message to be both decrypted and then validated as coming from a trustworthy source.
Updating Keys for Custom Screening Provider
Once you have created your two keys for Encryption and Authentication, you can test your configuration by calling the PATCH Method at {{baseURL}}/screeningcommand/api/v2/configuration/provider/{providerId} using the below JSON Body.
{
    "data": {
        "adapterConfiguration": {
            "authenticationActive": true,
            "authenticationKey": {
                "key": "Bbi0pW0fB/xU4+oddRp0P2iHsvXrwUfTF91pLf/AbEE="
            },
            "encryptionKey": {
                "key": "3Rde1GKKULZDoNnpSjCzqaRFX7RFk/ibOh+Tfm0SAzg="
            }
        }
    }
}
Encryption and Decryption of messages for the External Screening Provider
The encryption and decryption steps are universal for the external adapter patterns, so follow this guide for how to encrypt and decrypt messages sent to your adapter and messages you send to the Screening Receptor.
Testing Your Custom Screening Adapter
Once you have updated the encryption keys, you can use the HTTP POST method to test your adapter against the following URL {{baseURL}}/screeningcommand/api/v2/configuration/provider/{ProviderId}/test.
This will cause the Fenergo SaaS application to send a test message to your hosted Adapter at the URL you provided in your configuration. Your adapter implementation needs to respond only with a HTTP 202 Accepted. Your adapter will then need to Decrypt this message. An example of the test message in its encrypted form is below :
POST /api/test HTTP/1.1
Host: {yourSpecifiedURL}
Content-Type: text/plain
X-Encryption-IV: NF/xcZ21LhFIwA31q5oMzw==
X-Authentication-MAC: DEL/vVP8qD8feLtJCptnyI4ZYHRMDZ8zjkZk3AZRAnw=
X-Provider-Id: TestScreening
X-Tenant-Id: xxxxx-xxxxxx-xxxxx-xxxxxxx

UE30wHm2NrYnKkXBO4TLWdxxxp/QQLY1t1qFyJb3juEIZ+kh00zuQ68k8HiPxdlFX9wrrQWgCgjJ/kDhZcnYqTTADXWCzgLH9KCVGf19nz8Yn0XNbzeKiLQCvPeIq92UJIIDbon+3eMdOcQ7TOg54jaI6A/2U7A8qWXPbxkEhkd12kKJ4xq4Kg/jflnhDzyKjmhYKzC46CIbk9AecRIvla1oowqqzNKAOdDbu+Vqr9A=
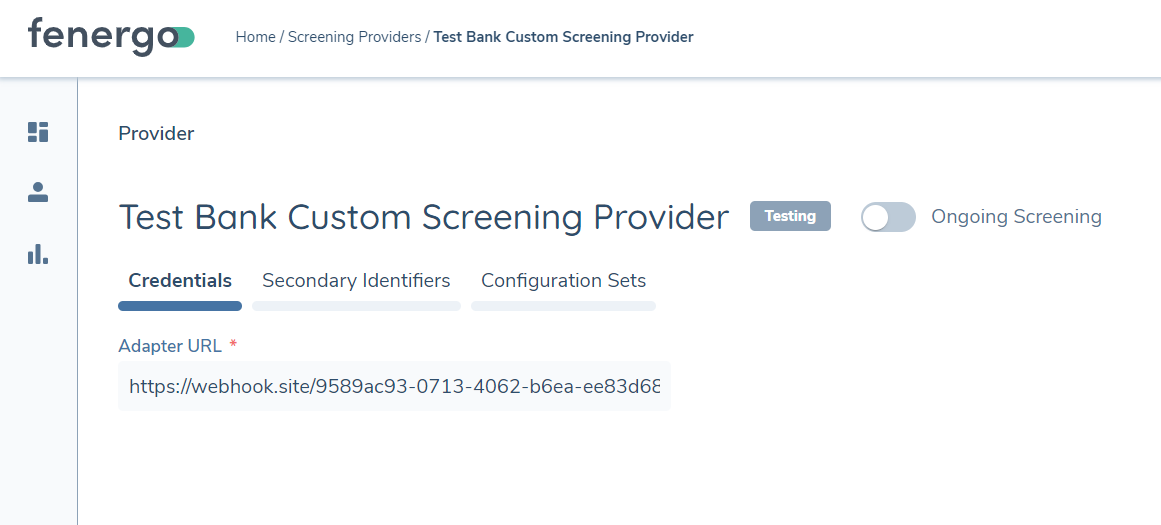
On the User interface of the Fenergo platform, if you navigate to your screening provider, you will see the status is labelled as Testing
You will need to also implement the other methods as outlined in the Screening Adapter Contract.
https://{yourSpecifiedURL}/api/screen- Called when screening functionality is invoked on Fenergohttps://{yourSpecifiedURL}/api/resolvematches- Called to resolve screening matcheshttps://{yourSpecifiedURL}/api/test- Called to test the Adapter Configuration (Connectivity and Encryption)https://{yourSpecifiedURL}/api/ongoingscreening(optional if you don't support Ongoing Screening, mandatory if you want to support Ongoing Screening)https://{yourSpecifiedURL}/api/ongoingscreeningupdate(optional if you don't support Ongoing Screening, mandatory if you want to support Ongoing Screening)
Ongoing Screening is optional and if your Adapter does not support and you do not need Ongoing Screening, the last two methods are not required.
Creating a Response for the Fenergo Receptor
Fenergo send the encrypted message to the adapter asynchronously, and receive a HTTP 202 Accepted response. To close the test and have the custom adapter Verified, you need to send a message back to the Screening Receptor. In the screening receptor swagger definition, there are a examples of all available messages which can be sent back to the receptor.
- Screen operation - Success - Entity type 'Individual'
- Screen operation - Success - Entity type 'Company'
- Screen operation - Error
- ResolveMatches operation - Success
- ResolveMatches operation - Error
- Test operation - Success
- Test operation - Error
- OngoingScreening operation - Success
- OngoingScreening operation - Error
- OngoingScreeningUpdate operation - Success
- OngoingScreeningUpdate operation - Error
- OngoingScreeningGetResults operation - Success - Entity type 'Individual'
- OngoingScreeningGetResults operation - Success - Entity type 'Company'
- OngoingScreeningGetResults operation - Error
{
  "response": {},
  "id": "fd23f474-eff9-425f-a776-78e2176b36e4",
  "tenant": "xxxxxxxxxxxxxxxxxxxxx",
  "providerId": "MyProviderId",
  "type": "Test",
  "status": "Success",
  "errorDetails": null
}
The message that needs to be sent is : Test operation - Success and the Json Body is above. We have to encrypt and sign this message.
"id"should be the same id that is sent to the adapter in the request."tenant"is the tenantId (blanked out below for security reasons)"providerId"is the string value for the ProviderId supplied in the configuration."type"is the type of message being sent to the receptor, in this case "Test""status"is the status of the message being sent, which is set to success.
The above message must be encrypted as per: this guide.
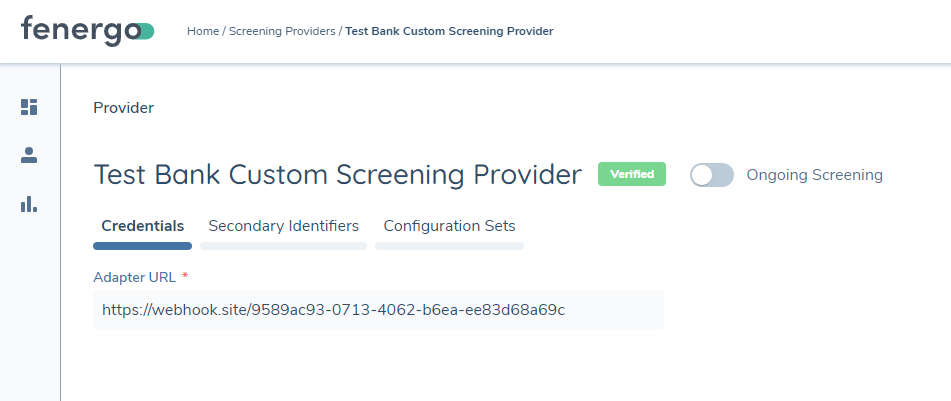
Once you have sent the above encrypted message back to the Fenergo Receptor, if you navigate to your screening provider config, you will see the status is labelled as Verified