Deployment Pipelines
Browsing Deployment Pipelines
What this covers
The Deployment Pipelines page is where you view the deployment pipeline hierarchy and switch between list and chart layouts. This guide covers the top-level page only — the list view, sub-pipeline rows, filtering, and the chart view. The inside of a Deployment Pipeline is covered in Viewing a Deployment Pipeline.
List view
List view is the default. Each row shows the pipeline name, owner, tenant count, child count (where children exist), stage pills, and an archived marker where applicable.
- Click the deployment pipeline name or main row area to open its detail page.
- Use the chevron at the far left to expand or collapse sub-pipelines without leaving the list.
- Deployment Pipelines with children show an Expand all control; once expanded it becomes Collapse all.
Filtering
Use the controls above the list to narrow what's shown:
- All states switches between all, active, and archived deployment pipelines.
- The owner filter narrows to a specific owner.
When filters are active, ECP keeps ancestor deployment pipelines visible so matching children still appear in context. Use Reset filters to return to the default list.
Chart view
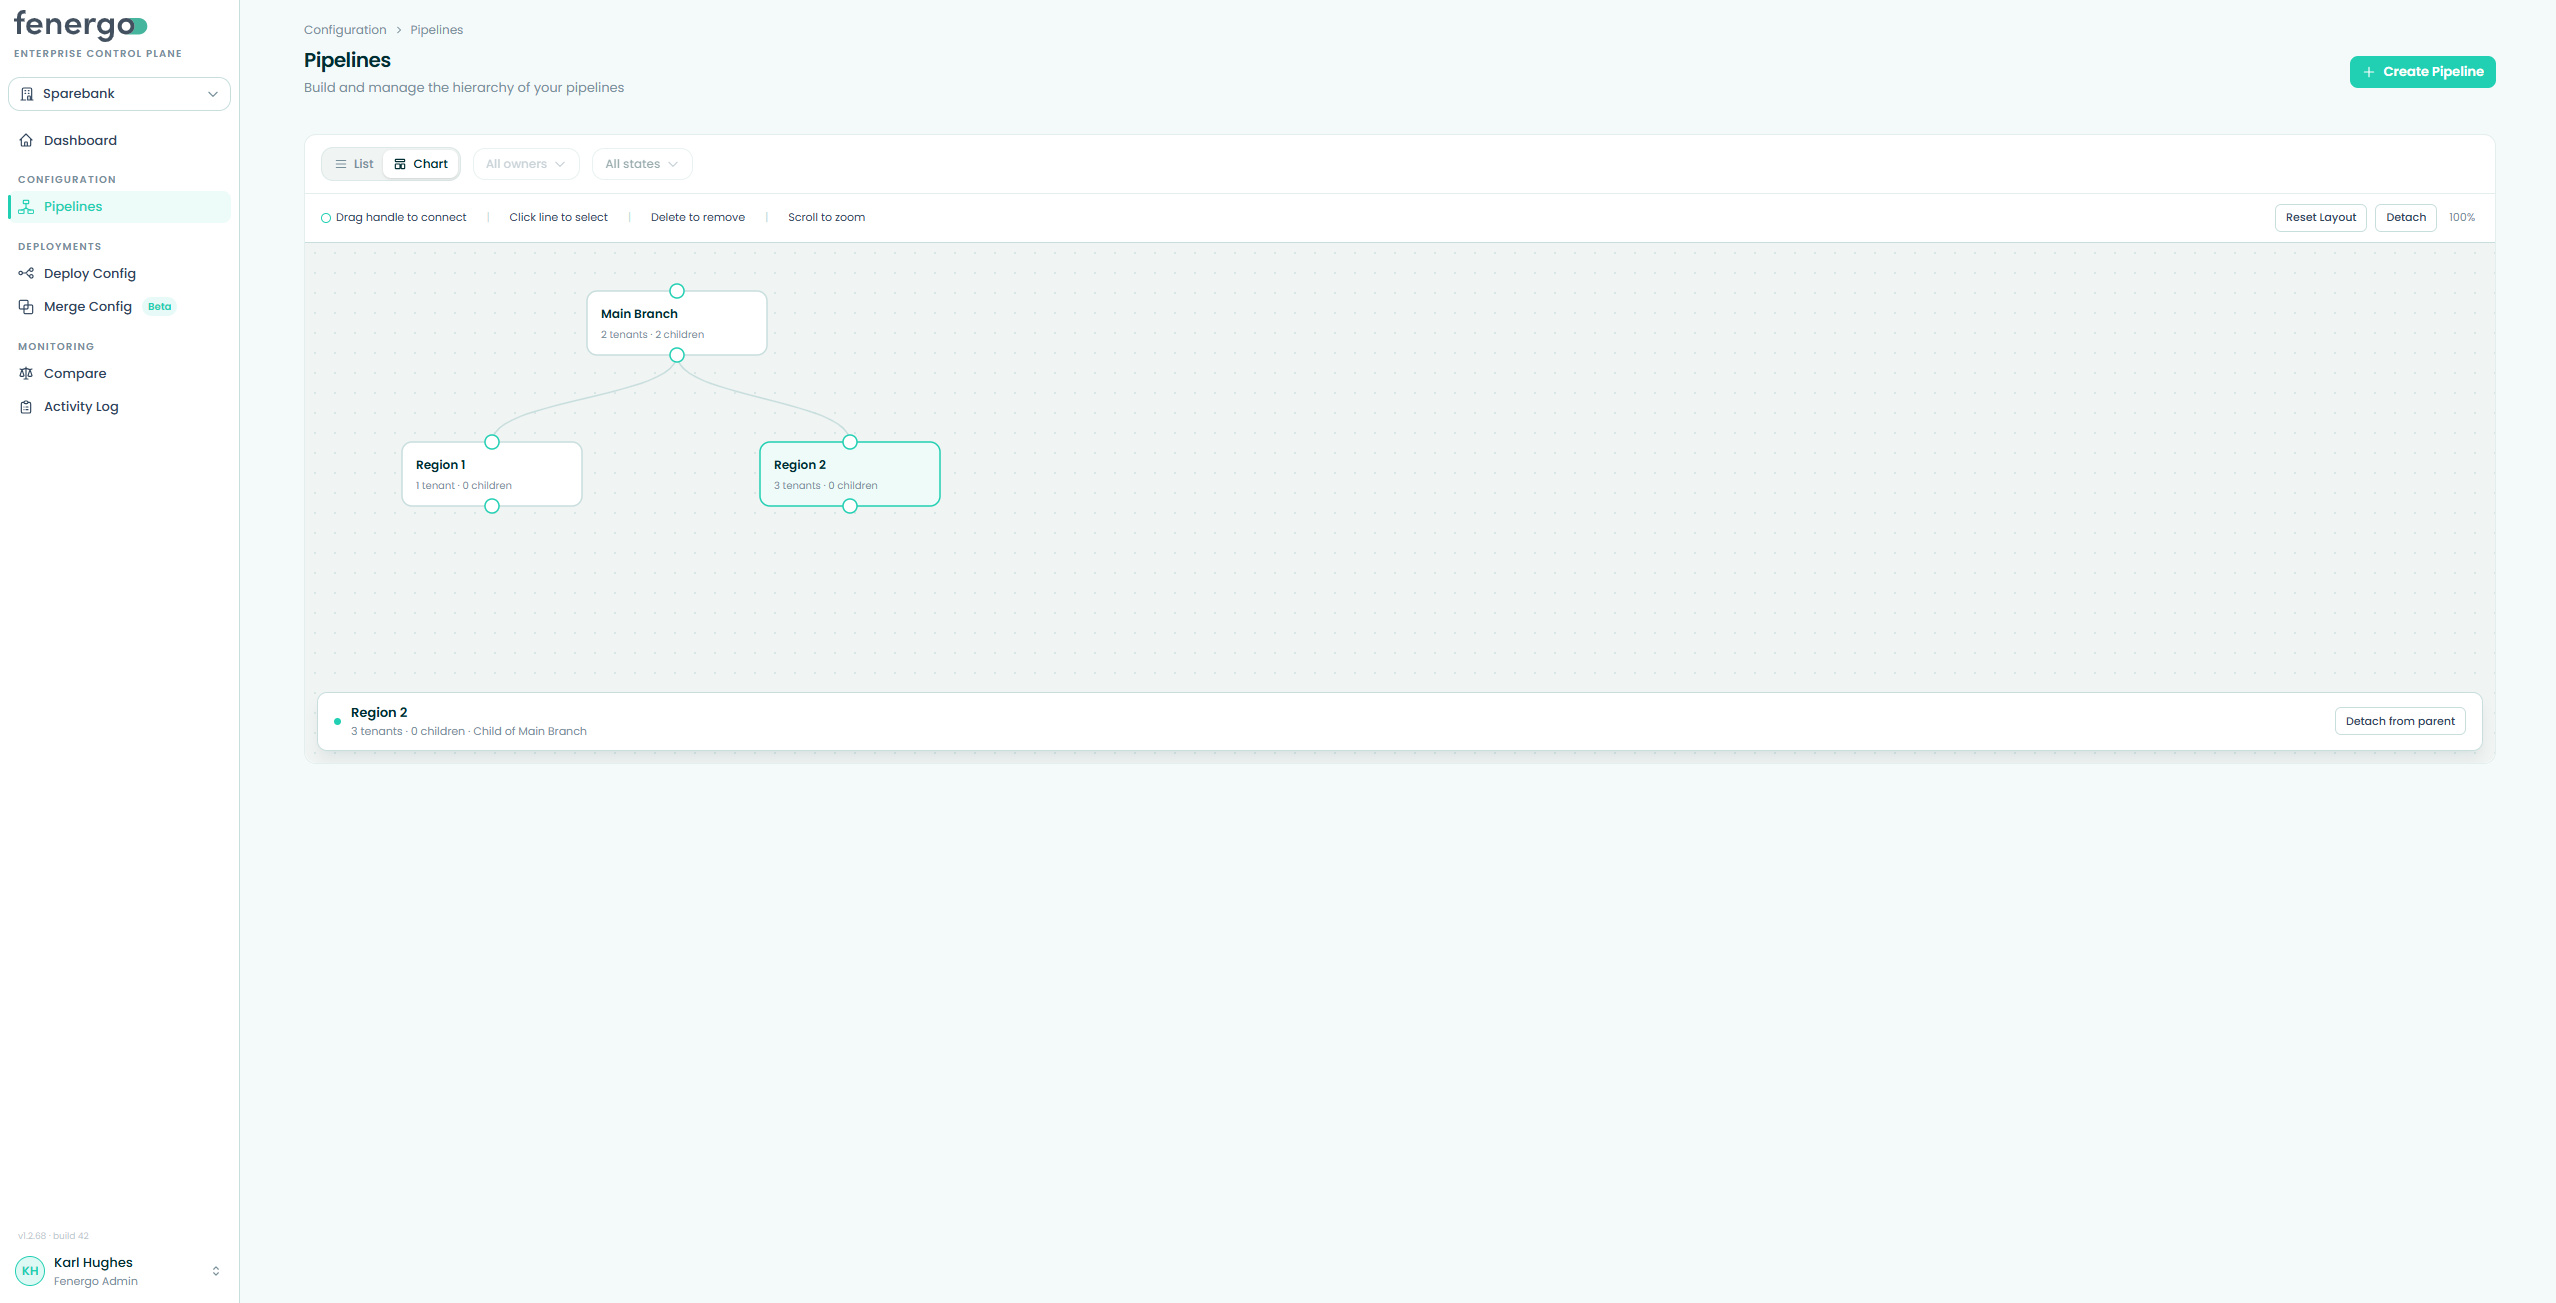
Click Chart to switch to the hierarchy chart, which renders each deployment pipeline as a card with its tenant and child counts. It's designed for understanding and adjusting parent/child relationships.
- Click a card to select it; drag the canvas to pan; use the mouse wheel to zoom.
- Reset Layout clears temporary positioning and restores the pan/zoom state.
- To create or change a relationship, drag from the handle at the top or bottom of a card to another card. ECP validates the relationship before saving.
- To remove a relationship, select the connection line and press Delete or Backspace.
- Selecting a card also opens a detail panel below the chart, showing its tenant and child counts and a Detach from parent action for child pipelines.
Troubleshooting
| Issue | Likely cause | How to fix |
|---|---|---|
| A deployment pipeline won't expand in list view | Only deployment pipelines with children show an expand chevron. | Use the row as a normal link, or switch to Chart view to inspect the hierarchy. |
| Owner or state filters are disabled | Filters are disabled while Chart view is active. | Switch back to List view to filter. |
| A chart connection won't save | The relationship already exists, would create a loop, or exceeds the maximum depth. | Choose a different parent/child relationship within the supported depth. |
Creating a Deployment Pipeline and Adding a Tenant
Deployment Pipelines sit inside an organisation. Before creating one, confirm which organisation it should belong to — access to an organisation grants visibility of every pipeline within it.
If your team needs its own organisation, raise a request rather than trying to create one yourself.
Step 1 — Create a Deployment Pipeline
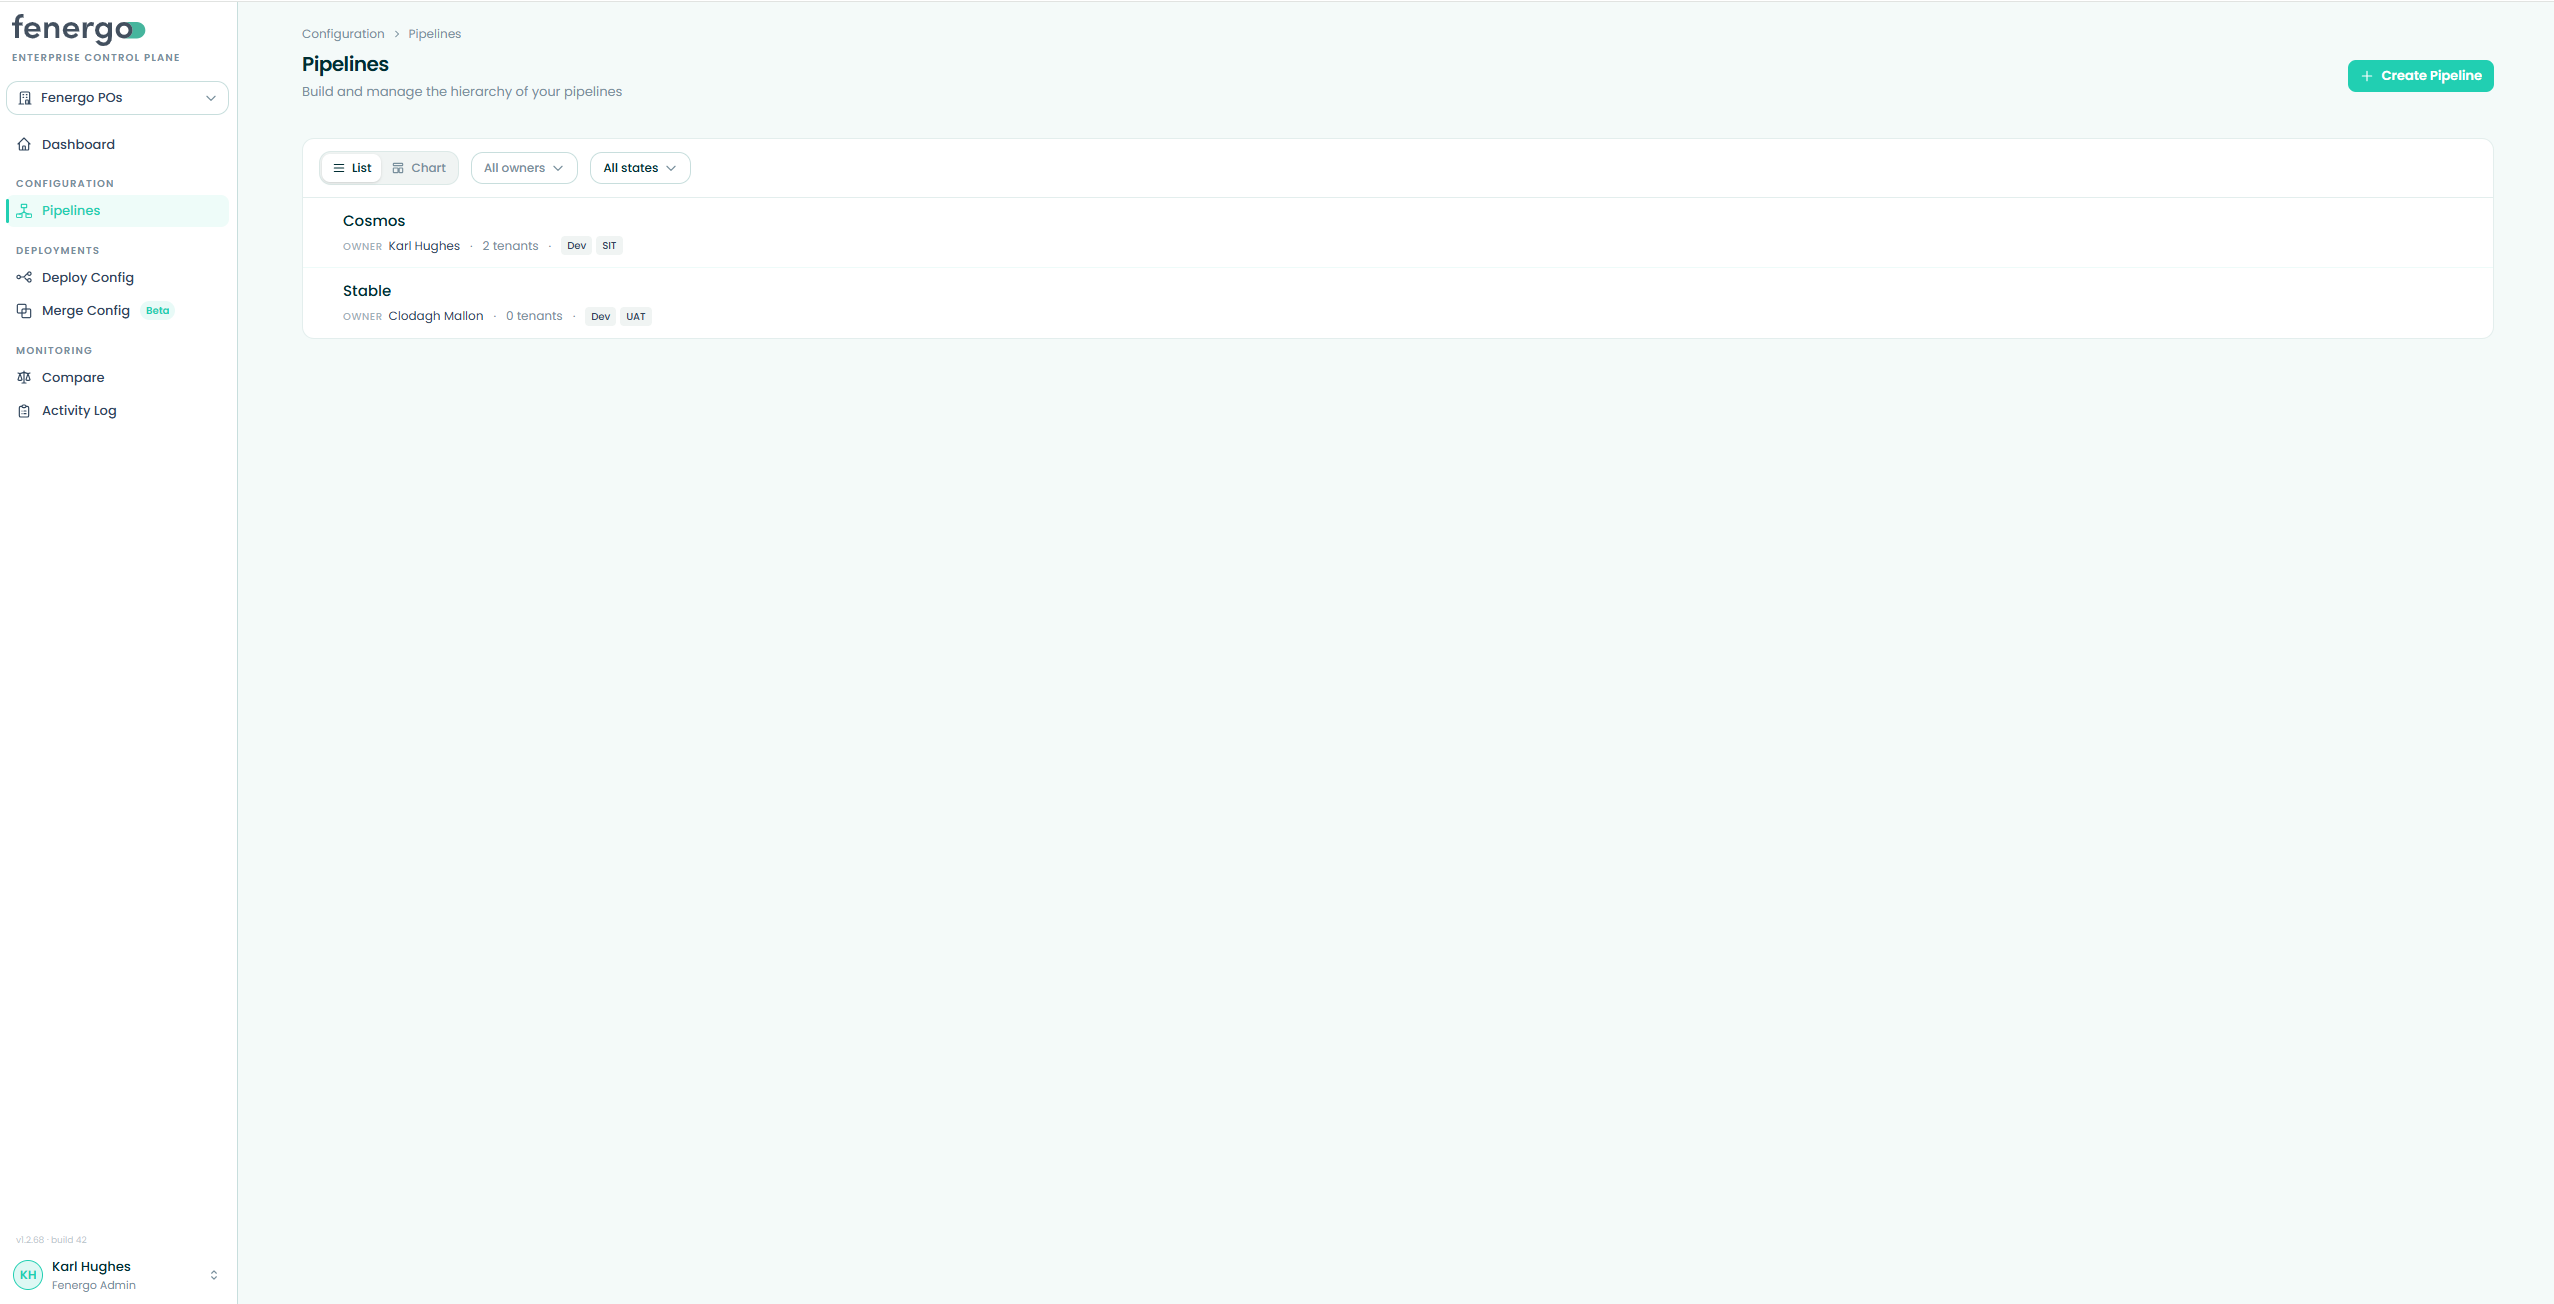
- Go to the deployment pipelines list in the left-hand nav and click + Create Pipeline.
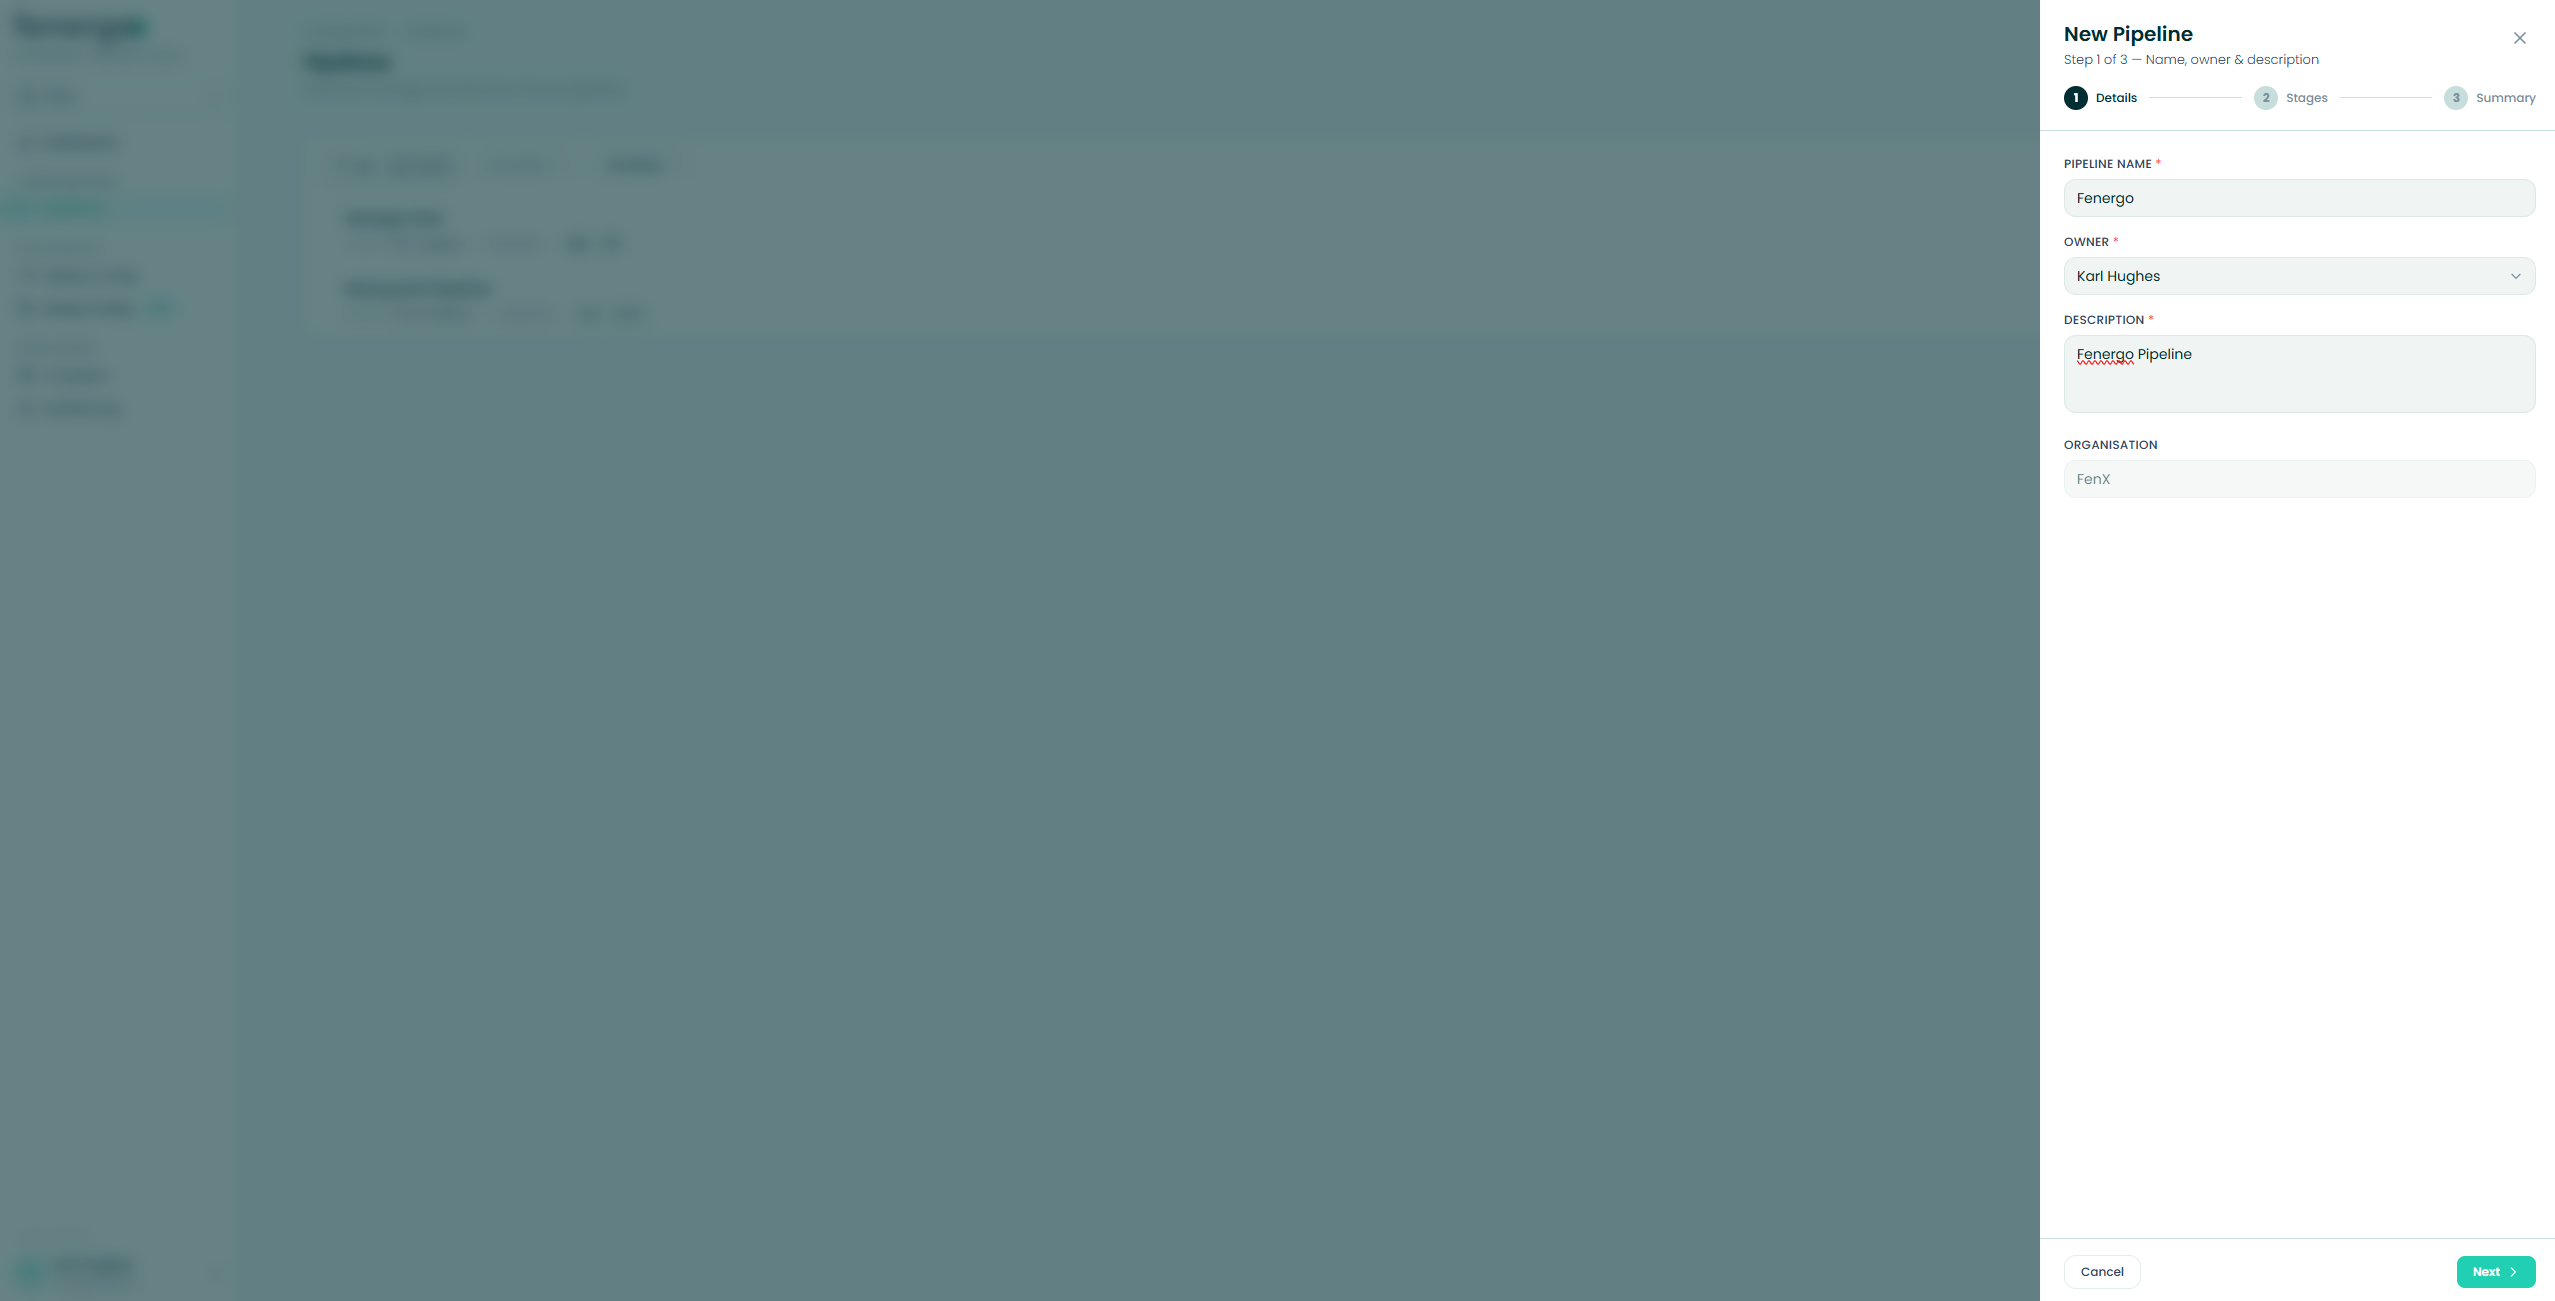
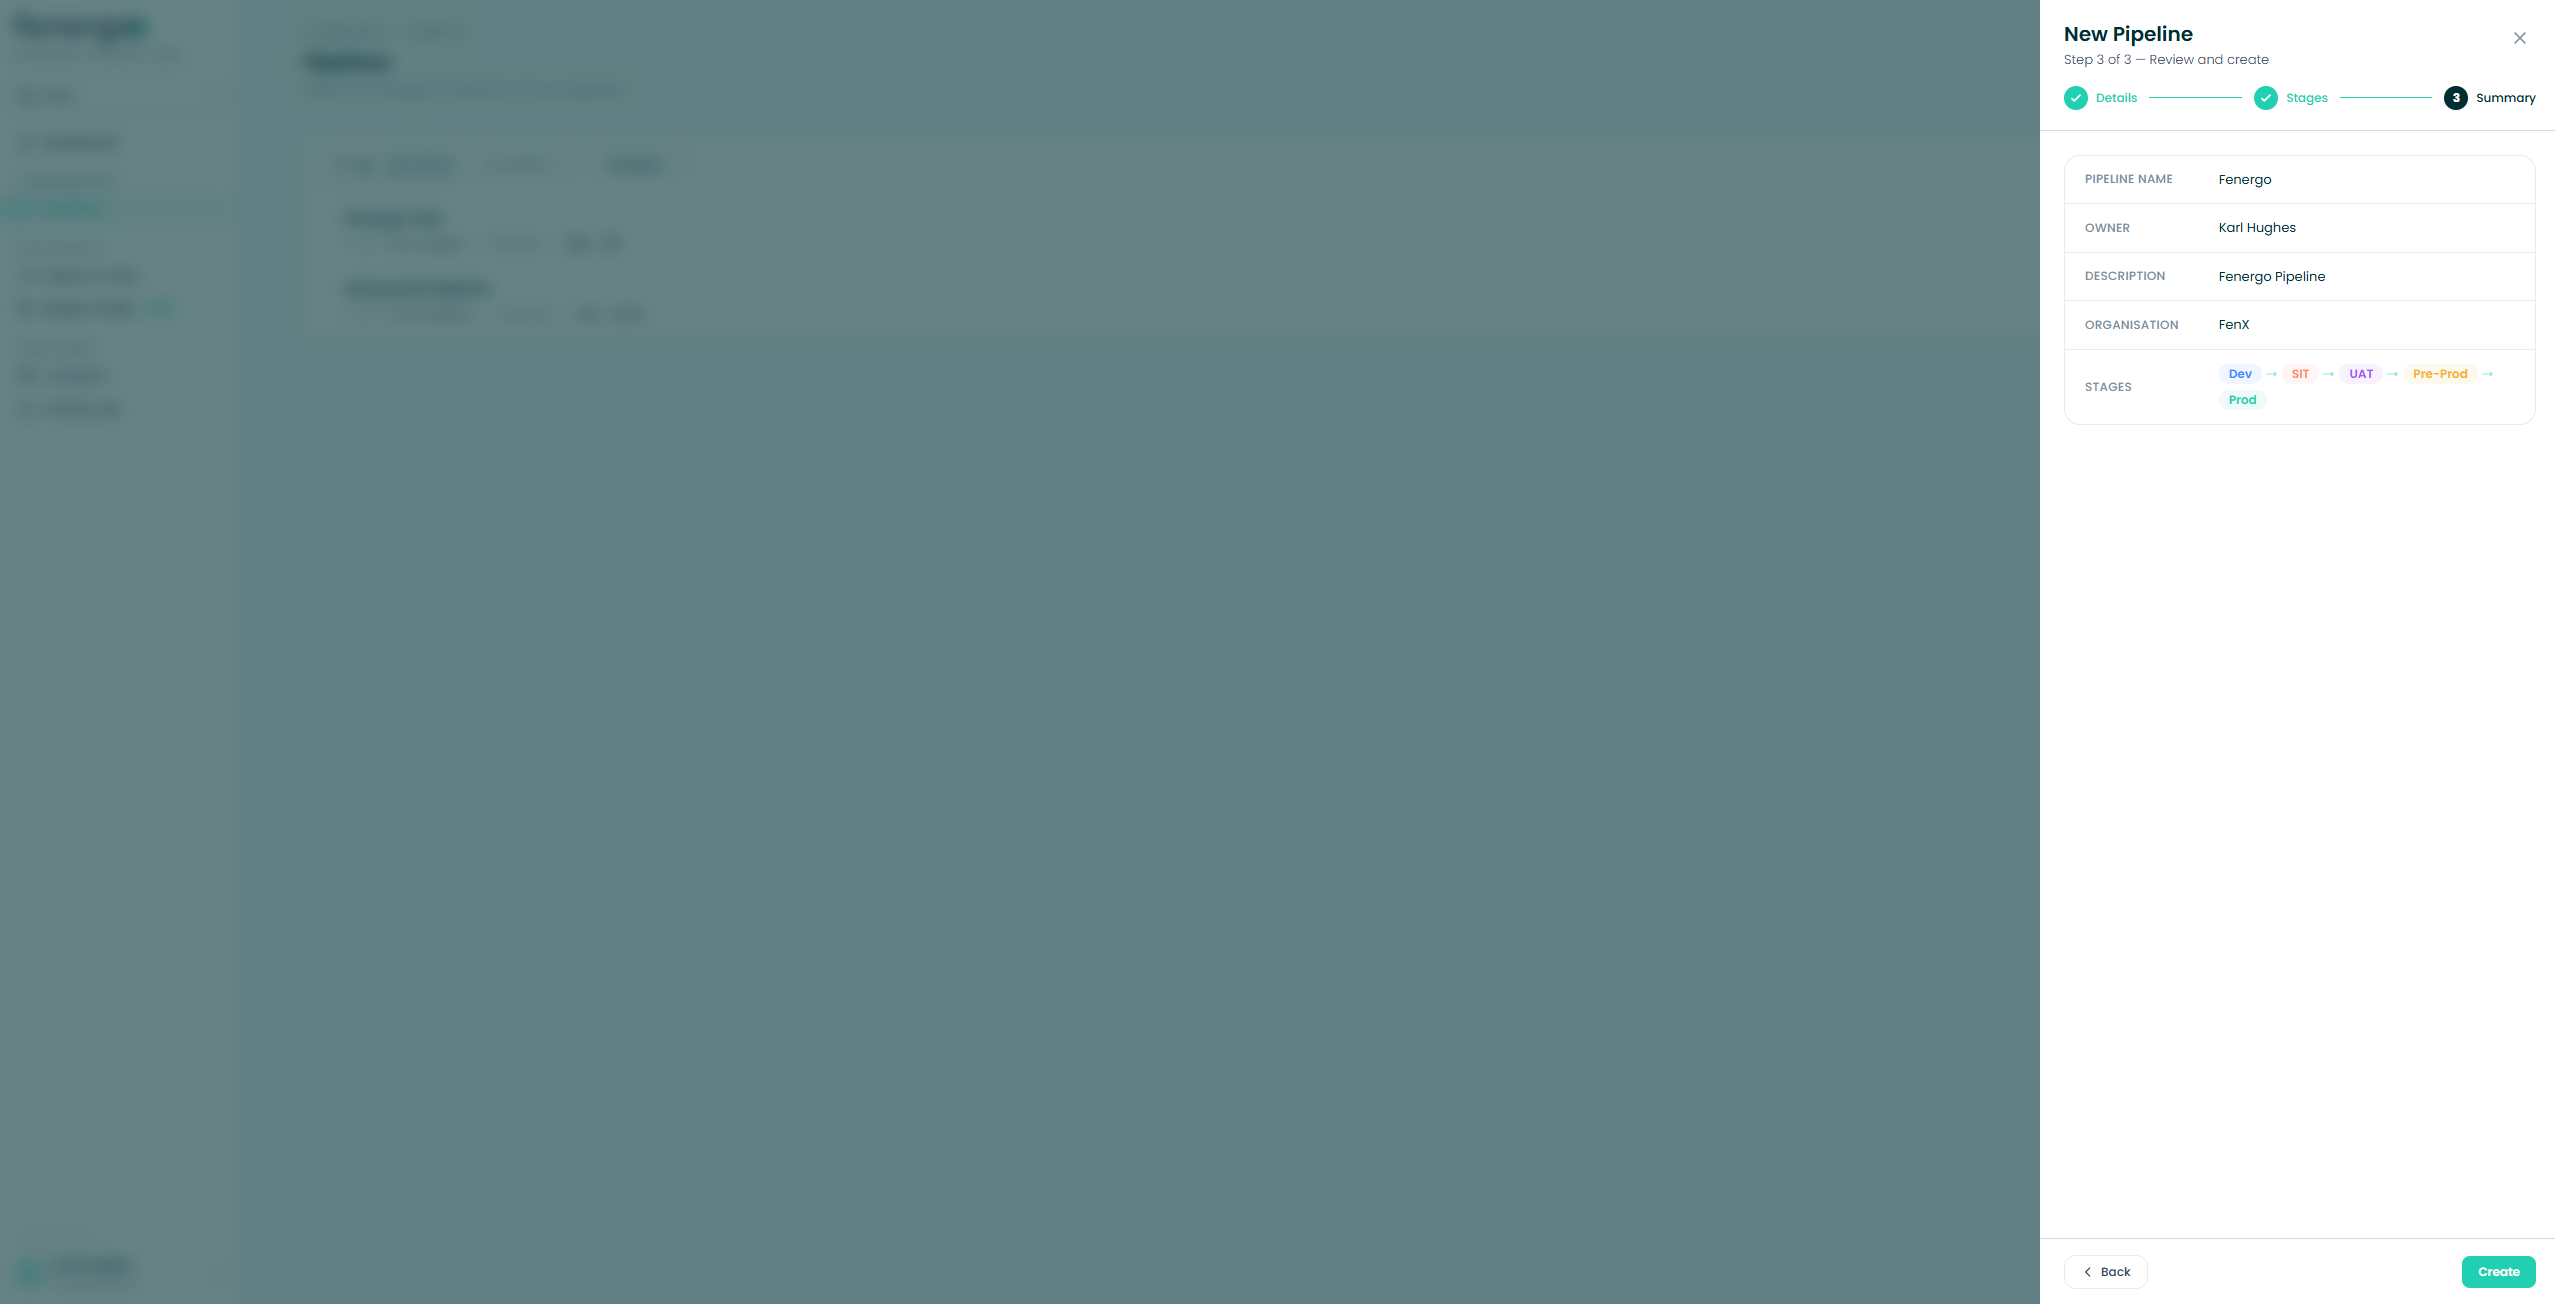
- Details: enter a Pipeline Name, Owner and Description. Check the Organisation field matches where the pipeline should live.
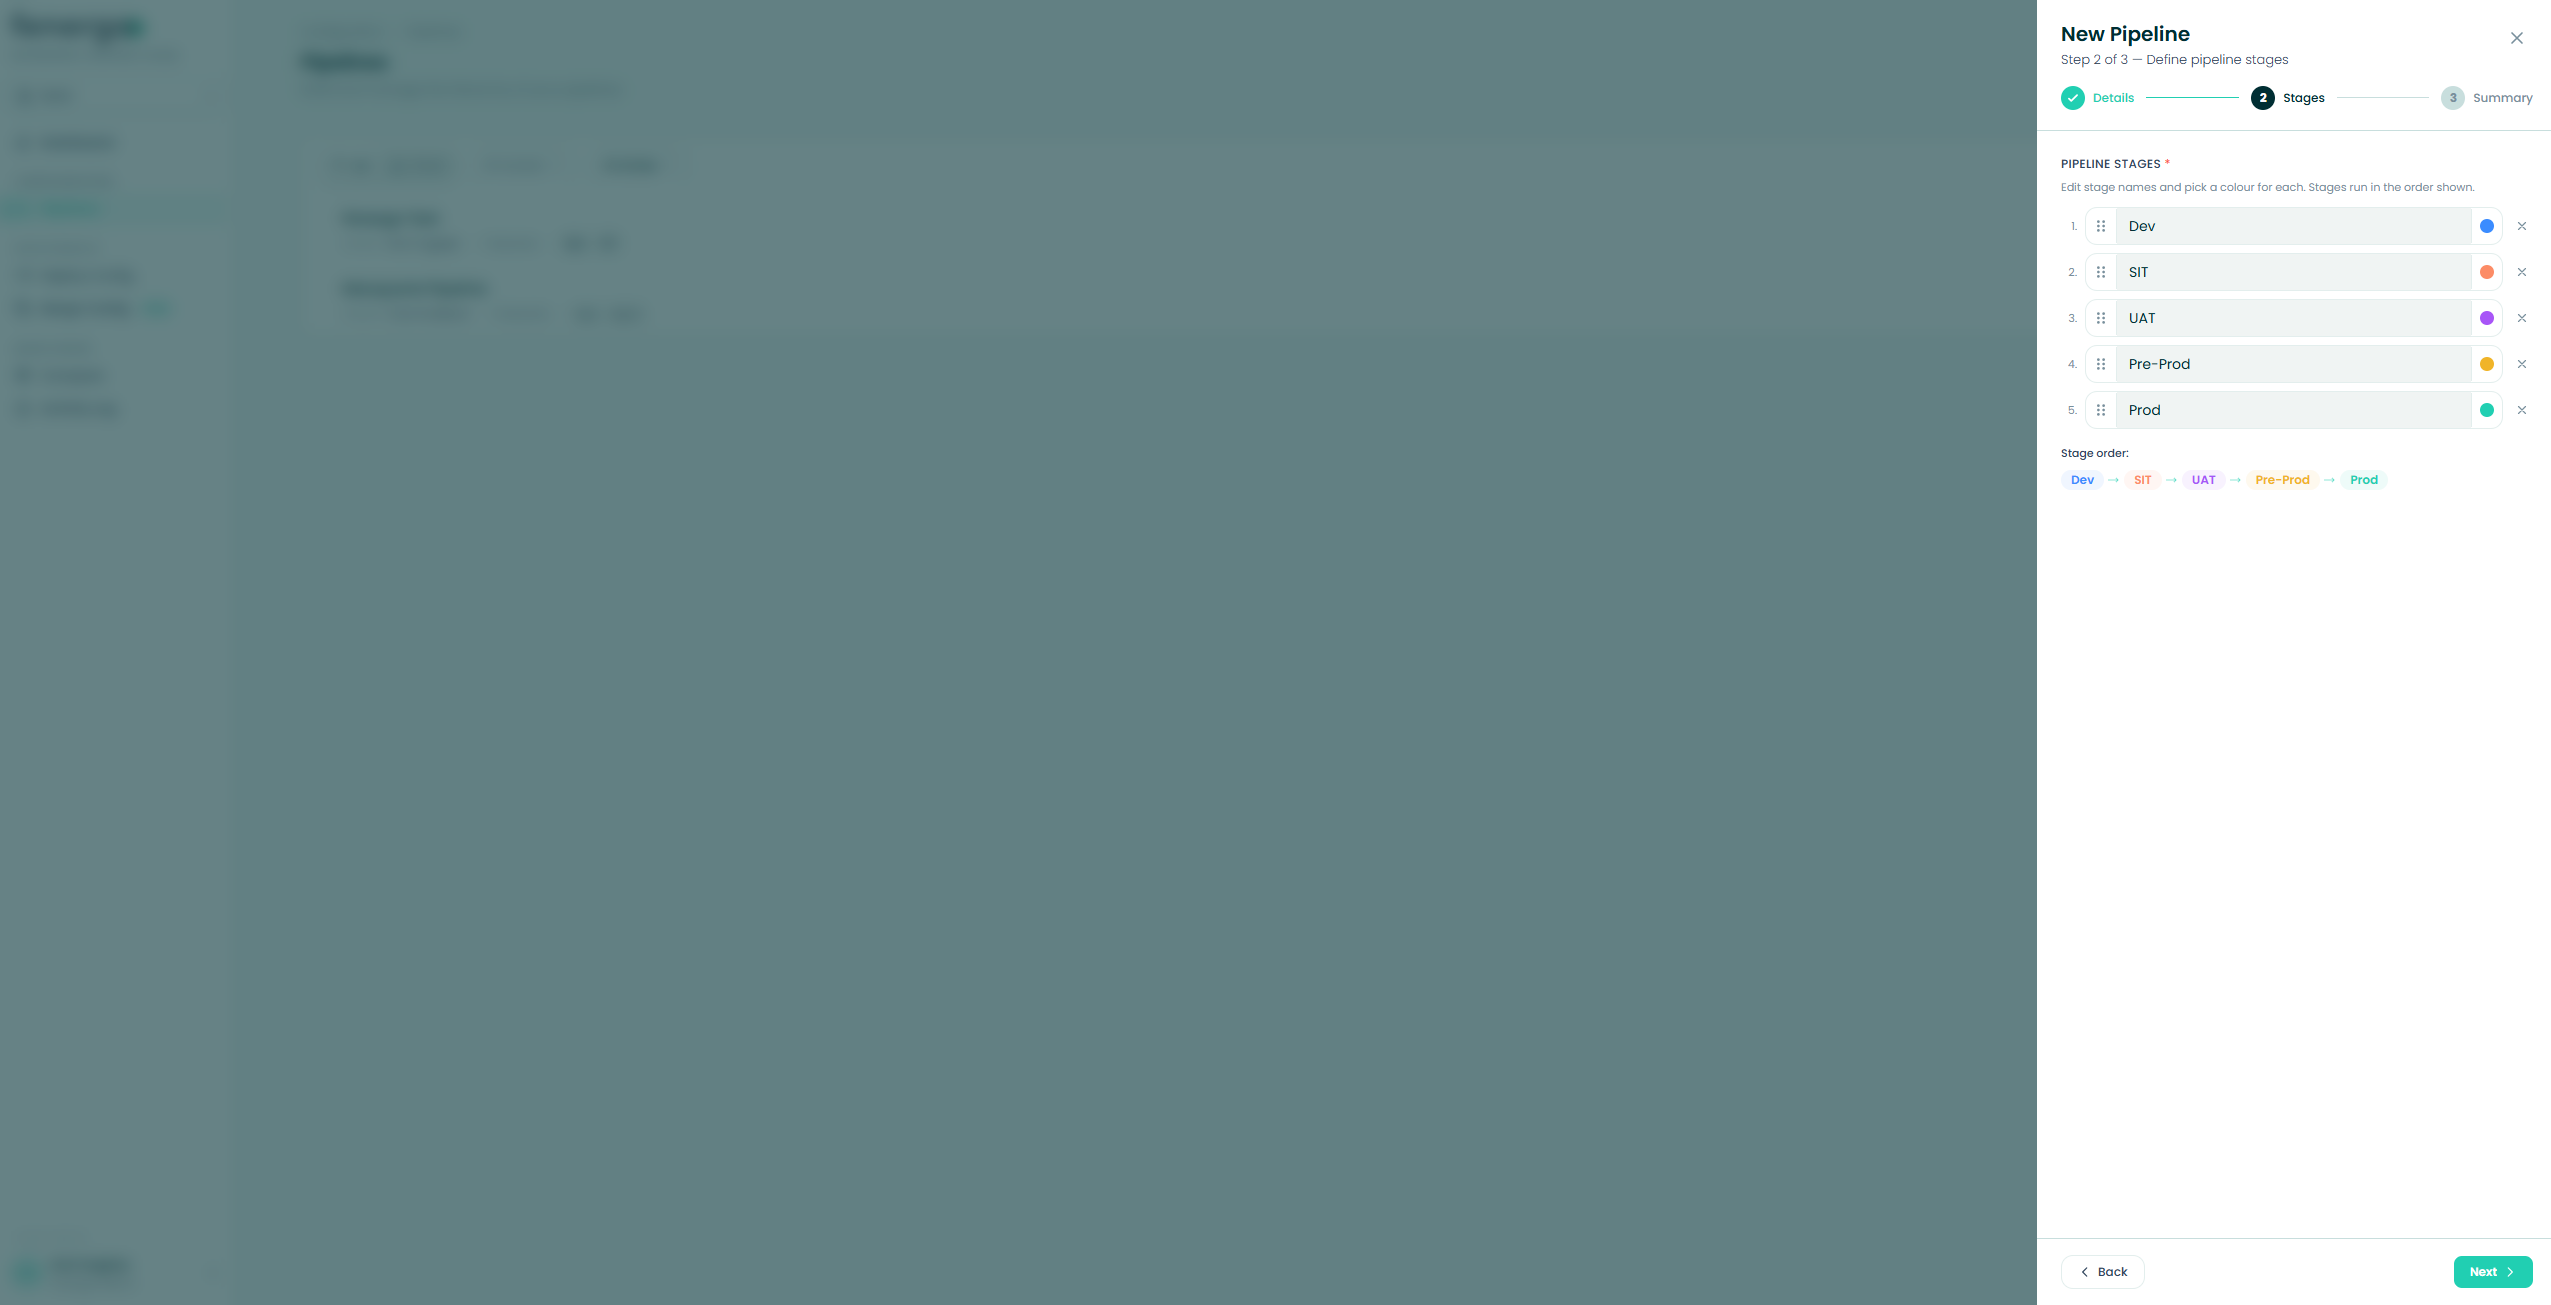
- Stages: define the stages (e.g. Dev, SIT, UAT, Pre-Prod, Prod) and set a colour for each. Stages run left to right.
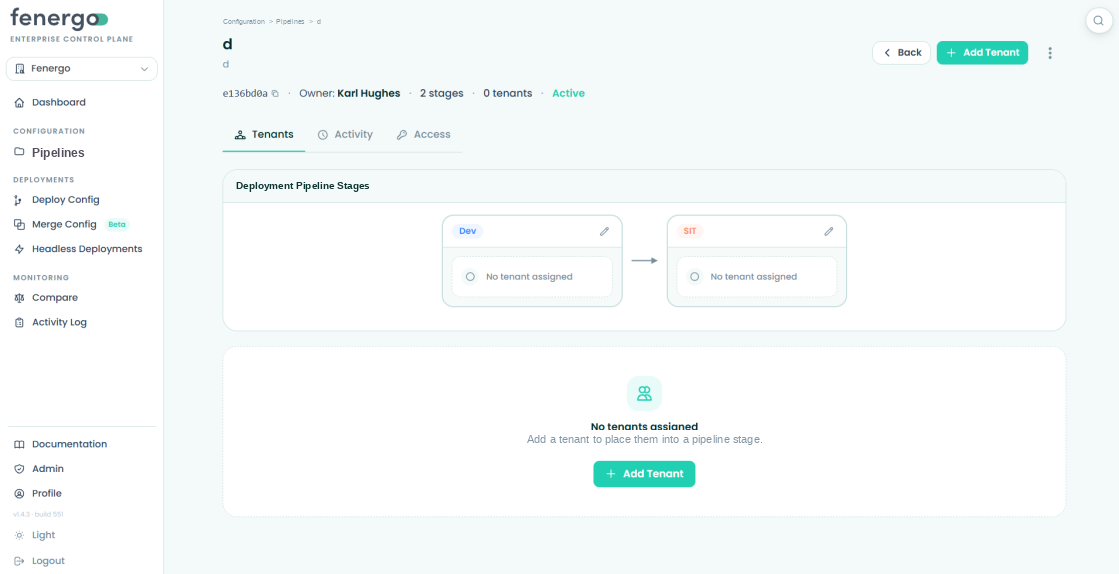
- Summary: review and click Create. The pipeline appears in the list with no tenants assigned yet.
Step 2 — Create an API client in the target tenant
ECP connects to each tenant using a Client ID and Client Secret generated inside that tenant.
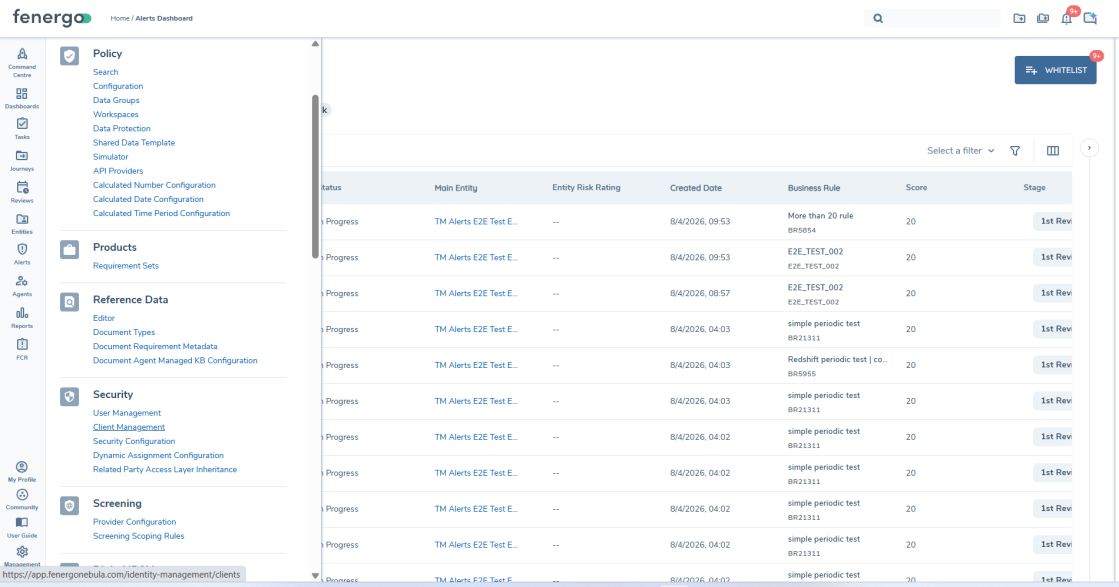
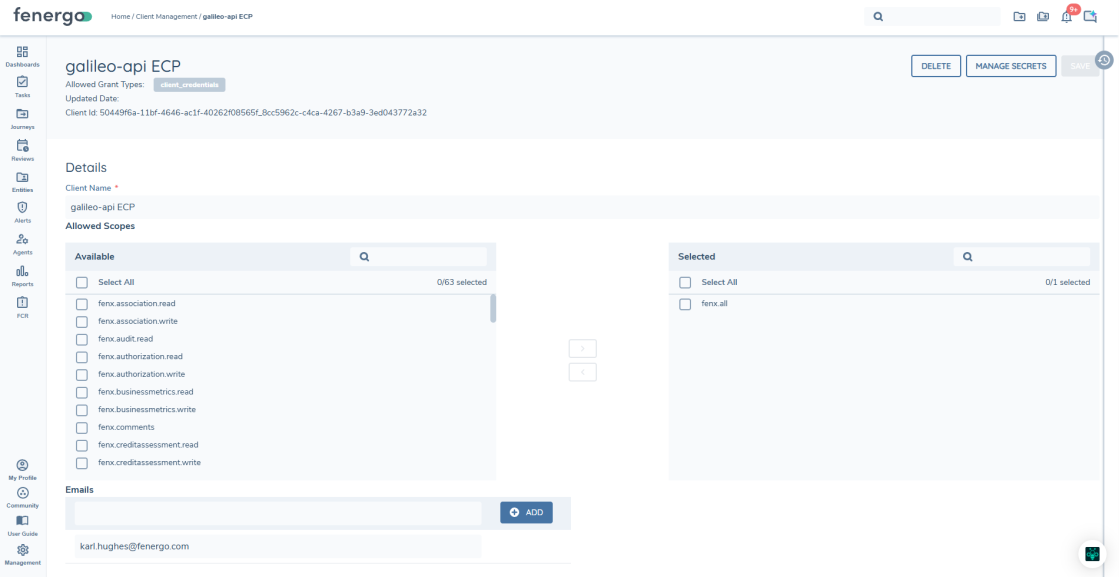
- Log into the Fenergo tenant to be added and go to Management > Security > Client Management.
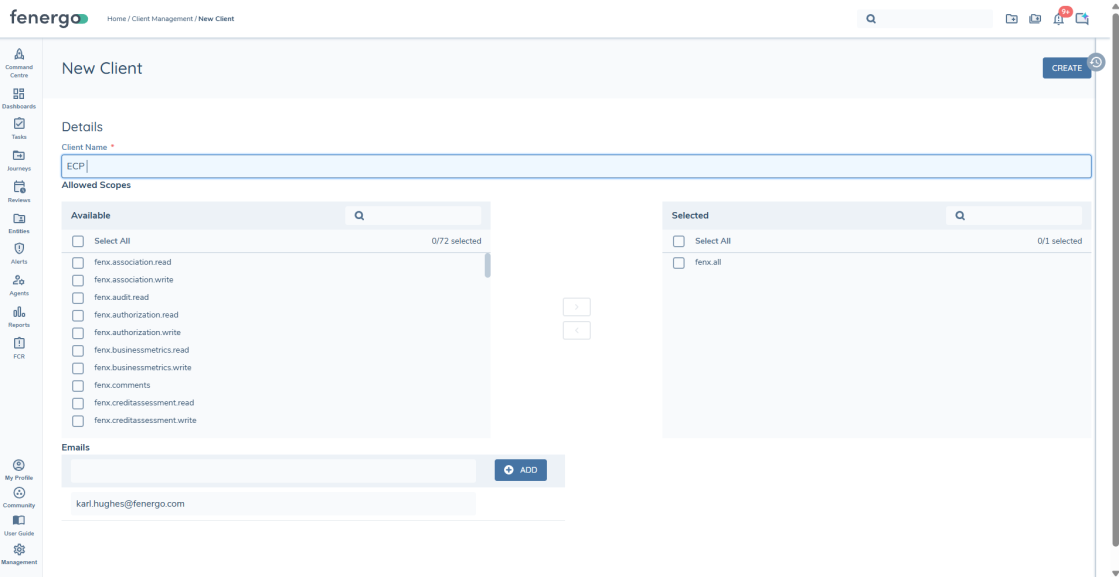
- Click + ADD, enter a Client Name, assign the
fenx.allscope, add a notification email, then click Create.
- Note the Client Id from the detail page, then click Manage Secrets.
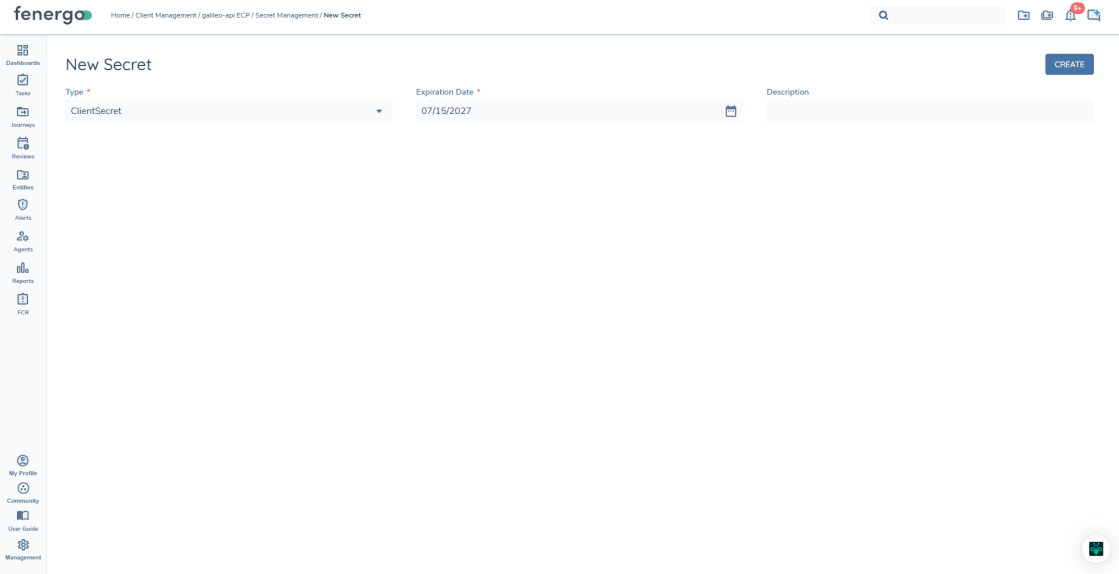
- Click + ADD, set Type to
ClientSecret, choose an Expiration Date, then click Create.
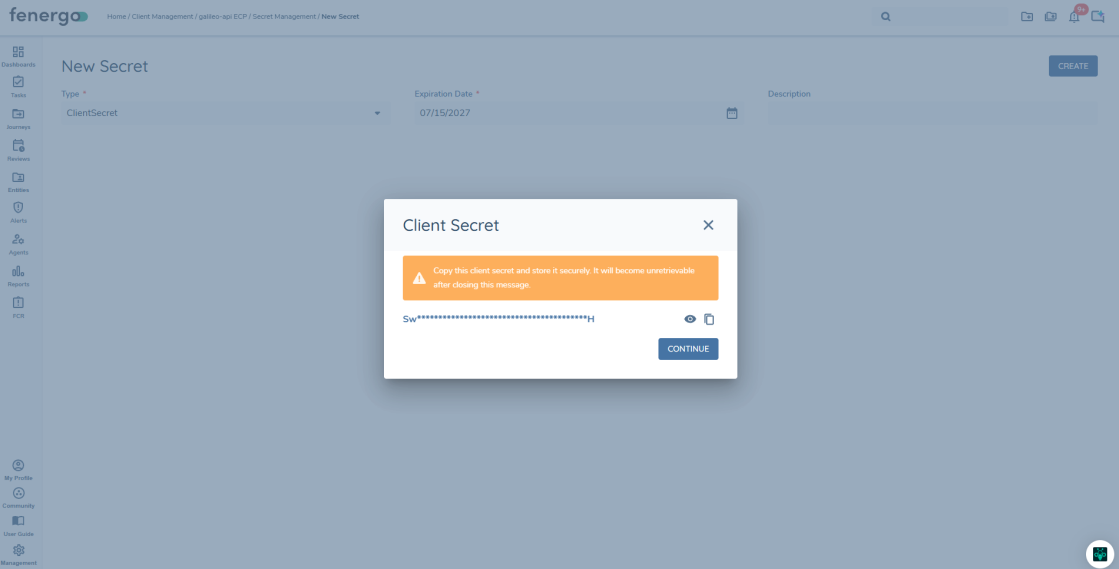
Copy it as soon as it's generated and store it securely. If you close the dialog before copying, create a replacement and delete the unused one.
Step 3 — Add the tenant to the deployment pipeline
- Back in ECP, open the pipeline and click + Add Tenant.
- Fill in the form: Tenant Name, Tenant ID, Fenergo Environment, the Client ID and Client Secret from Step 2, and the Pipeline Stage.
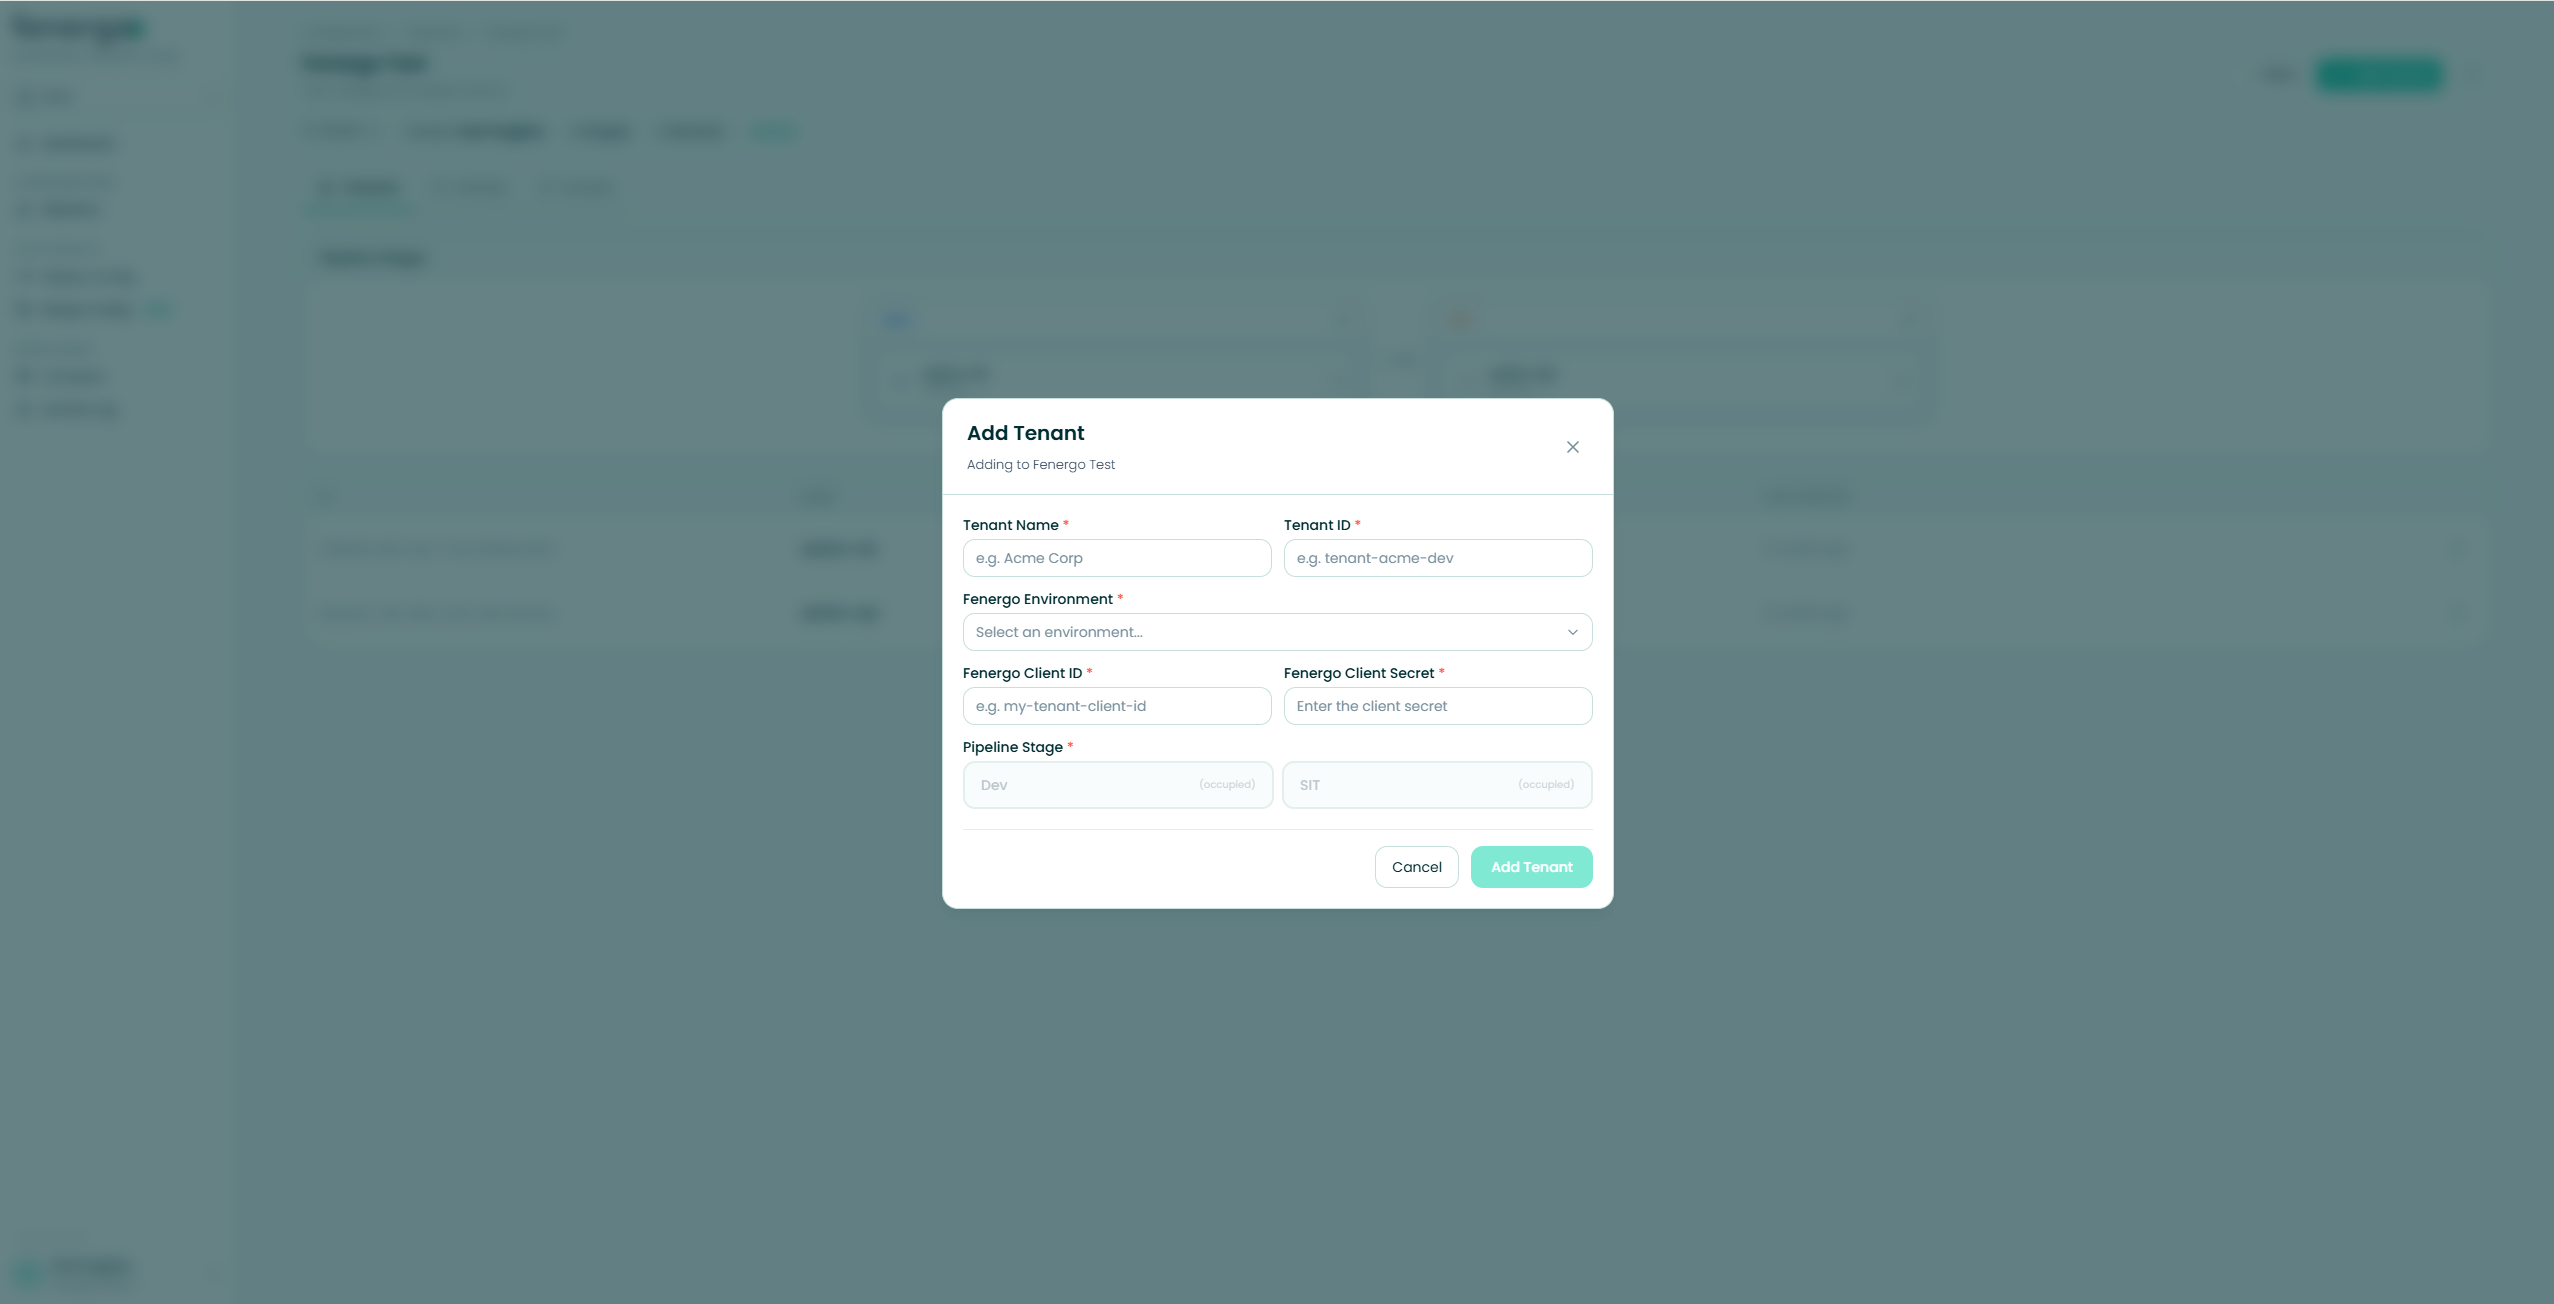
- Click Add Tenant. ECP pulls configuration from the tenant and shows progress as it goes.
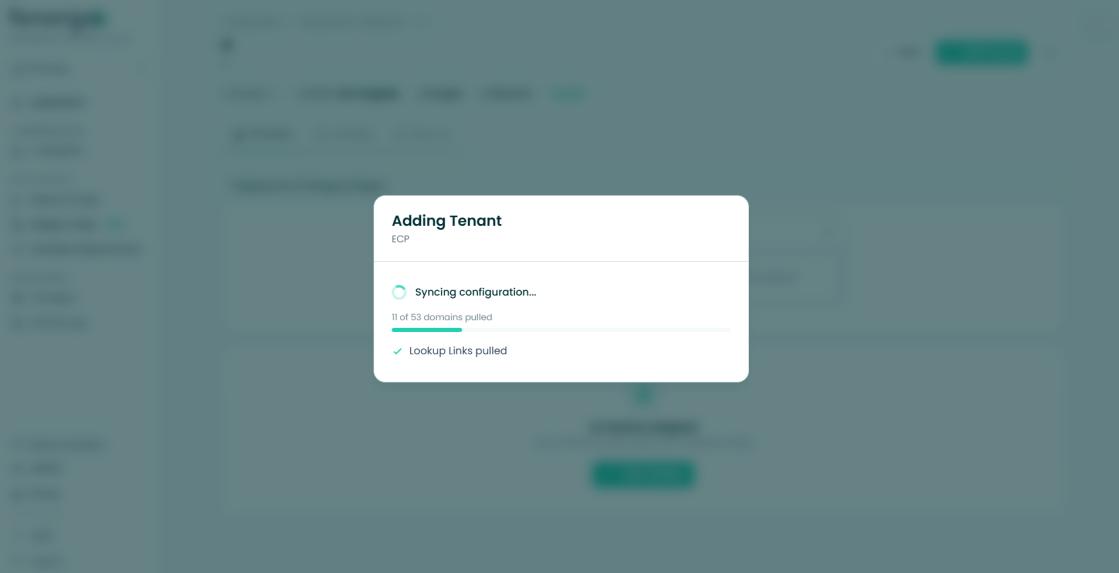
- Once complete, the tenant appears on the pipeline page ready to use.
The Environment list only shows environments granted to your organisation. Occupied stages can't be selected.
Troubleshooting — adding a tenant
| Issue | Likely cause | How to fix |
|---|---|---|
| Add Tenant isn't showing | The pipeline is archived or you don't have access. | Use an active pipeline and check your access. |
| A stage can't be selected | The stage already has a tenant assigned. | Pick an available stage or use Swap Stage to rearrange. |
| Some domains fail after adding | Wrong credentials. | Fix the credentials in the target tenant, then refresh the affected domains from the tenant page. |
Editing Deployment Pipelines
How to reconfigure a deployment pipeline's stages after it's been created — renaming, recolouring, reordering, and adding or removing stages.
Setting up stages
ECP starts you with a default pipeline of Dev → SIT → UAT → Pre-Prod → Prod. Each stage is an editable row, so you can shape it to match how your team promotes configuration. For each stage you can:
- Rename it — up to 50 characters, unique within the deployment pipeline.
- Recolour it using the colour dot.
- Reorder it by dragging the handle — order defines the promotion sequence.
- Add a stage (up to five) or remove one (at least one is required).
Stages use one of five colours — Blue, Amber, Purple, Gold and Green. The colour appears on that stage's badge everywhere it's shown: deployments, comparisons, merges and the activity log.
Editing a deployment pipeline
Open a deployment pipeline's detail page and click Edit to reopen the drawer, where you can rename the pipeline, change its owner and description, and rename, recolour, reorder, or add and remove stages. You can also rename or recolour a single stage directly from the detail page without opening the full drawer.
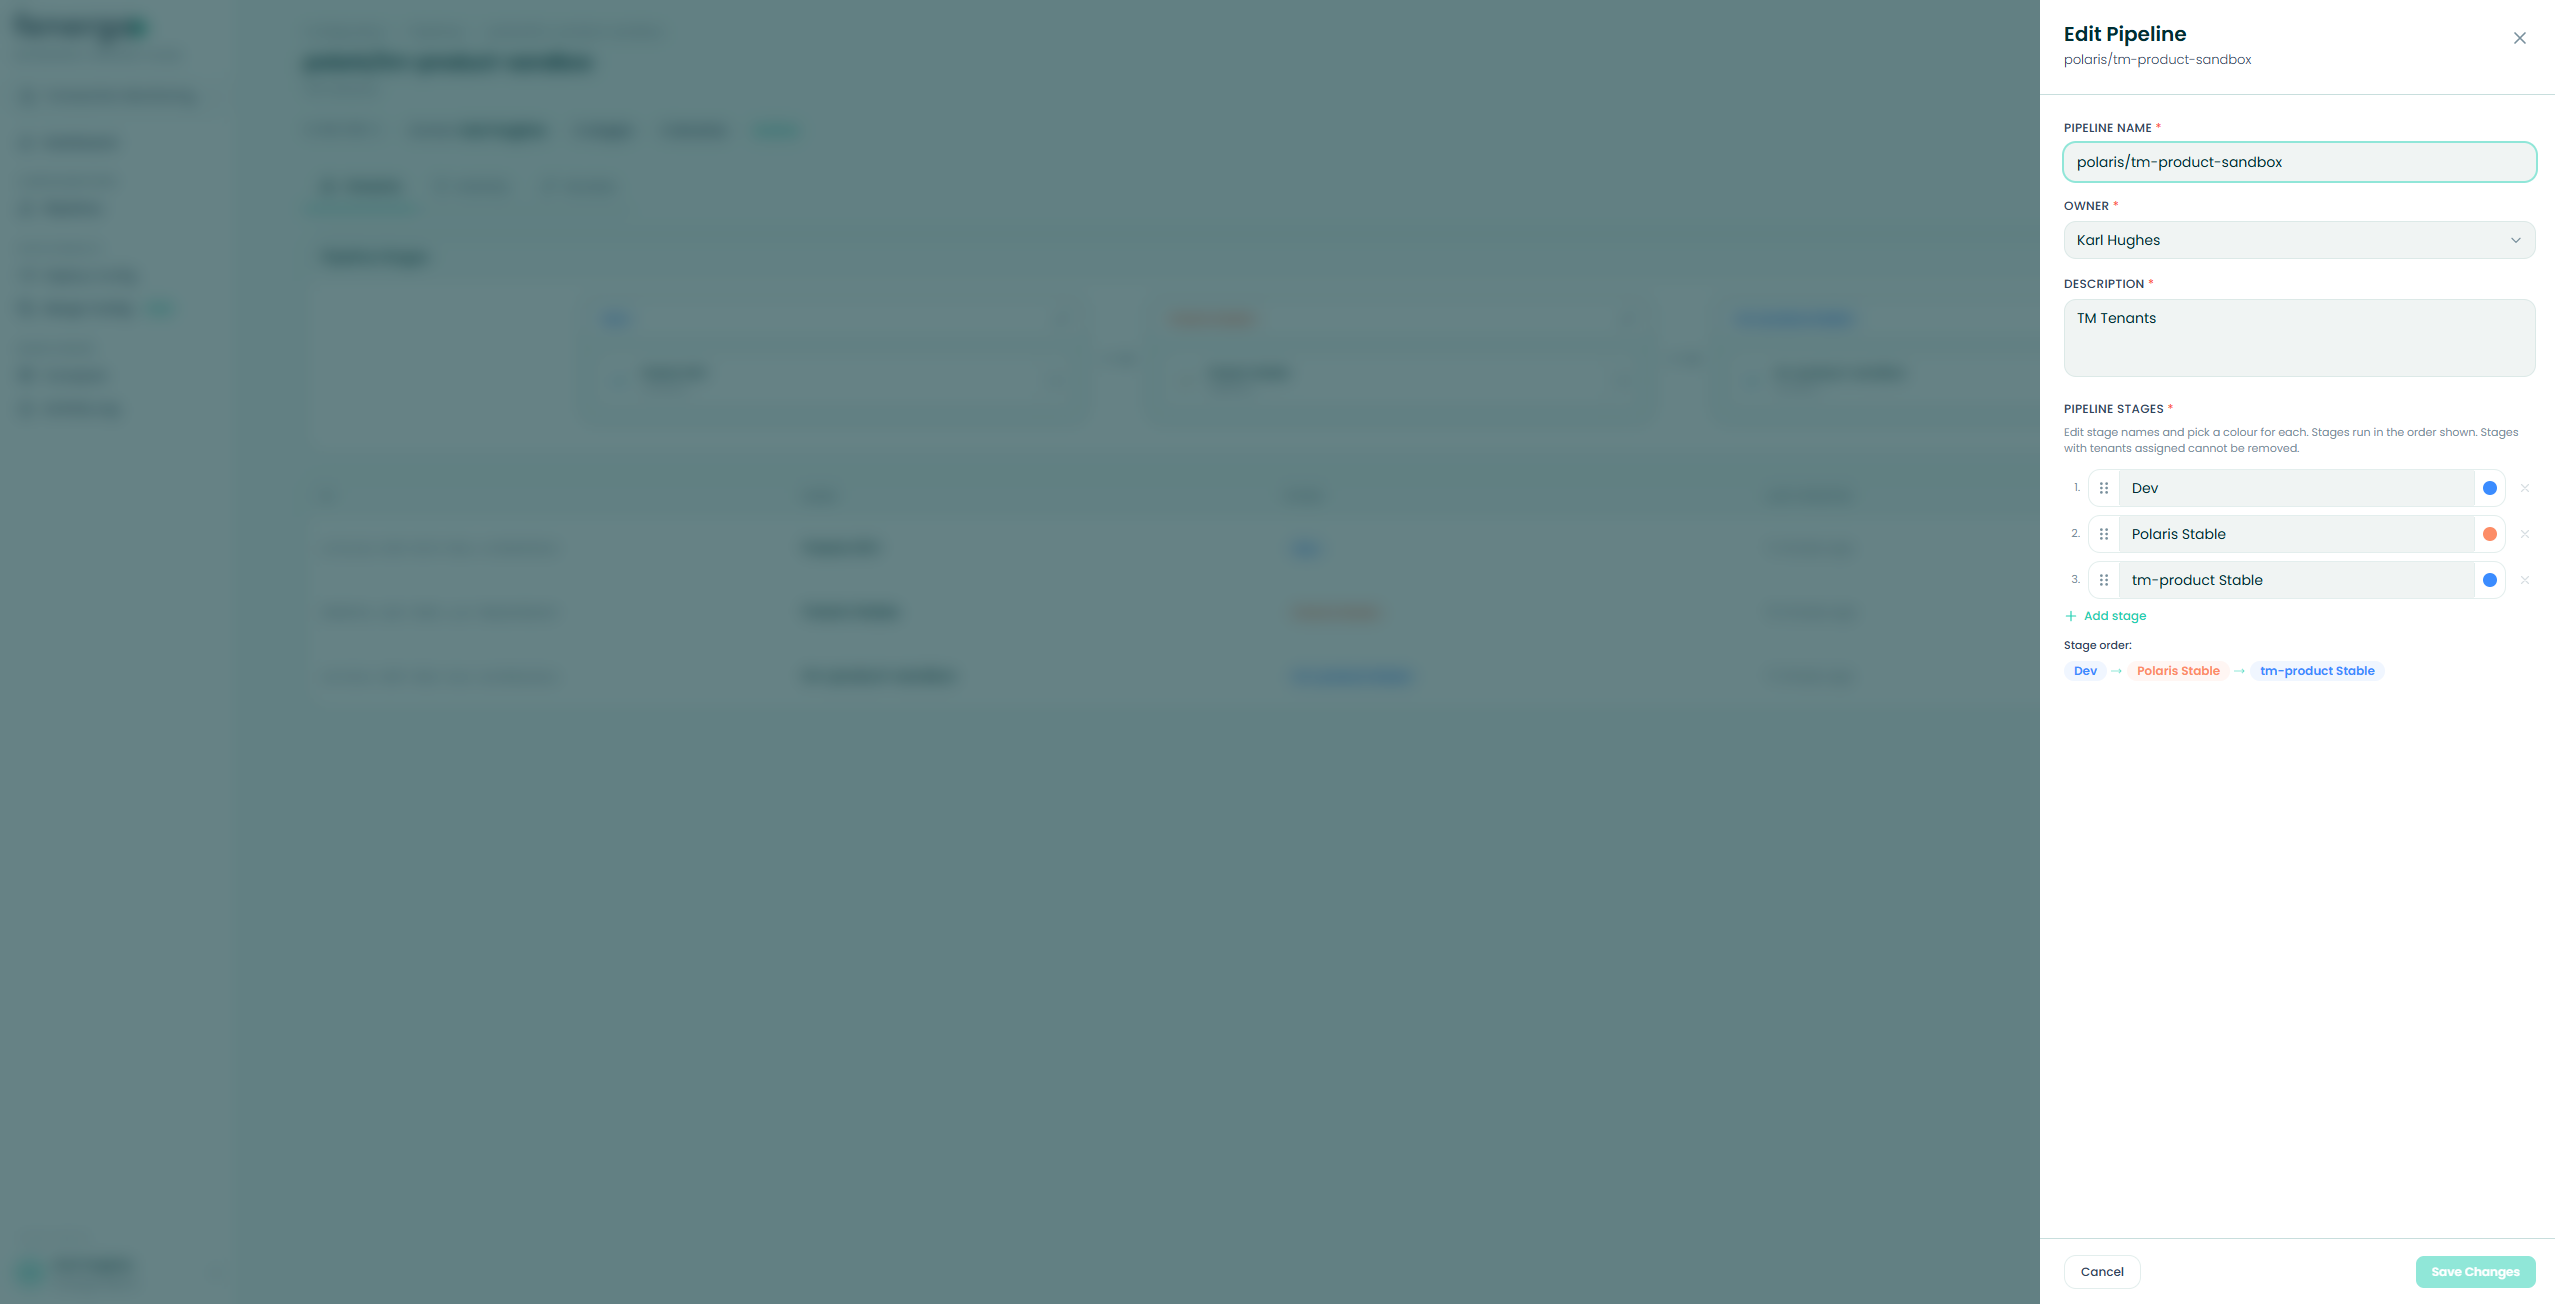
A stage that already has a tenant assigned can't be removed. Move or remove that tenant first, then delete the stage.
Viewing a Deployment Pipeline
Opening a deployment pipeline shows the header, the stages panel, the tenant table, and secondary tabs.
The header
Shows the pipeline name, description, ID, owner, stage and tenant counts, and active or archived status. Admins see Add Tenant and an actions menu with Edit and Delete. Members and archived pipelines don't show these.
Tenant stages
The Tenants tab shows the stage sequence with tenant cards. Admins can:
- Rename or recolour a stage — click the pencil on a stage header.
- Move a tenant between stages — drag the tenant card or use Swap Stage. If the target stage is occupied, the two tenants swap.
To reconfigure the whole stage set, use the pipeline Edit drawer — see Editing Deployment Pipelines above.
Tenant table
Tenant rows show the tenant ID, display name, stage and last-updated time. Click a row to open the tenant detail page. Admins get a row actions menu with Rename, Swap Stage and Delete Tenant.
Secondary tabs
- Tenants and Activity always appear.
- Child Pipelines appears when the pipeline has children.
- Access appears for admins to manage pipeline access for users.
Viewing a Tenant
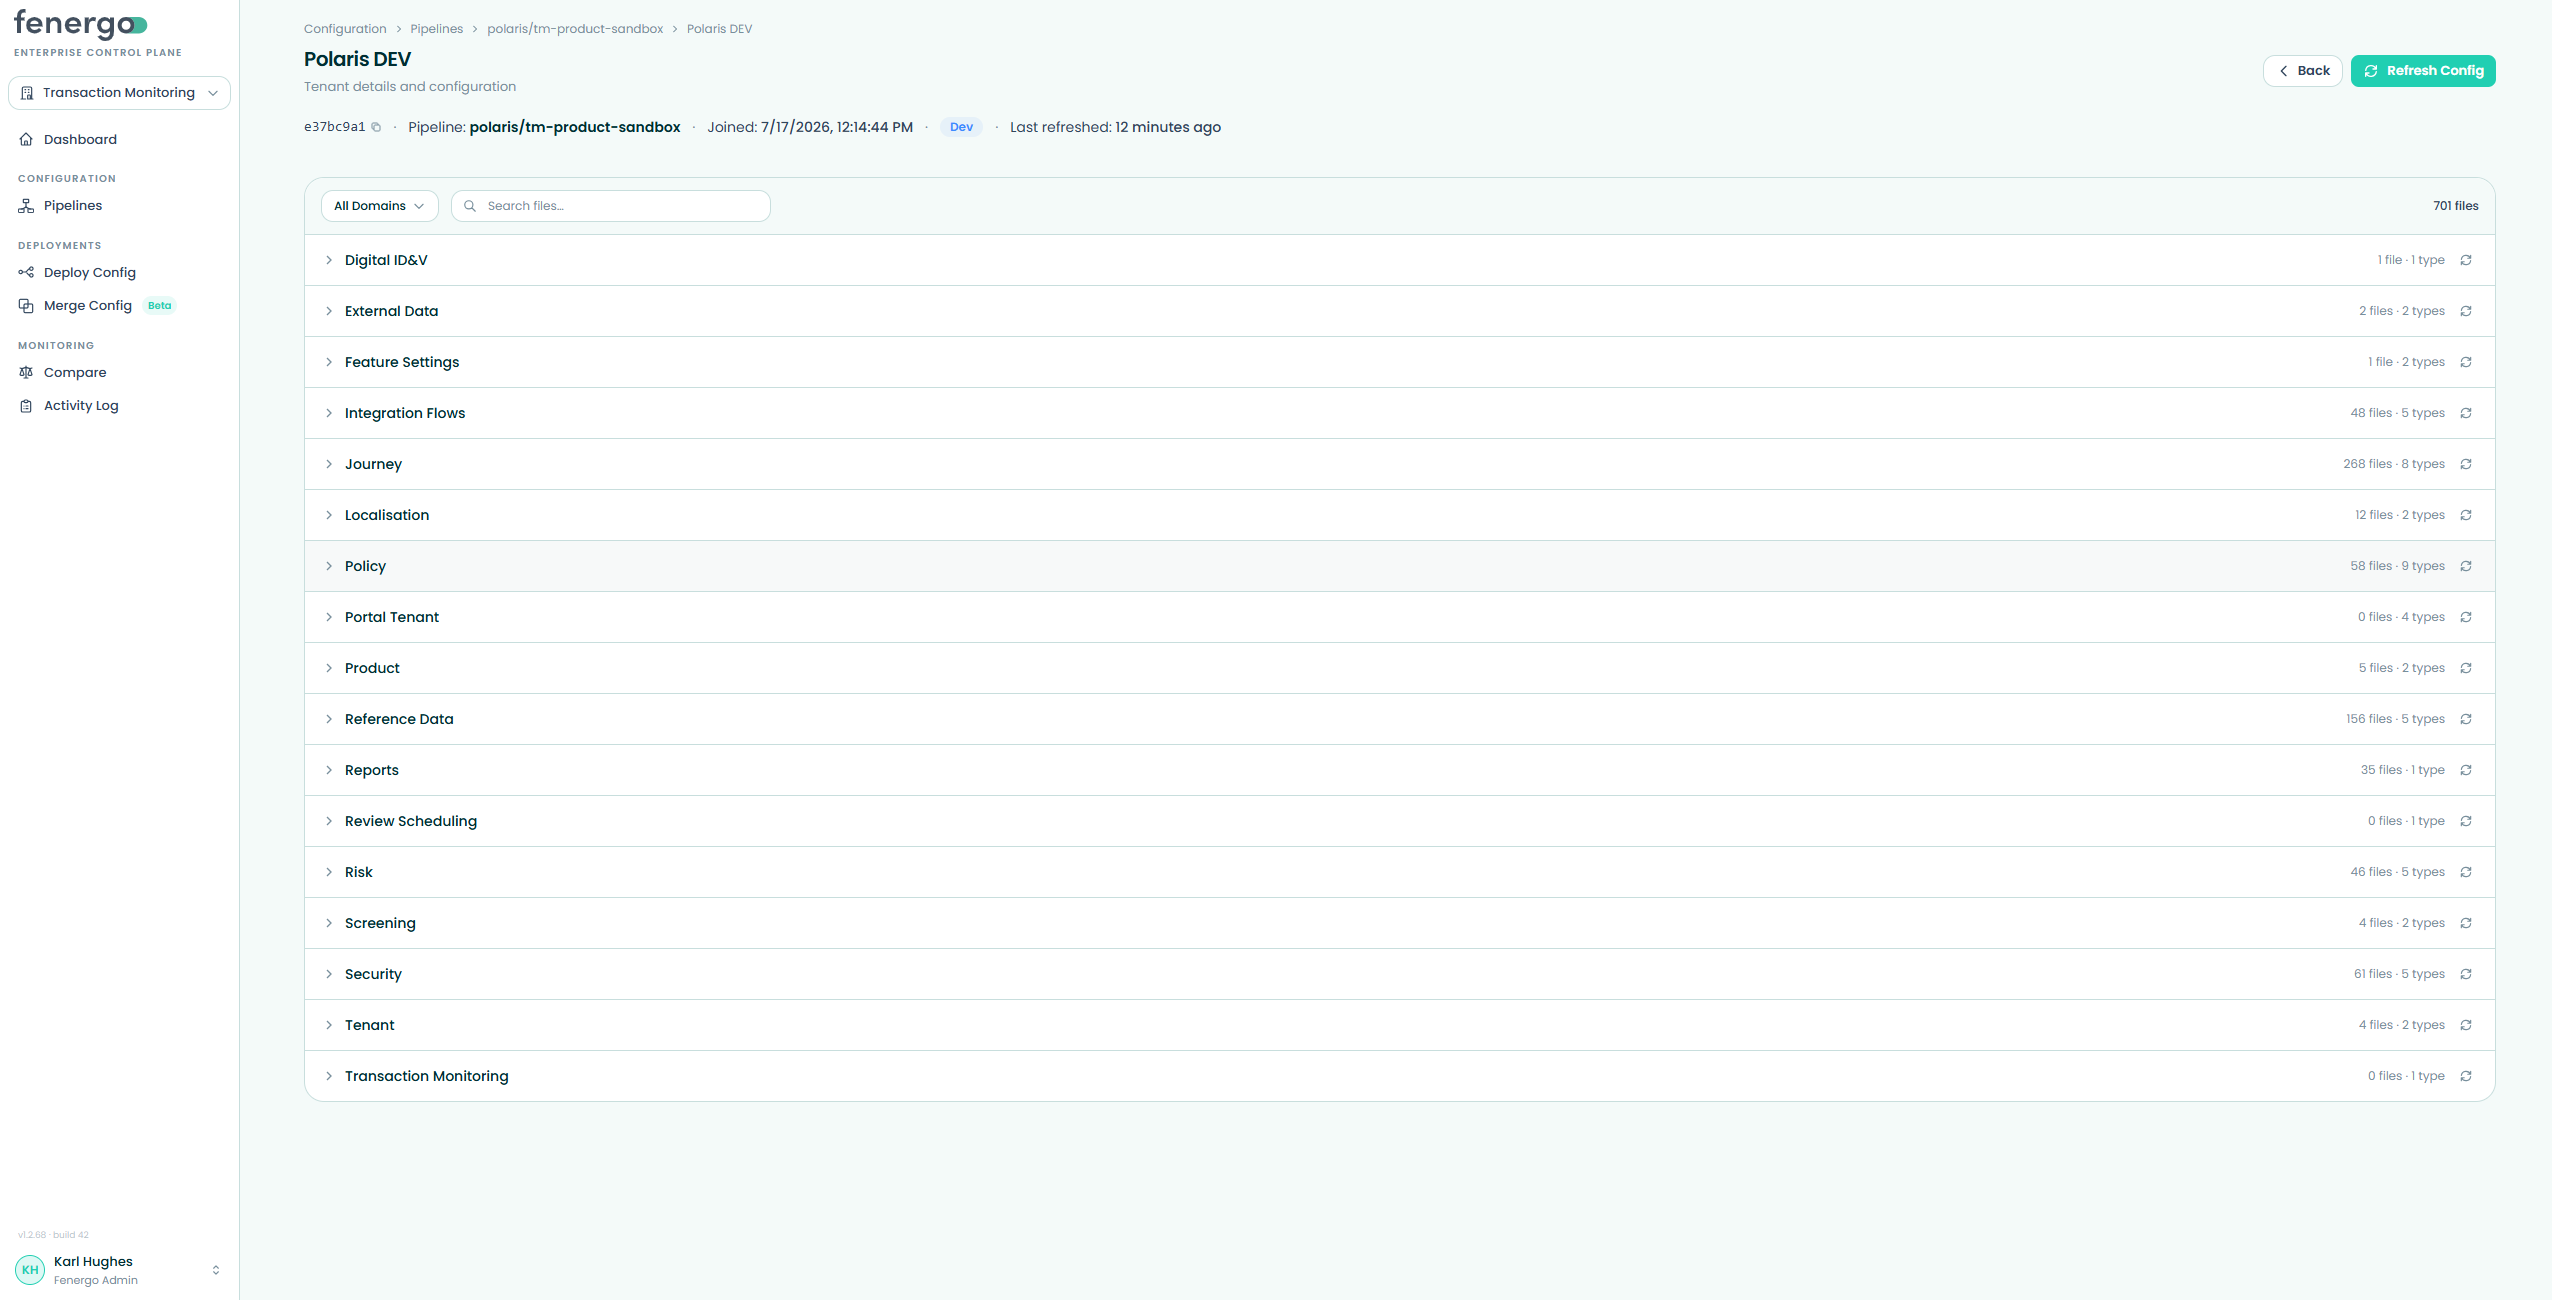
Click a tenant row on a pipeline's Tenants tab to open its detail page, which shows the tenant's configuration files grouped by domain.
Refresh Config
Click Refresh Config to pull the latest active files from Fenergo. ECP refreshes parent domains sequentially and shows progress as it goes. Each domain's last refreshed time persists across reloads. Individual domain and sub-domain refresh icons are also available for targeted refreshes.
If a tenant has never been synced, the tenant page starts refreshing automatically on first load.
Browsing domains
Files are grouped by parent domain, each expanding to its sub-domains. Parent rows show the number of active files and file types. Use the All Domains filter or the search box above the list to narrow to a specific domain or file.
Viewing a file
Expand a parent domain, then a sub-domain, and click a file row to view its JSON and status.
Deleting files
Use the checkboxes to select individual files or all files in a sub-domain. Click Delete — the confirmation modal shows the selected files before sending the delete requests to Fenergo.
The confirmation modal is the final review point — deletions can't be undone from ECP.
Troubleshooting — viewing a tenant
| Issue | Likely cause | How to fix |
|---|---|---|
| A sub-domain shows no files | Not refreshed yet or no active files. | Use the sub-domain refresh icon or Refresh Config. |
| Refresh buttons are disabled | A refresh is already running. | Wait for the spinner to finish. |
| JSON content won't load | The request failed for that file. | Refresh the sub-domain, then click the file row again. |