Portal Brand Configuration
The Portal Configuration section provides guidance on how to customise and manage the look and feel of the Fenergo Portal. It covers configuration options such as appearance, colours, multi-branding, and email appearance, enabling each tenant to align the Portal experience with their organisation’s brand and communication style.
Appearance Configuration
Each portal tenant can be configured in many ways to meet customer requirements. A Fenergo user with Portal Configuration Access/Edit will be able to access the Portal Configuration area from Fenergo.
From the portal configuration area, the Fenergo user can change the detail, appearance, and some of the behaviours of their portal. Elements that can be updated from the Portal Configuration are:
- Portal Logo
- There are 2 logs that can be configured in Portal. The Default Logo and Logo - Login & High Contrast Mode. The Default Logo is displayed in the top left of the portal. The Logo - Login and High Contrast Mode is displayed on the login screen and when high contrast mode is enabled. If no Logo - Login & High Contrast Mode is provided, the Default Logo is displayed.
- Recommended file type to upload is svg. The default height of the logo in the portal is 32px.Recommended file size should be under 200KB to keep page load times low. It’s important to quality check your logo to ensure it is rendering correctly in the browser.
- Portal background page
- This is the backdrop to the portal login page. Recommended image size is 1920px wide x 1080px. File size should be under 1mb to keep page load times low.
- Dashboard background
- This is the backdrop to the dashboard homepage. Recommended image size is 1680px wide x 316px. File size should be under 1mb to keep page load times low.
- Watermark
- This is the watermark for the portal application. Recommended image size is 864px wide x 664px. File size should be under 200kb to keep page load times low.
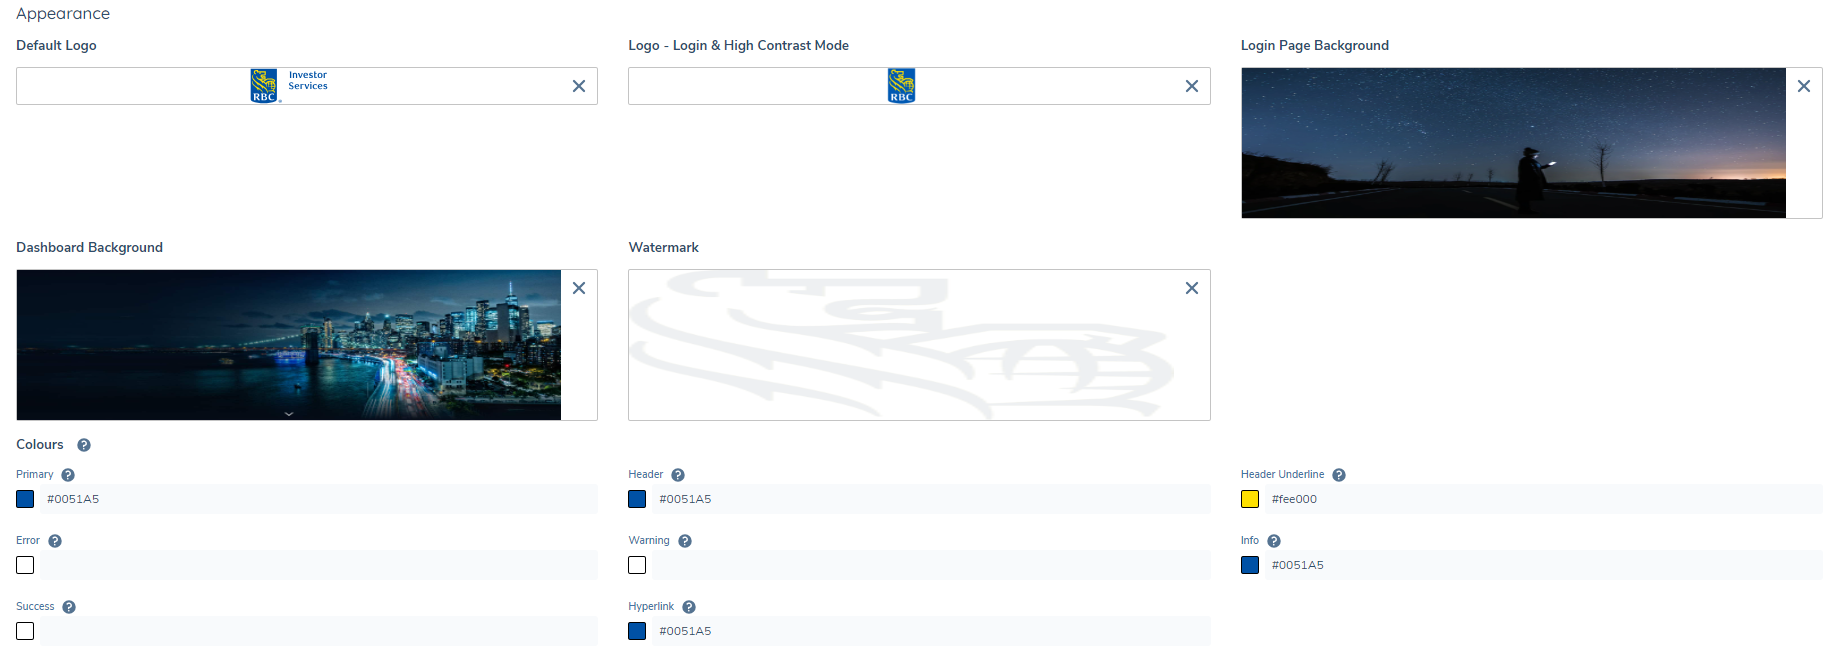
Portal Colour Theming
To enable clients style the portal that aligns to their brand guidelines, the ability to style elements and colours is available in the Portal Configuration Area.

From this area, users can provide their own hexadecimal color value for 6 elements/components
- Primary
- This color is used for the primary action button, loading spinner, icons etc.
- Header
- This color is used for the header area in portal.
- Header Underline
- This color is used for the header area in portal.
- Error
- This color is used for error icons, chips, error messages and error state border on input fields.
- Warning
- This color is used for warning icons, chips and warning messages.
- Info
- This color is used for In Progress task icons, chips, information messages and active state border on input fields.
- Hyperlink
- This color is used for completed hyperlinks.
If a color is not provided in the Portal Config area, the default colors will be used by the Portal. Any colors provided by the configurator and saved will override any default colors.
Configuring Custom CSS Styling in the Portal
The Custom CSS capability in the Fenergo Portal empowers configurators with the ability to apply tailored styling directly into the portal UI, without requiring code deployment or backend changes. This feature enables highly flexible branding and accessibility enhancements across both Standard Mode and High Contrast Mode.
Custom CSS gives teams the power to:
- Apply organistion-specific visual themes quickly and consistently
- Enhance accessibility with targeted styles for high contrast scenarios
- Make rapid non-disruptive visual updates in response to client feedback
- Override the default appearance of key components in a safe and controlled way
All custom styles are scoped to supported components and validated prior to application, ensuring consistency across the platform without compromising layout or responsiveness.
Accessing the Custom CSS Fields
Two text area fields are available within the Portal Administration UI for entering custom CSS:
| Mode | Field Name | Location in UI |
|---|---|---|
| Standard Mode | Standard Mode CSS | Portal Configuration Area > Appearance Config |
| High Contrast Mode | High Contrast Mode CSS | Portal Configuration Area > Appearance Config |
These fields accept raw CSS input, which is applied immediately after saving. Each field applies styling to its corresponding mode only.
For more information on how to configure, please refer to the Custom CSS Configuration Guide.
Fonts
The Fonts section enables Portal configurators to upload and manage a custom font family to be used across the Portal UI. This allows each tenant to align the Portal experience with their organisation’s branding and visual identity. Uploaded fonts are applied globally to all headings, body text, form fields, buttons, tables, modals, and notifications within the Portal.
A fallback font stack (beginning with Open Sans) is automatically applied if a custom font cannot be loaded, ensuring the UI remains accessible and readable.
Uploading Fonts
From Portal Configuration > Appearance, scroll to the Fonts section (located after the Custom CSS section).
- Click Add to begin uploading a font file.
- Supported file types: .woff, .woff2, .ttf, .otf.
- For each file, you must specify:
- Font Style: Normal or Italic
- Font Weight: Choose from 100–900, or define a range (e.g., 100–900)
Multiple files can be uploaded to support different styles and weights within the same font family (e.g., bold italic, light normal). This ensures text is rendered consistently throughout the Portal.

Managing Fonts
- Add Button: Add more font files to the same family until the upload limit is reached.
- Delete Icon: Remove unwanted fonts. When a font in use is deleted, the Portal reverts to the fallback font.
Behaviour Notes
- If no fonts are uploaded, the Portal continues to use the default font stack.
- Once uploaded, the custom font is applied globally wherever matching
font-styleandfont-weightcombinations are used in the UI.
Auth0 login page
To ensure the correct font is used, a font file with the Font Style: Normal and Font Weight: 400 must be configured. If this is not configured, the Auth0 login page will automatically use the portal default font.
Messages
Users can configure the messages that appear on portal pages to guide the user or update the of progress or change in their journey
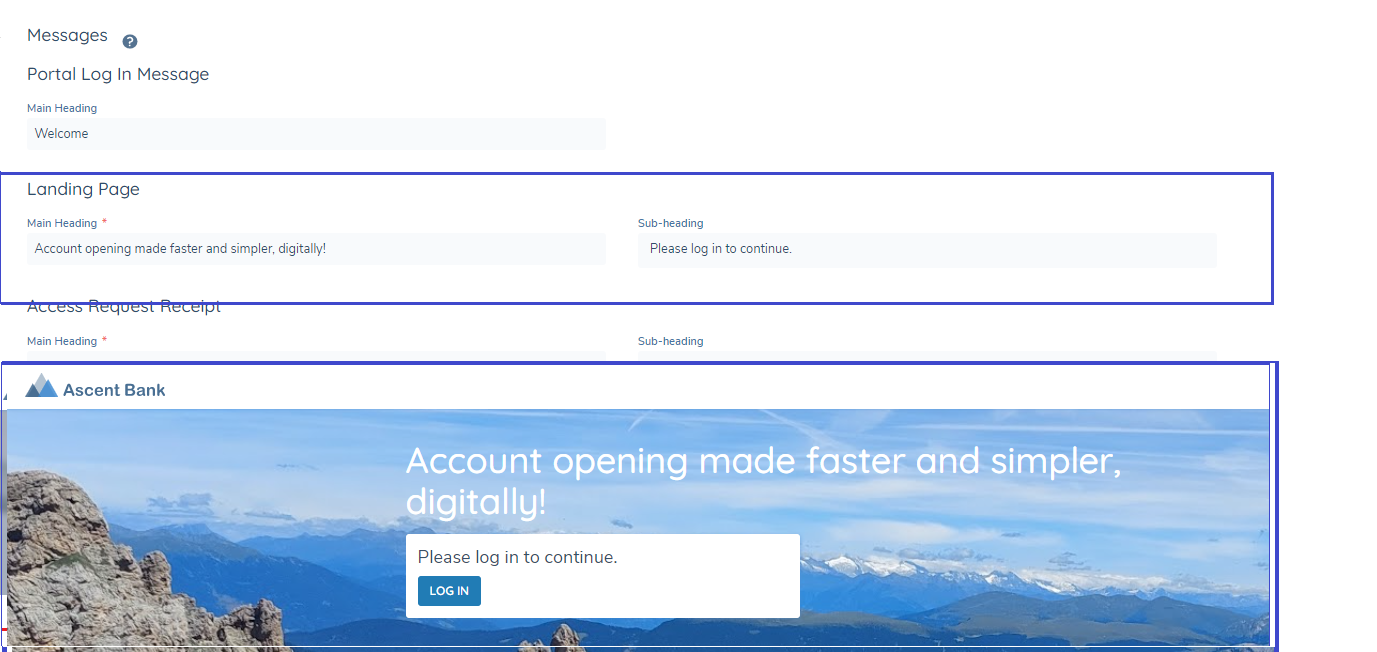
- Users can also configure the portal footer, the static data that’s presented and the URLs that it points to
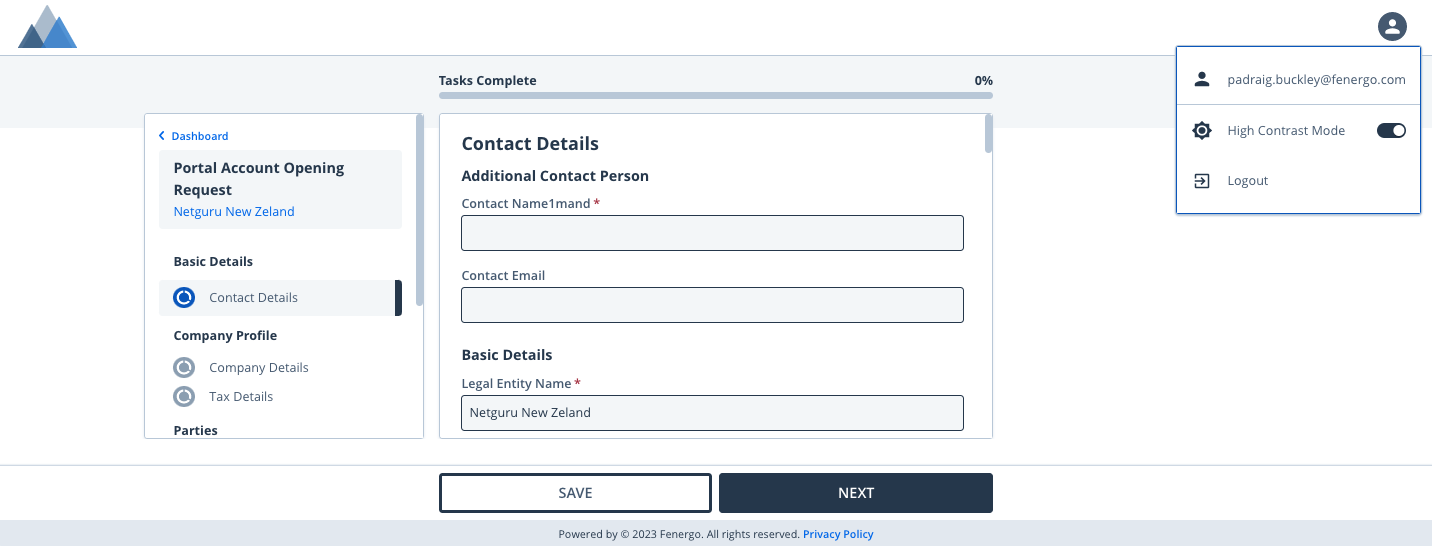
High Contrast Mode
To improve accessibility and aid users with visual impairments, high contrast mode is accessible via the global menu in the portal. This increases the color contrast on elements used in the portal.
Colours defined as part of the standard Portal Appearance configuration are automatically adjusted to maintain a minimum colour contrast ratio of approximately 4.5:1.
This ensures accessibility compliance and readability across the Portal without requiring manual adjustments.
Email Configuration
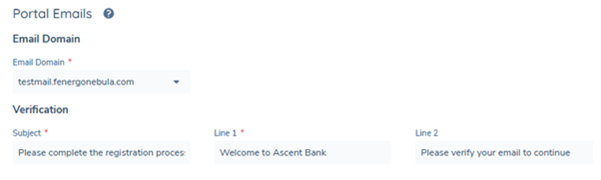
Email Domain
To configure an Email Domain, please refer to the Configuring the Fenergo Portal guide.
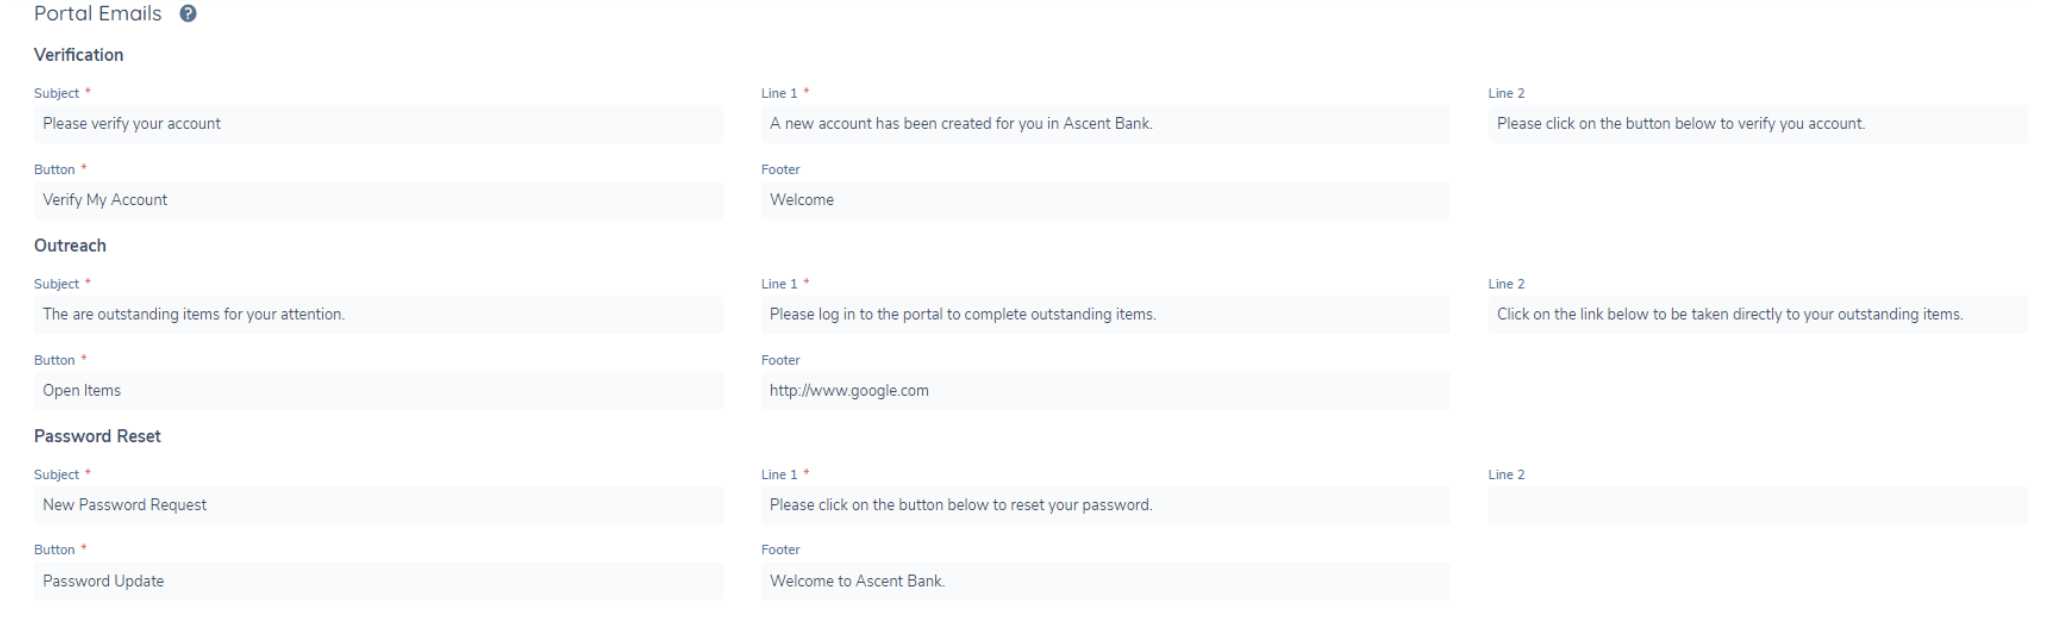
Email Templates
There are four types of emails sent to portal users:
- Account Verification Email: Once a user's account is created, they will receive a verification email. By clicking the button in the email, their account is verified and activated.
- Password Reset Email: If a user requests to reset their password, they will receive an email with a link to reset their password.
- Outreach Stage Notification: Users will receive an email notification if an outreach stage is triggered for an entity they are linked to. The email will inform them of outstanding work, with a button that takes them directly to their open tasks.
- Delegated Access Email: When a user is granted delegated access through the Share Access button in the portal by another portal user, they will receive an email notification.
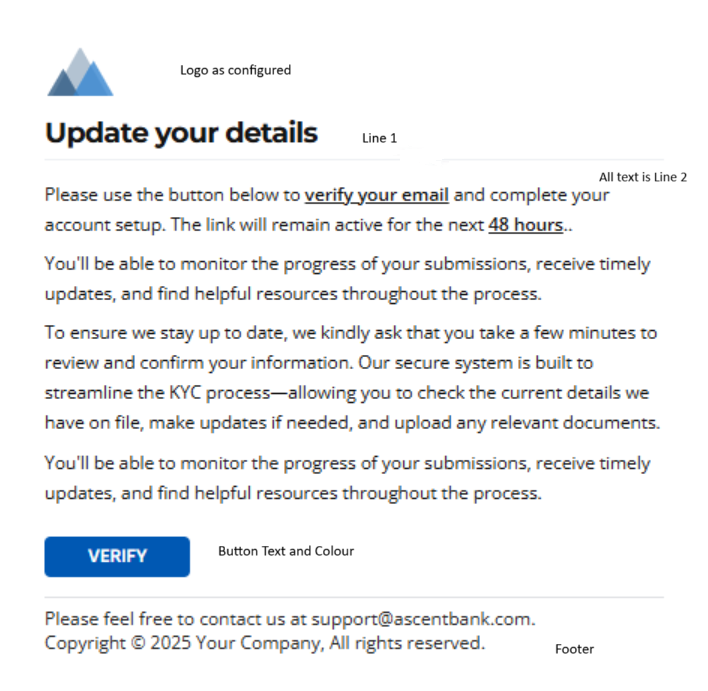
The following can be edited:
- Email Subject, max limit of 200 characters
- Email line 1, max limit of 1000 characters. The content will display in one paragraph.
- Email line 2, max limit of 1000 characters. The content will display in one paragraph.
- Text to appear in the button included in the email, max limit 20 characters.
- Footer, max limit 1000 characters.
- Button colour will be driven from the primary colour defined for the portal.
- Logo which will be included in the email will be as defined in the config area.
V1 Email Templates

V2 Email Templates
Portal introduces new email functionality which adds support for:
- Changing email templates per tenant (base templates).
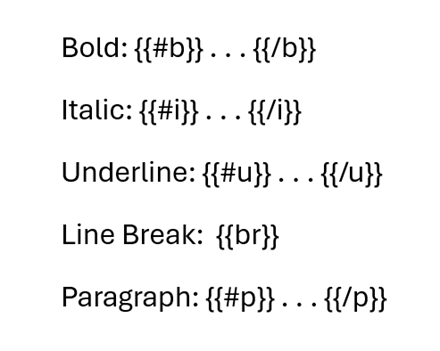
- Text formatting: bold, italic, underline, line break, and paragraph.
- Configurable email sender per tenant.
To enable the v2 email template on your tenant, please raise a service request via a service request with the customer support team. Requested Change: Update Email Template to V2.
By default the email sender is INFO. This is now configurable and can be updated via a service request via a service request with the customer support team. Requested Change: Update Email Sender Name.
Note: Emails sent from Auth0 won't be changed to V2 until Portal Configuration is updated from FenX UI.
Text formatting can be applied on any variable on each email template per tenant. This will allow Portal admins to configure the components of the Emails in whichever style they wish to.
To configure this:
- Navigate to Portal Configuration
- Scroll to Portal Emails section
- Choose the desired Email Type you wish to style (For example: Outreach Email 1, Password Reset etc.)
- Add the text format you wish to use on the variables. The variables are these sections of the Email:

The configuration for the text symbols are as follows, the symbols are placed on each side of the word or sentence that is required to be in that text format.
For example:
If the client wishes to add text formatting to Line 2 of Outreach Email 1.
The text: You are requested to provide more information. Click on the button below to begin your work. Then, please sign in to complete the required tasks.
The text with the desired formatting:
![]()
-
Click Save at the bottom of the Portal Configuration Page.
-
See example below:
MultiBranding
Overview
The Multibranding functionality allows clients to configure and manage multiple branded experiences within a single Portal instance. Each brand can have its own distinct look, feel and content, enabling organisations to deliver unique digital experiences for different client groups or business lines. With Multibranding, Portal configurators can define and maintain multiple Portal URLs, each associated with a specific brand identity. These brands can have their own configurations including:
- Distinct URLs for each brand experience
- Logos and colour palettes tailored to the brand’s identity
- Customised content and email templates aligned with brand messaging
- Independent configuration management through a centralised Brand Configuration section
1. Multiple Business Lines or Divisions
Use Case: A financial institution operates several business lines (e.g., Corporate Banking, Wealth Management, and Retail Banking) under the same group.
Multibranding Benefit: Each business line can have its own branded Portal URL, visual identity, and tailored content, ensuring the right tone, design, and messaging for each client segment while maintaining shared backend infrastructure.
2. Asset Servicers Managing Multiple Clients
Use Case: An asset servicer provides whitelabelled onboarding and lifecycle management services to multiple asset management firms.
Multibranding Benefit: The servicer can configure a dedicated brand experience for each client, including custom branding, logos, and email templates, allowing clients’ end-users to interact through a Portal that reflects their own firm’s identity.
3. Regional Branding for Global Organisations
Use Case: A global bank operates across multiple regions (e.g., EMEA, APAC, etc.) with different regulatory, linguistic, and branding requirements.
Multibranding Benefit: Each region can have its own branded Portal instance (URL, language, and visual identity), ensuring compliance with local standards and improving the user experience for regional clients.
Supporting Multiple Portal URLs
The Portal now supports configuration of multiple URLs for a single tenant. To configure additional URLs, a service request must be raised with Fenergo via the customer support team.
Service Request Type:

Once processed, the new domain URLs appear automatically on the Portal Configuration page, where the configurator can update settings for each individually.
Note: A maximum of 10 URLs can be created for a single portal tenant.
Existing configurations (default URL and Bring-Your-Own-Domain URL) are automatically migrated into this grid view for consistency.
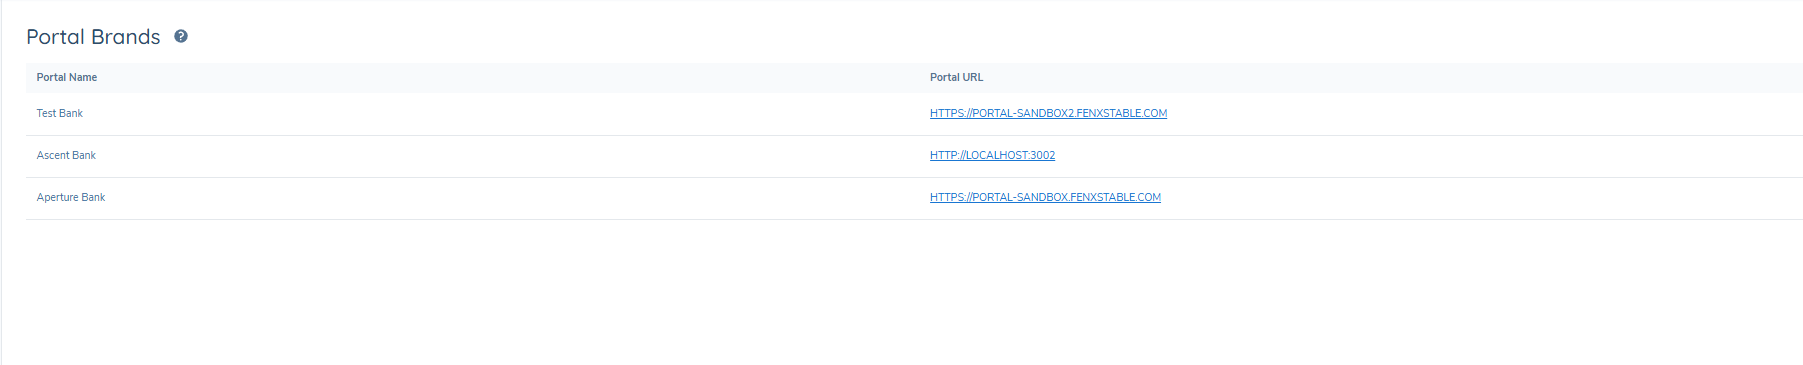
Managing Configurations per URL
- Each Portal URL listed in the grid is displayed as a hyperlink.
- Clicking a URL opens its dedicated configuration page.
- Configurators can update settings independently for each brand/URL, tailoring the appearance, colours, and branding to match the selected URL’s identity or use case.
Assigning a URL to a Brand Each newly created URL corresponds to a distinct brand configuration, allowing custom branding per URL.
Manual Selection of Brand via a Fenergo Task
The manual selection of a brand ensures all communications and Portal interactions remain consistently aligned to a single client brand. When multibranding is enabled, the system automatically applies the correct branded email, logo, and Portal URL throughout the user journey.
Configuration Steps:
-
Navigate to Journey Builder
- In Journey Builder, navigate to the Create Snapshot task.
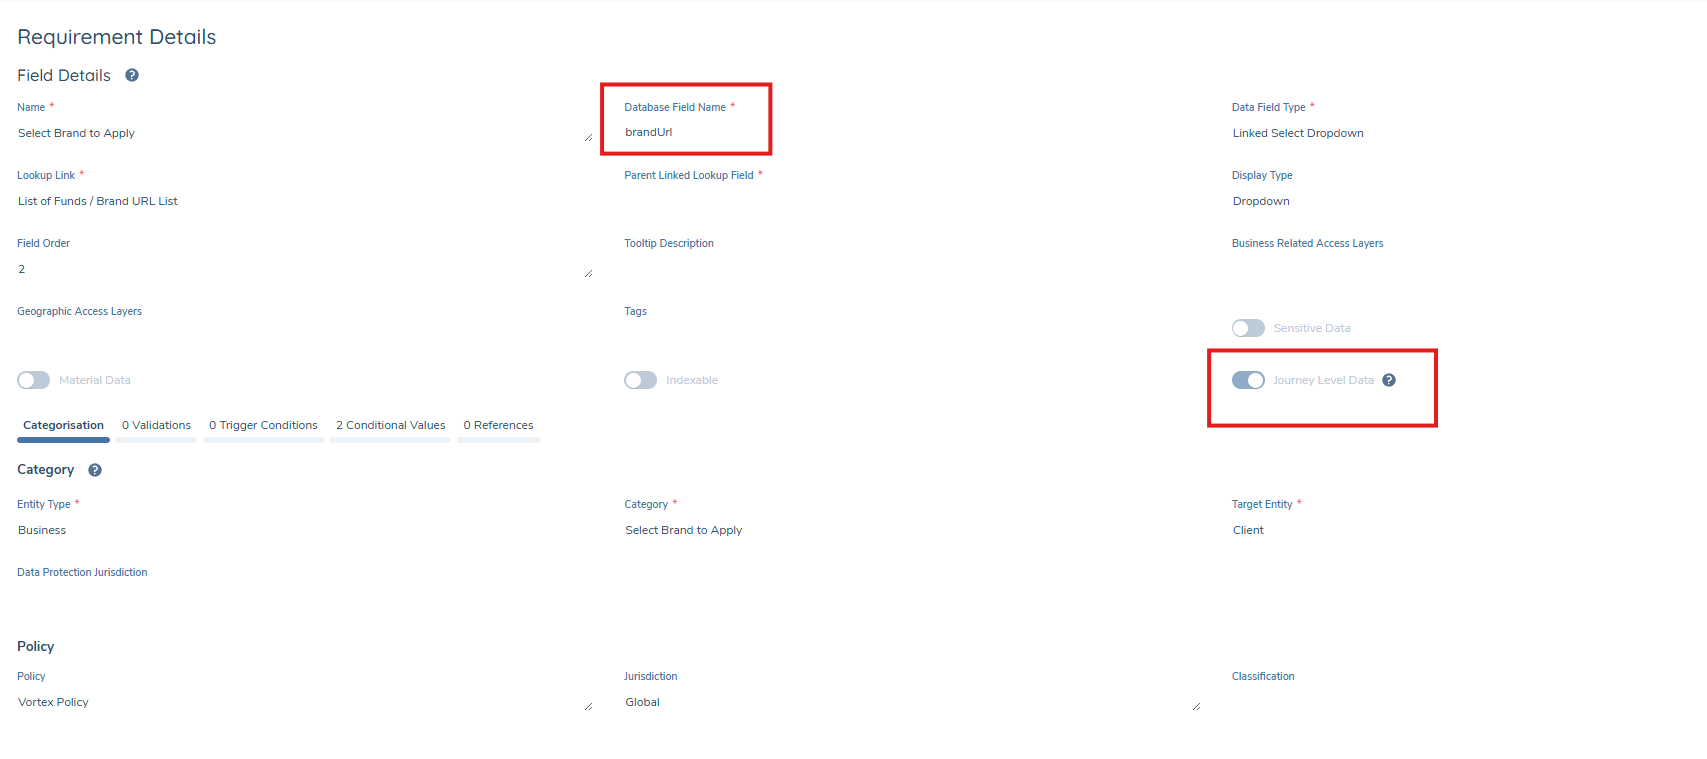
- A new toggle named Enable MultiBranding is available. When enabled: The system will use a journey-level data field called brandUrl to determine the Portal URL and apply the correct branding to emails. When disabled (default): The system uses the default portal brand.

-
Define the
brandUrlField- Create a journey-level data field named
brandUrl. - The field type should be a dropdown listing all configured brand URLs or Portal Names.
brandUrlsupports two resolution modes, applied in sequence:- URL Mode: Exact, case-sensitive match against the Portal URL column in Portal Brands configuration. This is the existing behaviour and is unchanged.
- Portal Name Mode: If URL mode produces no match, a case-insensitive match is attempted against the Portal Name column. The first matching row is used.
- If neither mode resolves a brand, no email is sent — consistent with existing behaviour.
- Leading and trailing whitespace in
brandUrlis trimmed before resolution is attempted. - If
brandUrlis empty or null, no resolution is attempted and no email is sent.
Why use Portal Name?Portal URLs are environment-specific. When journey configuration is promoted between environments (dev → UAT → pre-prod → prod), a
brandUrlset to a Portal URL may become stale. SettingbrandUrlto a Portal Name — which is stable across environments — allows journey configuration to promote cleanly without manual reconfiguration.Important Notes- Existing journey configurations using a Portal URL in
brandUrlare fully unaffected. URL-mode runs first, so no migration is required. - Portal Name matching is case-insensitive:
"apex financial"matches"Apex Financial". - If two Portal Brands rows share the same Portal Name, the first row in the Portal Brands list is used.
- The field name
brandUrlis unchanged. Adoption of Portal Name mode is opt-in.
- Create a journey-level data field named
-
Assigning the Brand During the Journey
The
brandUrlfield can be set in multiple ways:- Using conditional values
- Through linked lookups
- By default values
- Or manually by a Fenergo user
Once defined, the Create Snapshot task references the selected brandUrl to:
- Select the appropriate brand
- Ensure the appropriate branded email is sent (including email text, sender address, and URL)
-
Validation Rules
- If no value, or multiple values, are set for the brandUrl field when Enable MultiBranding toggle is enabled, then no email will be sent
- A single valid brand value must be provided for the functionality to be executed successfully.
When properly configured, enabling Multibranding ensures:
- Portal users receive the correct branded email.
- Users are directed to the correct brand-specific Portal URL.
- A consistent and seamless brand experience is maintained throughout the entire journey.
Email Sender: Multiple Email Domains
In order to send emails from addresses that align with a client’s brand, the configurator may need to configure multiple email domains. This process involves two steps:
1. Domain Creation
- Email domains must first be created and managed within the client’s organisation.
- This ensures that the domain is valid and available for use before it is referenced in Fenergo.
2. Adding the Domain in Fenergo
- Once the domain is available within the organisation, it can be configured in Fenergo using the Outreach API:
- Use the Create Domain endpoint: Create Domain API
#tag/EmailDomain/operation/CreateDomain - Insert the newly created domain into the name parameter.
- Always set the useTenantIdAsDomainId property to false.
- Use the Create Domain endpoint: Create Domain API
Example Request Body:
{
  "data": {
    "name": "testmail.fenergonebula.com",
    "useTenantIdAsDomainId": false
  }
}
-Once configured, the new domain will be available for sending client-facing emails under the appropriate brand identity. -To assign to a brand, navigate to the Email Domain field and assign the correct email brand.
Configuring Multiple SSO Providers
A new field is now available in the Portal Brand Configuration that allows administrators to select which SSO connection to use per brand. If no value is selected, the Portal will automatically use the default (first) configured SSO connection.
This enhancement enables clients to configure additional SSO connections so that each brand’s login experience aligns with its unique branding and identity provider — or to integrate with a different client’s SSO as required.
This is only available/visible if the SSO flow enable on the tenant is SSO with Pre Registration.
Configuration Process
To configure multiple SSO providers, follow the same process used when setting up the initial SSO connection by raising a Service Request ticket and providing the required SSO details.
Once configured, the available SSO connections can be selected from:
Portal Configuration → Brand (in Fen-X) → SSO Connection Name
SAML 2.0 Authentication Flows
When using SAML 2.0, provide the following information:
- Connection Name: Label displayed in the Portal Configuration area.
- Sign-In URL
- X509 Signing Certificate
- Is IdP-Initiated
- Enterprise Identity Provider Connection Name: Used in redirect URLs (in both IdP configuration and Portal UI as the SSO login button label).
- (Optional) Sign-Out URL: If not provided, the Sign-In URL will be used by default.
OpenID Connect (OIDC) Authentication Flows
If switching to OIDC, provide the following information:
- Discovery Document URL
- Client ID and Client Secret for the integration application configured in the Identity Provider.
- Connection Name: Displayed on the Portal UI as the SSO login button label.
If these are not included in the OIDC metadata (Discovery Document), the following must be provided separately:
- Authorization Endpoint
- Issuer
- JWKS URI
- Token Endpoint
- User Info Endpoint
Once the information and requirements have been clarified, the next step is to set up a SAML2.0 SSO connection in the Fen-X Portal Identity Provider(Auth0). This is currently managed by the Vortex team in SaaS Engineering. When the initial setup process is finished, the person requesting this will receive a list of configuration values which should be sent to the client so they can configure them in their Enterprise IdP.
Once completed, a configurator will be able to assign the SSO connection to a brand in the Portal Brand Configuration area in Fenergo.
Per-Brand Authentication Methods
Each brand within a client tenant can be configured with its own login method, independently of all other brands. This allows different brands to present different authentication experiences to portal users — for example, one brand using SSO with Pre-registration and another using username and password.
Supported authentication methods per brand:
- Username and password only — users authenticate using their portal email address and password.
- SSO with Pre-registration — the brand's login screen uses SSO with Pre-registration as the authentication flow. Per-brand visual branding is maintained throughout the SSO redirect chain.
- Username/password (primary) + SSO with Pre-registration (secondary) — the login screen presents the email and password form as the primary interface, with a secondary action available for users who authenticate via SSO.
- SSO with Pre-registration (primary) + Username/password (secondary) — the login screen routes users through SSO by default, with a fallback option to sign in with email and password.
A maximum of one SSO provider can be configured per brand. User identity is resolved using email address as the canonical identifier, ensuring users with credentials under both methods are recognised as a single portal identity.
Key behaviours when both SSO with Pre-registration and username/password are enabled on a brand:
- The self-service signup screen is removed from the username/password login flow. This is by design to prevent unauthorised account creation and protect against account hijacking.
- Users must be created manually via the FenX Portal User Management area. Users created this way are automatically set to Verified status — no verification email is sent.
To configure the authentication method for a brand:
Navigate to Portal Configuration → Brand → Authentication Flow. Select the required authentication method(s) from the available options and save the configuration. Where a brand URL is applicable, this can also be specified in the brand configuration.
To enable additional SSO providers, raise a request with Customer Support. If this is being configured for a specific brand in a multi-brand setup, include the relevant brand name or brand URL in the Comments field of the request form to ensure the correct brand is updated.
Dynamic Reference Data Mapping
Dynamic Reference Data Mapping enables configurators to automatically limit or preselect dropdown values on an Entity Data field, based on data held in another source, Account Related Funds and Datagroups. The introduction of this new Dynamic Reference Data Mapping Task ensures Portal users will only see valid, context-appropriate options derived directly from verified related data.
Scenarios
Scenario 1: Limit Brand Selection Based on Investor’s Actual Investments
An investor may hold multiple Investment Accounts; each linked to a specific fund with its own associated brand. When onboarding or outreaching the investor, only the brands tied to the investor’s verified funds should be selectable.
Business Value:
- Ensures the correct brand is always applied for outreach.
- Prevents Portal users from selecting irrelevant or incorrect brands.
- Eliminates configuration-heavy conditional value rules.
- Reduces operational risk and brand-related misrouting of communications.
Scenario 2: Filter Available Values Based on Datagroup Records
An entity may contain multiple Datagroup records, each representing different fund details, addresses, or custom data structures. Each record may contain a brand value. Values should be limited to only those appearing in these Datagroup records.
Business Value:
- Guarantees downstream fields reflect real, validated Datagroup data.
- Reduces user error.
- Supports large datasets without overwhelming the user with unnecessary options.
Scenario 3: Drive Context-Specific Dropdowns Without Complex Conditional Logic
Configuration teams often rely on conditional value rules to limit dropdown options. With multiple categories and variations, these rules become unmanageable.
Business Value:
- Simplifies configuration.
- Allows users to only be presented with values that are relevant to the entity, based on real related data.
Scenario 4: Enable Search and Filtering When Mapped Fields Are Indexed
Some mapped Entity fields (e.g., Applicable Brands, Fund Domicile, Investor Category) may be configured as indexable fields in FenX. When Dynamic Reference Data Mapping populates these fields, they can automatically be used in search queries, dashboards, analytics, and filters across the Portal and FenX.
Business Value:
- Ability to search, filter, and segment investors or entities based on dynamically derived values.
- Supports operational use cases such as:
- Searching for all investors associated with Brand X.
- Filter investors by mapped Fund Domicile.
Scenario 5: Supports Multi-Fund and Multi-Brand
Investors may participate in several funds, each managed by different brands or domiciled in different jurisdictions.
Configuring Brand Limitation Using Account Related Fund Data
This in-depth example explains how to limit the list of available brands for an investor based on the brands associated with the funds the investor is invested in. This ensures that users can only select brands that are valid and relevant for the investor, improving accuracy and reducing misconfiguration risks. This is only one configuration pattern. Other variations are possible depending on how your organisation models fund and brand relationships.
Business Scenario
- An investor may have multiple investment accounts across different funds.
- Each fund can have its own distinct brand or uses a default brand.
- We want the investor to only see brands associated with the funds they are invested in.
- Dynamic Reference Data Mapping enables this automatically.
Step 1: Capture Brand Information on the Fund
Funds are represented as entities in Fenergo so that metadata like brand can be associated with them.
- Add a new dropdown field to the Fund such as “Associated Brand”.
- This field must use the Brand Reference Data list. i.e. the list of all relevant brands.
- When creating or editing a Fund, populate the Associated Brand value and verify the fund.
This creates the source brand value that will flow into the investor profile.
Note: This is one configuration example. You could skip this step and instead map another dropdown option e.g. Fund manager. Linked looks can be used on the main entity we want to map these values to and limit brand selections.
Step 2: Create an Entity Field to Receive the Mapped Brand Values
Add a multiple-select dropdown field to the Investor/Entity to hold the filtered brand list.
- Add a field such as “Applicable Brands”.
- This field must use the same Brand Reference Data list as the Fund field from earlier.
- Make it read-only so users cannot edit it manually (Optional).
This defines the target field for Dynamic Mapping.
Step 3: Configure the Dynamic Reference Data Mapping Task
- In Journey Builder, add a new task of type Dynamic Reference Data Mapping Task.
- In the Data Source dropdown, choose “Account Related Fund”.
- Complete the following configuration fields:
Account Related Fund Datakey
- This is the datakey on the Investment Account that contains the brand you want to map.
- Example:
associatedBrand - Must be a reference data lookup field using the same reference list as the entity field.
Entity Datakey
- This is the entity-level field that will receive the mapped values.
- Example:
applicableBrands - Must use the same reference data lookup list as the source field.
Important Note:
- The source field (Fund brand) and target entity field must use the same Reference Data list. If they are different, no values will be mapped, and the target dropdown will be empty.
- Mapping only uses verified investment account data and only considers Investment Accounts in statuses Onboarding, In Review, or Offboarding. Offboarded accounts are ignored. This behaviour is hardcoded and not shown in the UI.
Step 4: Configure a Linked Lookup for User Selection
Once the Applicable Brands field is automatically populated, you can configure a Linked Lookup to restrict what users can select elsewhere.
- Create a Linked Lookup using Applicable Brands as the parent field.
- Configure the child field (for user selection) to only display values present in Applicable Brands.
This ensures the user can only select brands the investor is eligible for based on their fund investments.
Outcome
- Only brands linked to verified fund data flow to the investor.
- Users cannot select invalid or unrelated brands.
- No conditional values or complex configuration required.
- Supports multi-fund, multi-brand scenarios automatically.
Configuring Brand Limitation Using Datagroup Data
This configuration example explains how to limit the values available in an Entity dropdown field based on values held inside a Datagroup. Using the Dynamic Reference Data Mapping task, you can ensure that only brands already stored on the Datagroup records will appear as selectable options on the Entity. This provides consistent data, reduces user error, and avoids large sets of conditional value rules.
Business Context
An entity may have multiple Datagroup records, each representing different fund details, addresses, or custom data structures. Each record may contain a brand value. The goal is to ensure the Entity dropdown only shows the brands that appear in those Datagroup records.
Step 1: Add or Configure a Datagroup Field for Brand
To support this mapping, the Datagroup must hold the brand value you wish to drive the filtering.
- Open the Datagroup configuration in Policy.
- Add a Reference Data lookup field to capture the brand (for example, “Associated Brand”).
- Set a Conditional Value on the Datagroup so that each relevant Datagroup instance automatically receives the correct brand.
Example:
- Datagroup record for Fund ABC → Associated Brand = Brand 1. This establishes the brand values that will be used as input for the mapping.
Note: This is one configuration example. You could skip this step and instead map an existing dropdown option e.g. Fund Manager if captured as a dropdown and use linked lookups to limit brand selection as an alternative approach.
Step 2: Create the Entity Field to Receive the Mapped Brands
On the main entity (Investor or Company), create a field to hold the filtered list of brands.
- Add a multiple-select dropdown field, such as “Applicable Brands”.
- This field must use the same Reference Data list as the Datagroup’s Associated Brand field.
- (Optional) Make it read-only so users cannot override system-selected values.
This defines where the filtered brand values will appear.
Step 3: Configuring the Dynamic Reference Data Mapping Task
In Journey Builder:
- Add a task of type Dynamic Reference Data Mapping Task.
- Set the Data Source to “Datagroup”.
- Complete the following configuration fields:
Datagroup Datakey
- The datakey of the Datagroup field containing the brand value.
- Example:
associatedBrand - Must be a lookup field using the same reference list as the Entity brand field.
Datagroup ID
- The ID of the Datagroup definition in Policy.
- This points the mapping task to the correct Datagroup instances for the entity.
The Entity Datakey
- The entity-level field to receive the mapped brands (e.g.,
applicableBrands). - Must use the same reference data list as the Datagroup Datakey.
Important Note: If the Datagroup field and the Entity field use different reference data lists, no values will be mapped.
Step 4: Create a Linked Lookup for User Interaction (Optional)
If you want a Fenergo user to select a brand from a filtered list:
- Define a Linked Lookup where the parent is the mapped Applicable Brands field.
- The child field will only display brands present in Applicable Brands.
This ensures users choose only valid brand options.
Configuration Step-by-Step Example
- Add the task of type Dynamic Reference Data Mapping Task in the Journey Builder.
- Choose the Data Source from the dropdown field.
Configurator chooses Account Related Fund from the Data Source dropdown:
- The configurator must provide the Account Related Fund Datakey, this is the field that we want to map from the account related fund to the main entity record.
- Example:
associatedBrand - Note: This must be a reference data lookup field and use the same reference data list as the source field.
Configurator chooses Datagroup from the Data Source dropdown:
- The configurator must provide the Datagroup datakey, the datapoint that we want to map from the datagroup to the main entity record.
- Example:
fundDomicile - If Datagroup is selected, the configurator must also provide the Datagroup ID of the configured Datagroup from Policy.
- Note: This must be a reference data lookup field and use the same reference data list as the source field.
- Select the Entity Datakey
- This field identifies the entity field where the filtered dropdown values should be applied.
- Note: This must be a reference data lookup field and use the same reference data list as the source field.
Additional Notes
- The Source field and the target entity must use the same Reference Data list.
- If datakeys such as the Account Related Fund, Datagroup, and Entity datakey use different reference data lists, no values will be mapped.
- Extracts Reference Data IDs from the source (Account Related Fund or Datagroup).
- Only uses verified investment account statuses (Onboarding / In Review / Offboarding).