Using the New Entity and New Request Workflows
The New Entity / New Request workflows allow the user to create a new entity in Fenergo. There are currently 2 available workflows:
- The New Request Standard User Experience, where the user can enter the Entity Details, and perform a duplicate search inside the system, before deciding whether or not to create the entity based on the duplicate search results.
- The New Entity Enhanced User Experience, where the user can also search an external system such as an MDM, or Fenergos OOTB External Data Providers for data, before importing some of the returned data into Fenergo, where journeys can be launched to further enrich the data.
The intention is to deprecate the Standard User Experience after a set period of time, as the Enhanced User Experience has all of the required functionality.
Journeys
Standard User Experience
To initiate a Journey with the Standard Experience, we start with a new client in the New Request screen.
Screengrab of New Request Screen
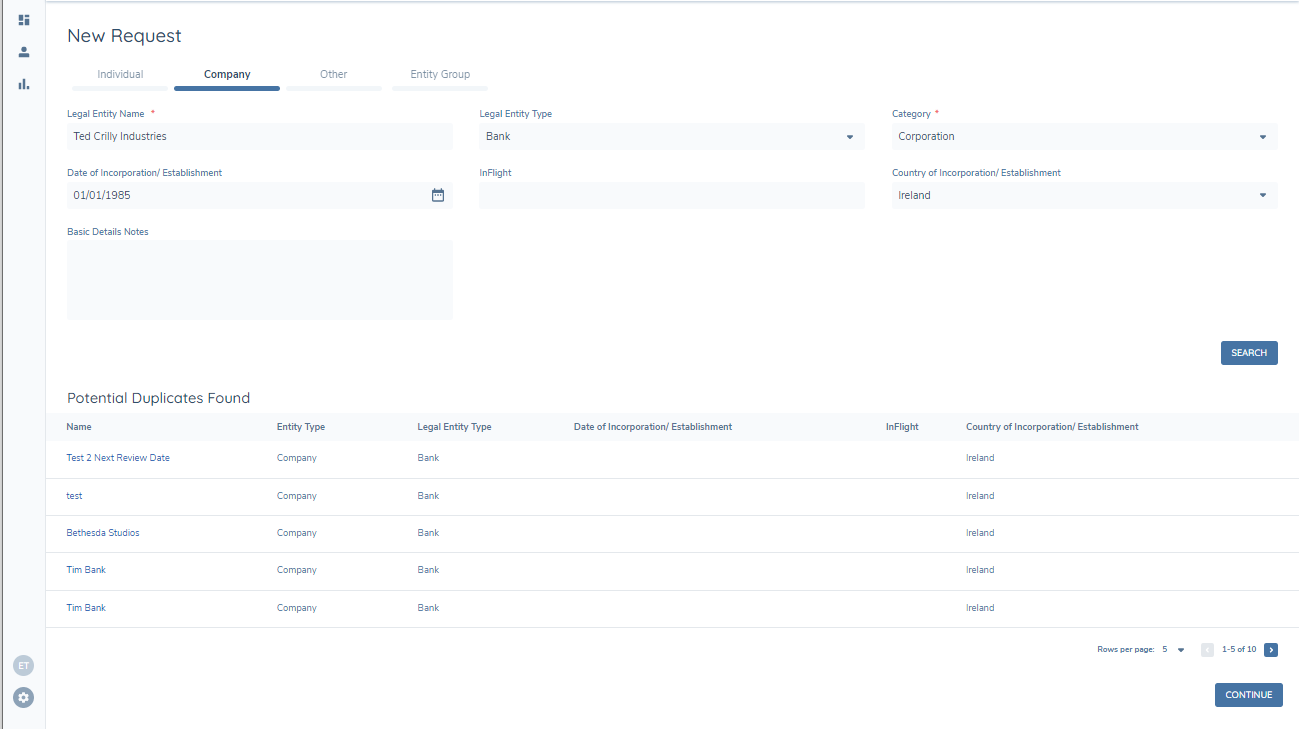
From here, we can create a new Individual, Company, or Other client based on their Entity Type.
The Entity Type attribute is the fundamental differentiator between entities in the system. Individual and Company are used to define Individuals and the various Company formations (e.g., Private Company, Partnership, Public Company). Other is used to accommodate the miscellaneous legal formations that do not sit under either of the other two definitions. Examples include Government Bodies and Trusts. The final Entity Type is Entity Group. This is an Entity Type that is more of an artifical structure within Fen-X, and is used to capture the Parent and Child entities that may belong together in a Group context. For more information on entity groups, refer to Using Legal Entity Groups.
Back to our example. We choose a Company Entity Type and input the base set of fields for our client. Note that the fields that appear here are pulled from the Global Policy. Any Data Requirement with a Category of ‘Basic Details’ will appear here.
Once we have entered the information, the system will perform a Duplicate Search. The user can either select one of the existing entities or can click on Continue to create a new Entity and Journey. Note that the fields that appear in the search results section are based on whether they have the ‘Indexable’ flag enabled in Policy. This adds the field to Elastic Search and displays it in the results grid.
Screengrab of Results of Duplicate Search
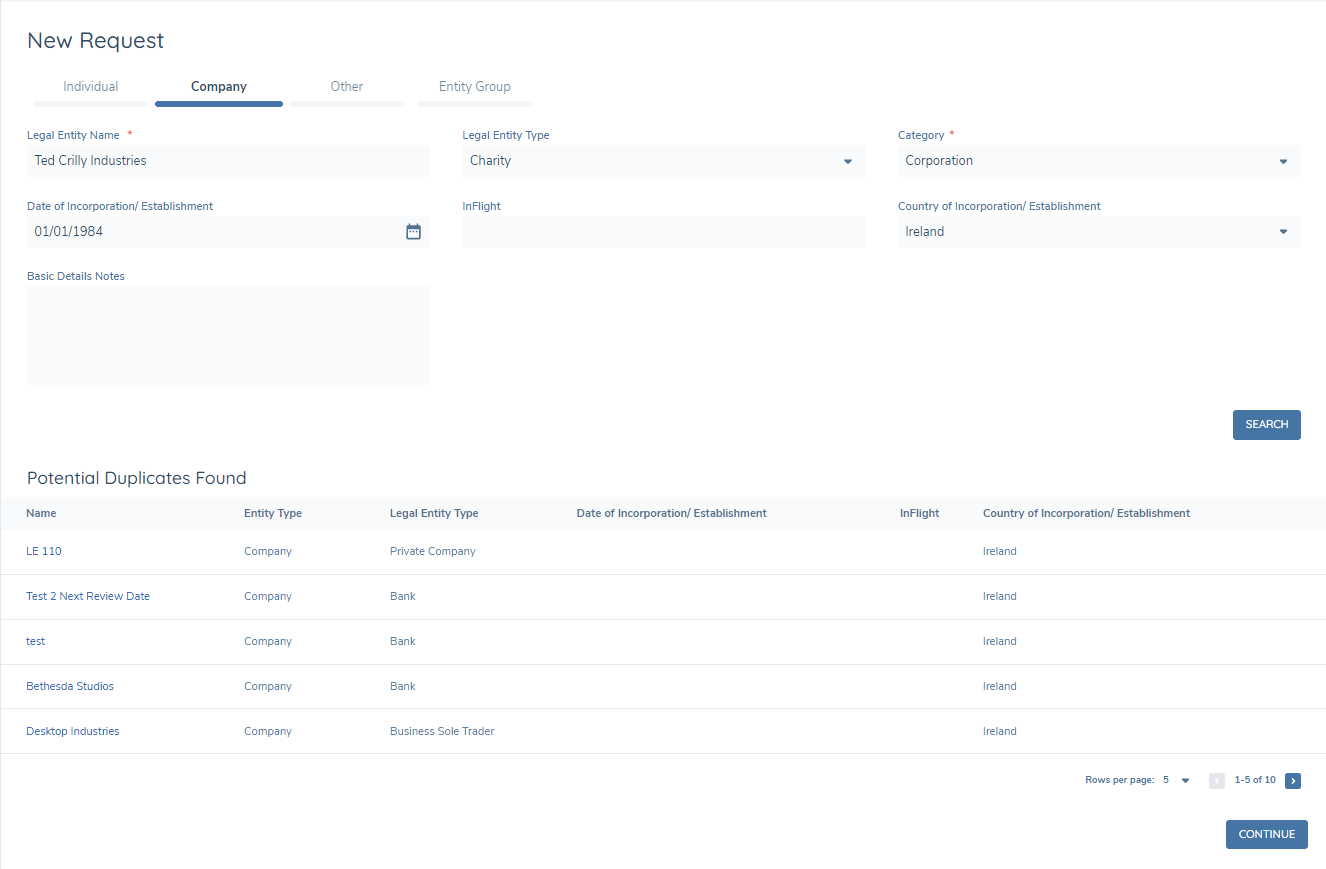
We will now hit Continue and launch a new Journey for our new entity.
Behind the scenes, a few things have happened here. Firstly, we create a Skinny Record of the client; this is a small set of verified data that we create right at the beginning when the entity is first created. Because this data is verified, it will appear in screens like the Entity Profile Page and will appear in entity searches.
We then immediately create a draft of that verified record, which is the version we will enrich and update as we go through our Client Onboarding Journey. So, by the time we get to the Journey Hub, we have a small set of data that is verified, and a fresh clone of that data which we can update in our Journey. Those updates will then be added to the verified data by the Verify Entity task at the end of the onboarding Journey, but we’ll cover that in more detail later.
Enhanced User Experience
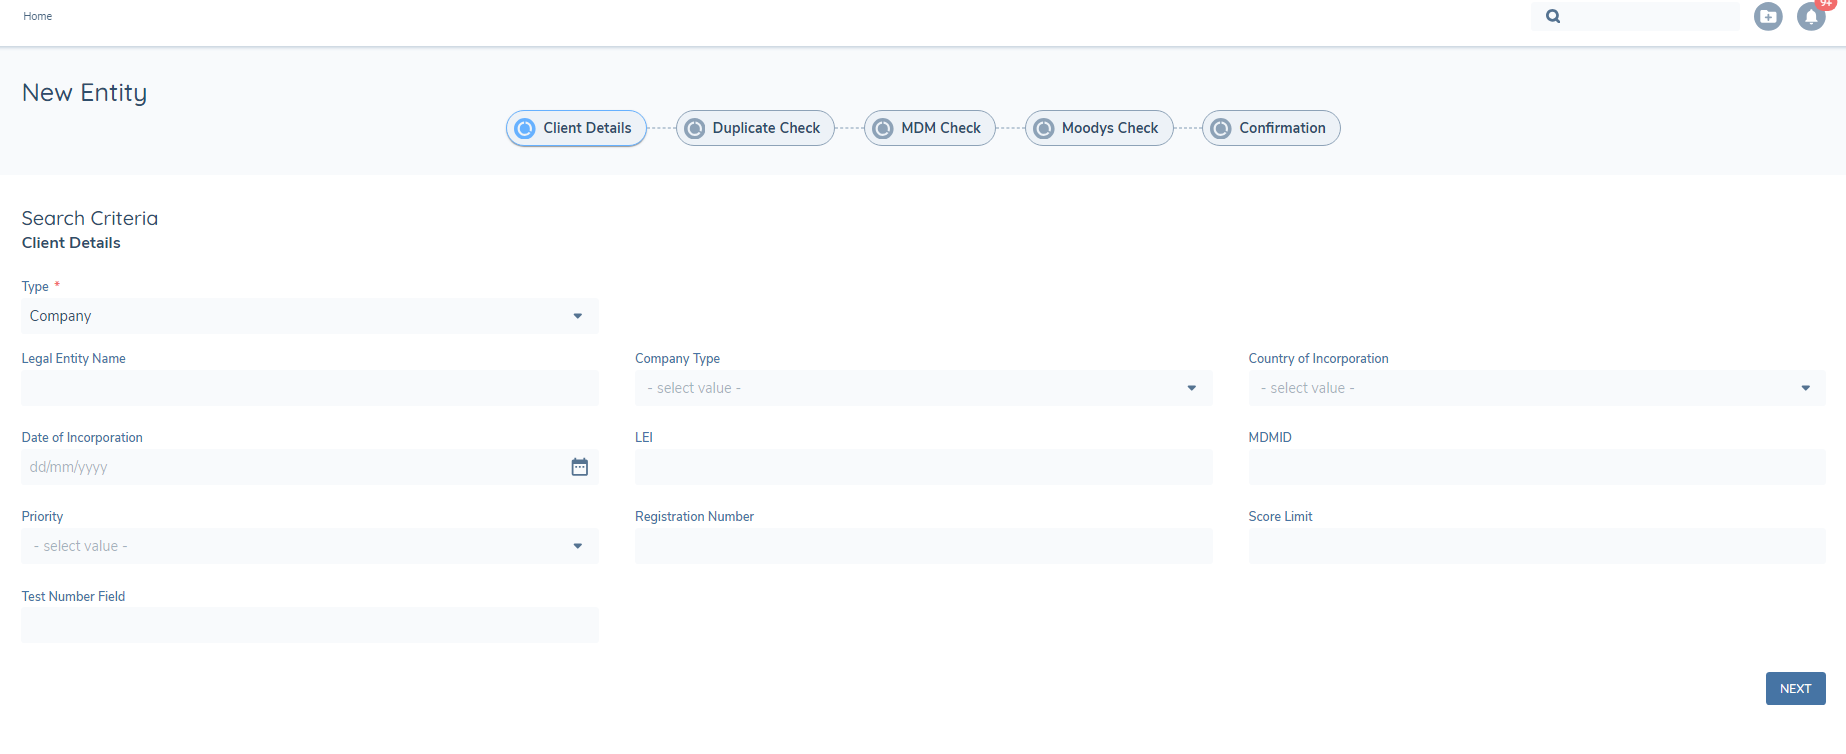
To initiate a Journey with the Enhanced User Experience, we start with a new client on the New Entity screen.
Fields that have been configured in the Basic Details task will appear on the New Entity page and can be used as search criteria. It is recommended to Index these fields in policy to improve search results.
The configured flow and progress indicator appears at the top of the screen and provides the user with an indication of where they are in the flow at any given time. The Blue icon indicates the current step and will change to Green when each step is completed.
When the user has entered the Client Details and clicked the Search button, the system will perform Duplicate check and return the results to the user in the Duplicate Check step.
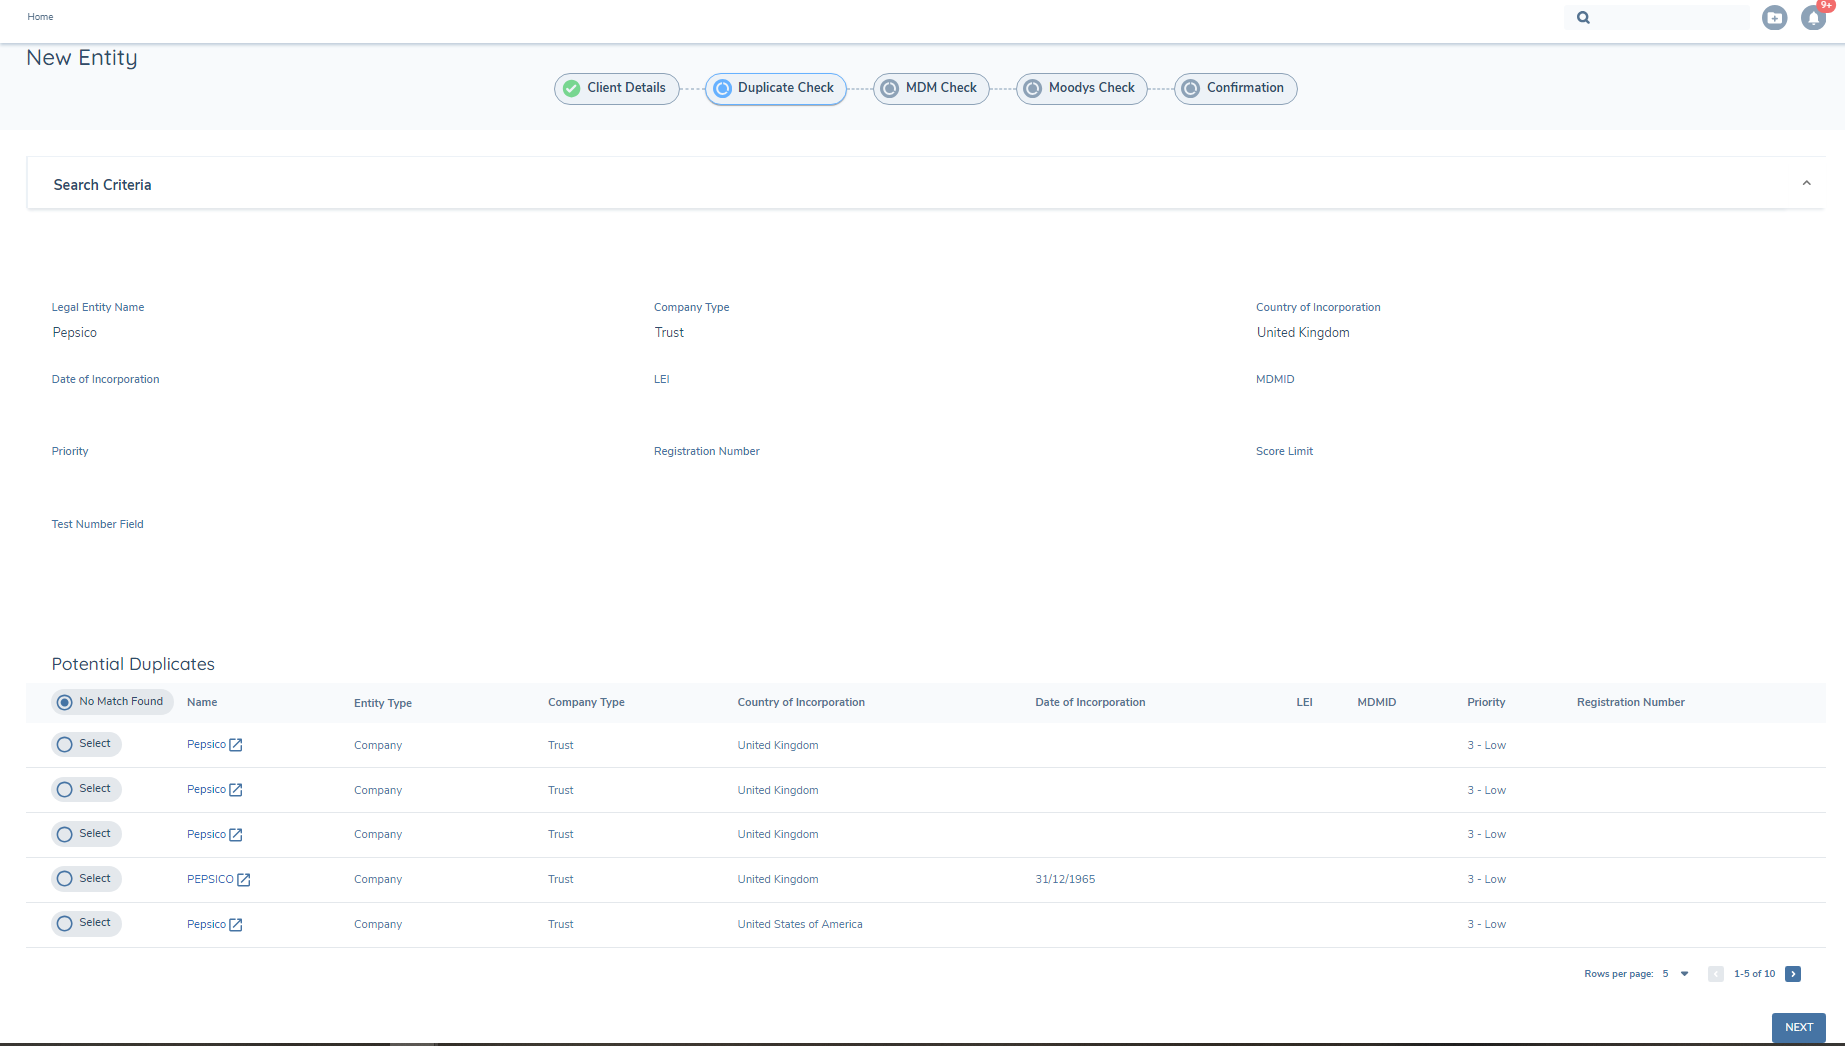
From here the user has the option to slect the No Match Found radio button if they find no match, which will bring the user to the next step in the process, or select a duplicate from the returned list.
If they select a match, when they click the Next button the User will be brought directly to the Confirmation Page and any steps in between are skipped.
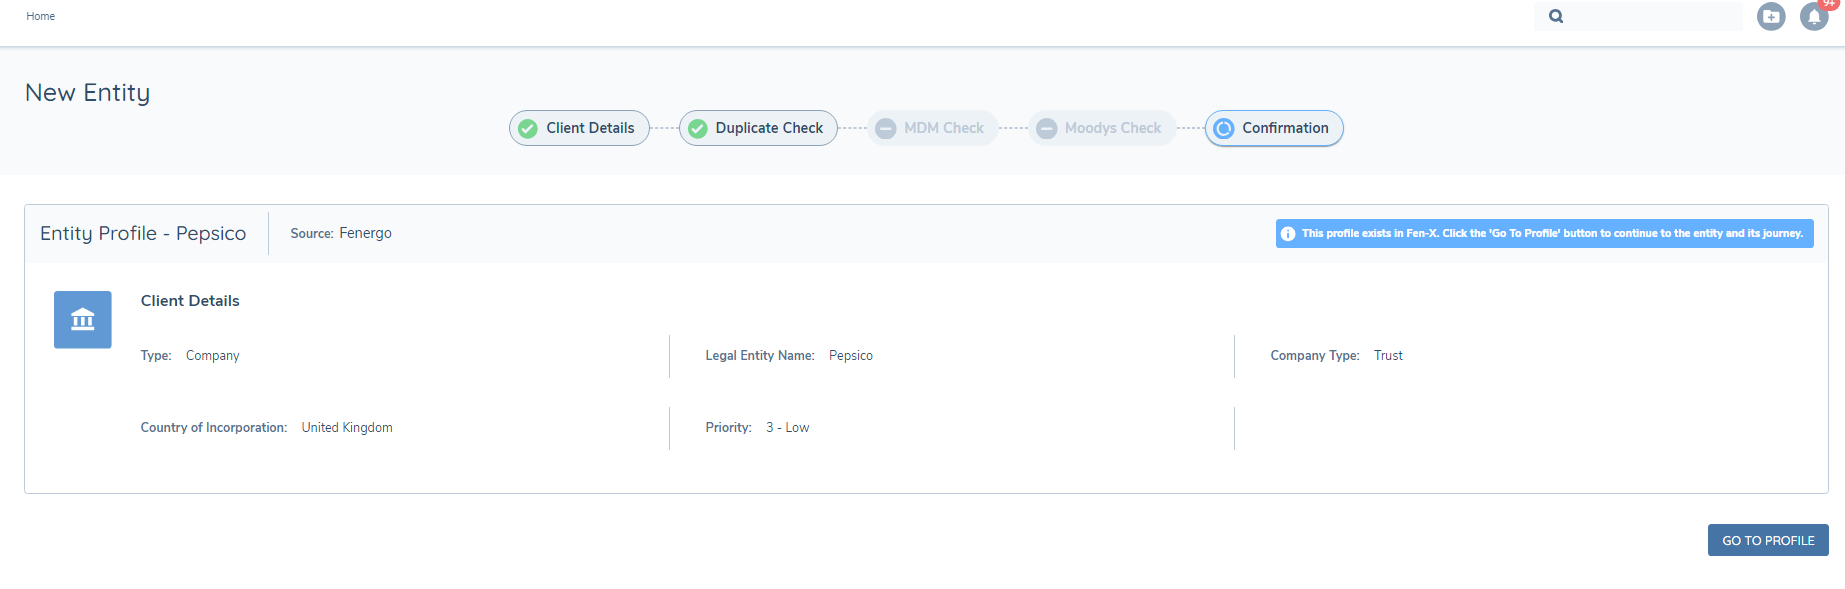
The user can then review the Confirmation page and click the GO TO PROFILE button to enter the Entity Profile page for that entity.
If the user fails to find a duplicate match in the system and they have checked the No Match Found radio button on the Duplicate Search step they can progress to the next step in the process, which will be the next step configured in the flow.
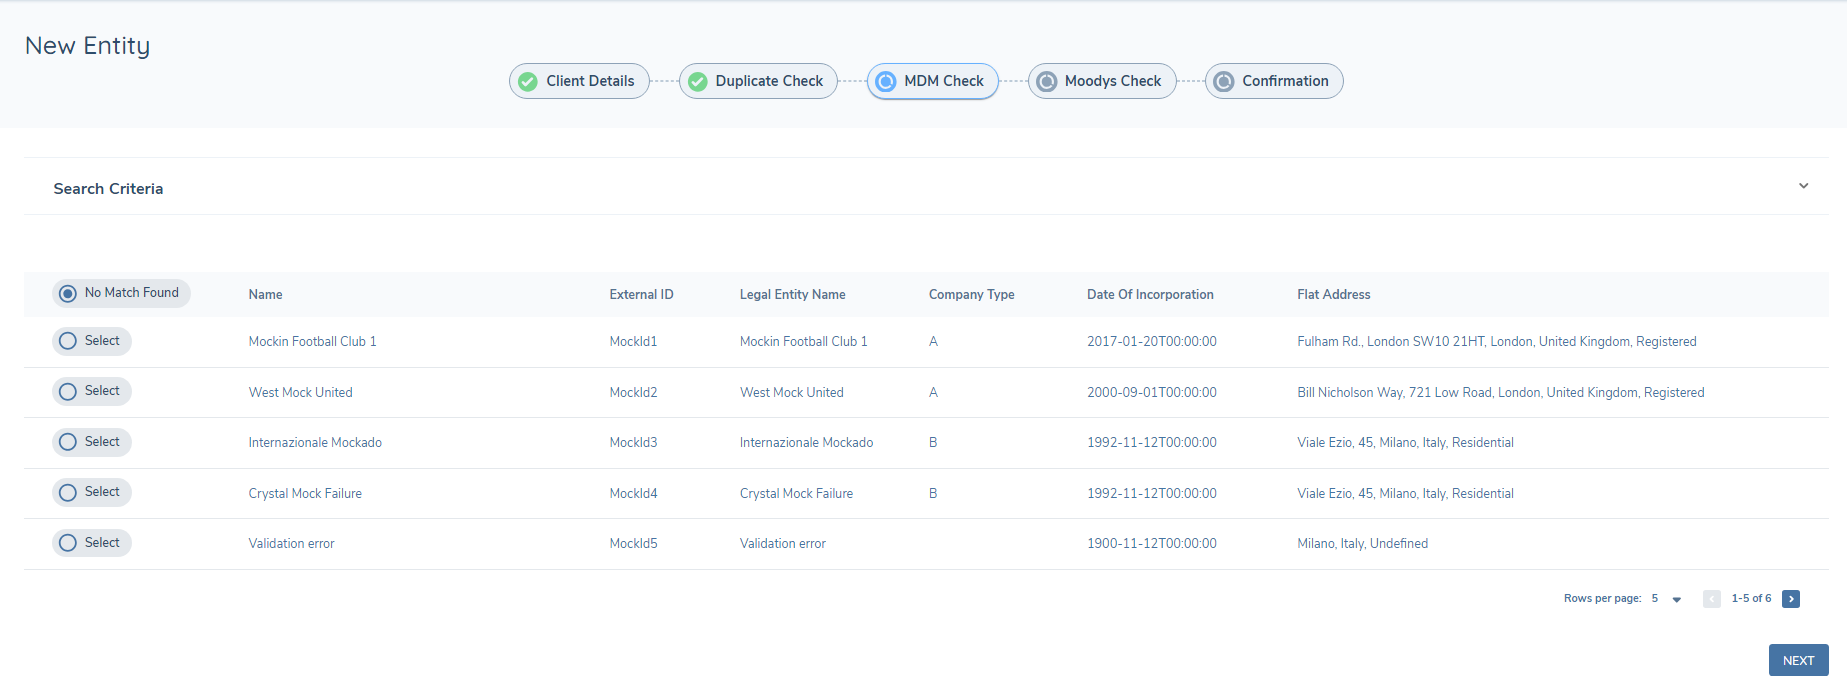
The example below is a mock up of a search of a customers own data source, such as an MDM system. If a match is found here the user can select the match and progress the flow to the Confirmation Page as before.
If no match is found, the user can progress to the next step in the flow, in the example belowm the Moodys Check (OOTB Providers).
Upon entering the Moodys Check, the system will search in the selected OOTB Provider system for a match, based on the supplied search crietria, and if found, will return the results to the UI.
As in previous steps the user will have the option to review the results and select a match or not.
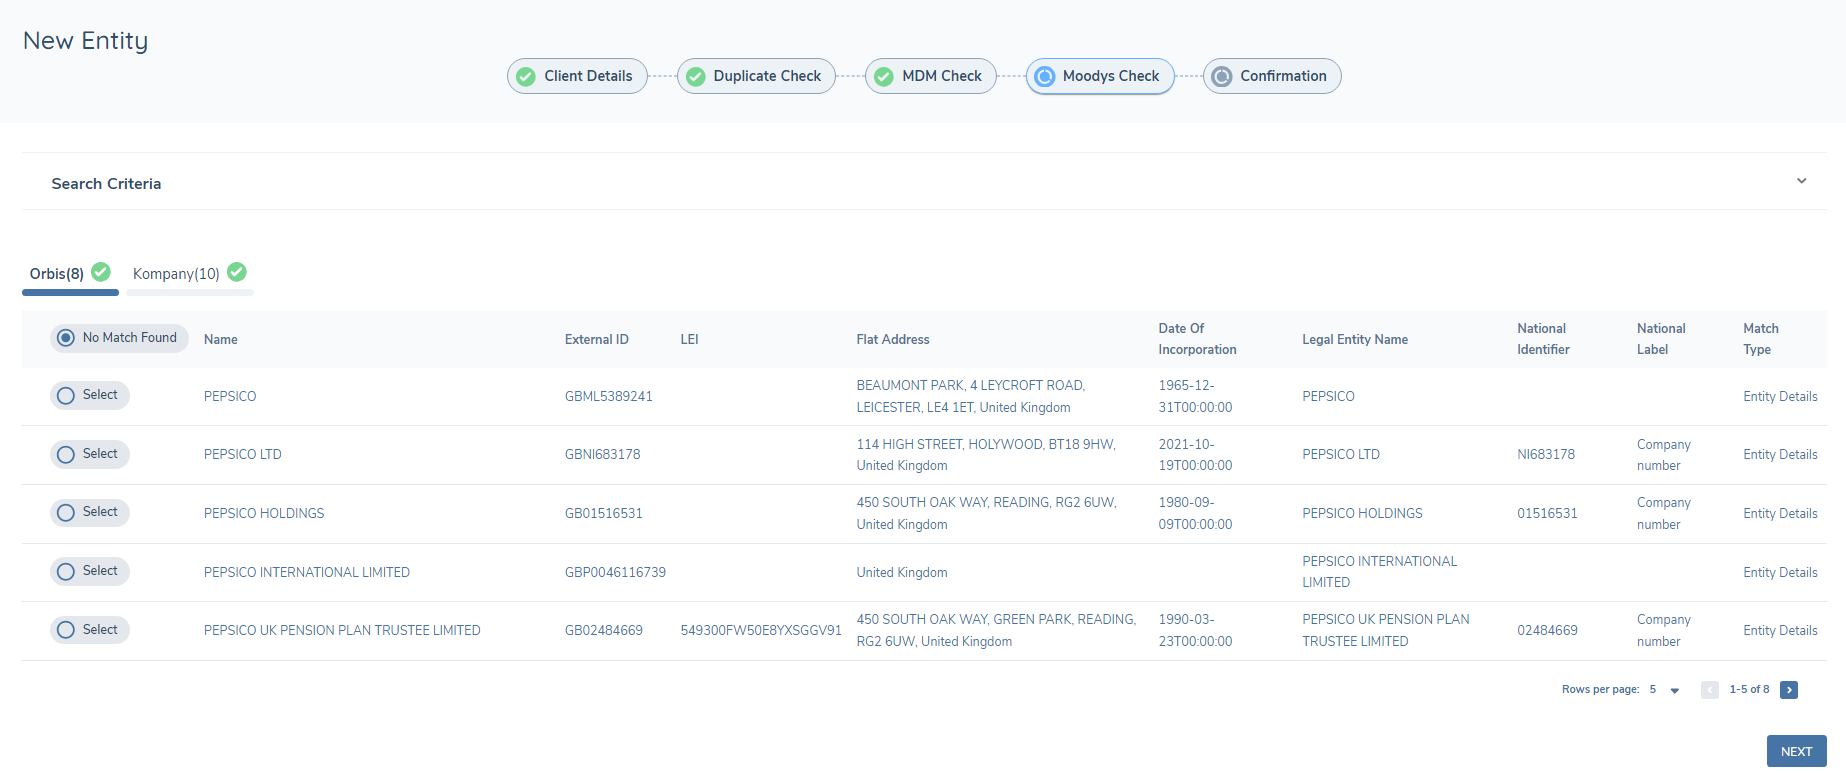
If a match is selected the user will move to the Confirmation page and the returned search data from the Provider, will be displayed. If no match is selected, the original search criteria will be displayed.
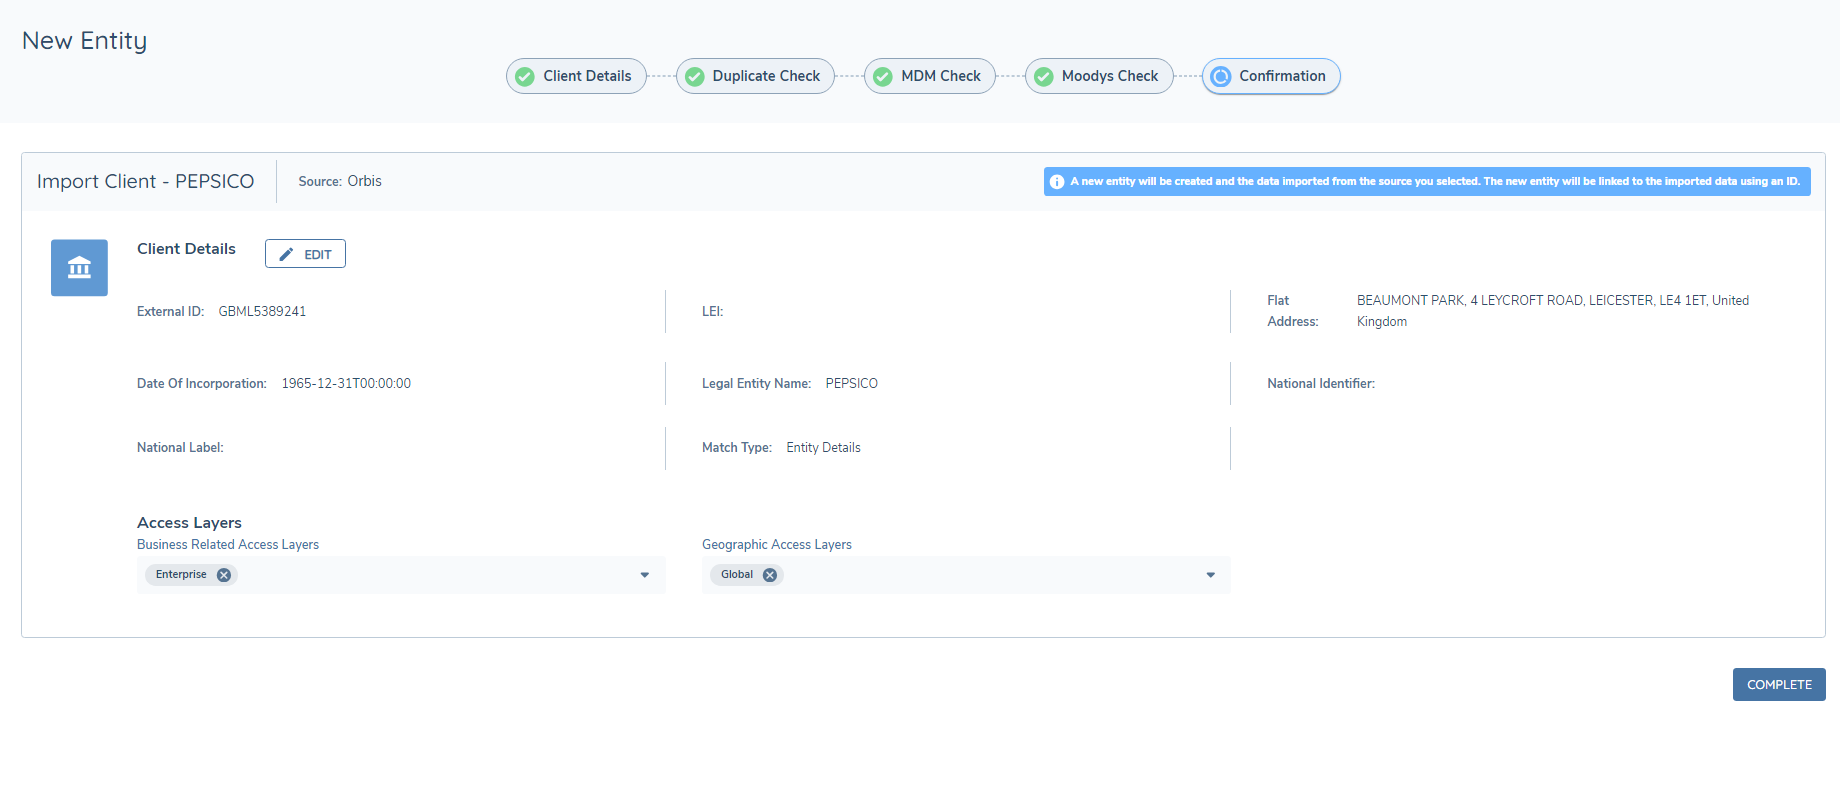
An Edit button on the Confirmation Page allows the user edit the data in the client details before saving to Fenergo.
This allows the user search without mandatory fields early in the flow, but enforces the field validation before the entity is created.
Upon clicking the Complete button the Entity will be created provided a journey has been scoped for the entity.