Credit Screening
Credit Screening is the process of gathering information from credit bureaus & external sources in order to verify financial information and look for red flags so that banks can properly evaluate the financial suitability of potential applicants. Credit Screening can be distinguished between Automated Credit Screening, where an automated request is sent to an external screening provider for screening checks, and Manual Credit Screening, where a user manually captures screening information against an entity.
Automated Credit Screening
Journey Task: Automated Credit Screening
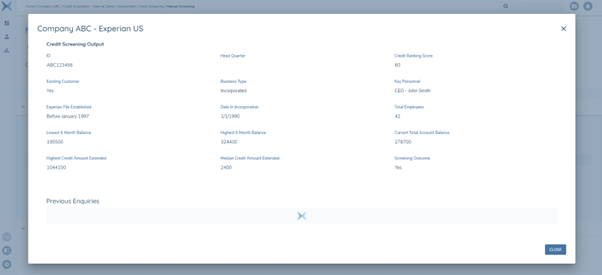
A user can navigate into the “Automated Credit Screening” task to view screening outcomes returned from external providers.
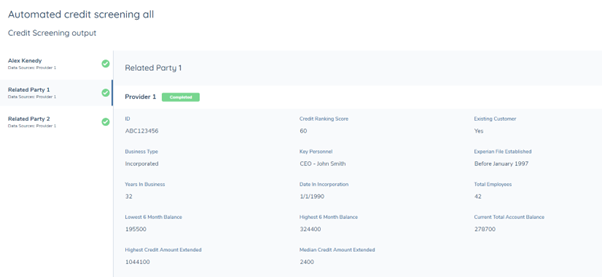
The left-hand navigation panel shows all the entities screened in this task, which may include the related parties in scope. The user can view the credit screening output of each entity individually.
Credit Screening Statuses
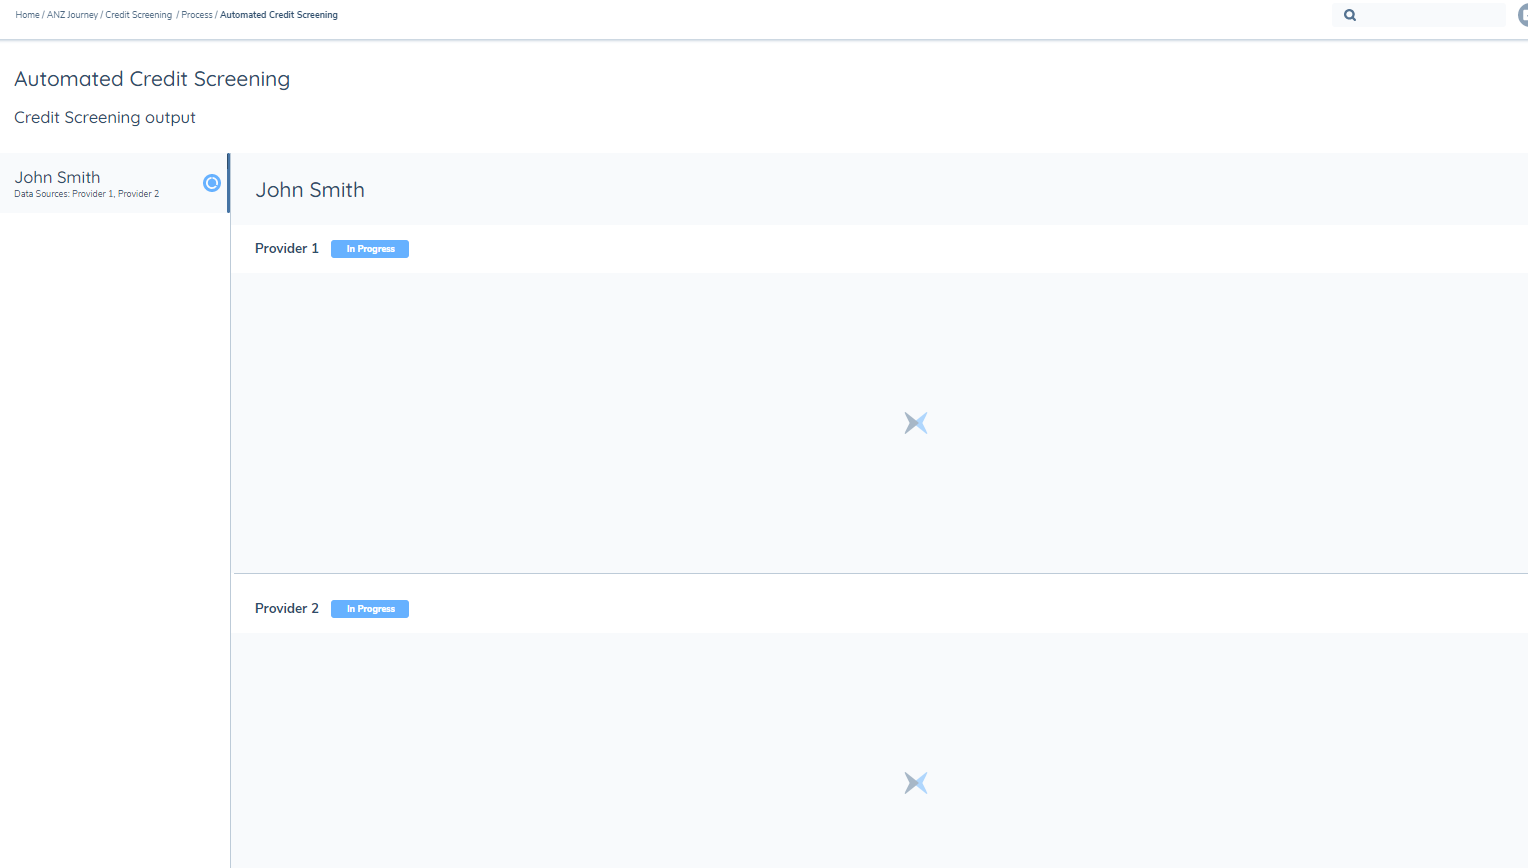
On the left-hand side, a vertical tab displays the entity being screened and external providers that the screening requests have been sent to. A status chip is placed next to the entity name to indicate the completion of credit screening and against each individual screening provider. There are three possible credit screening statuses:
“In Progress”
At least one provider is still completing the credit screening, therefore, the user will see a blue in progress icon next to the entity’s name for the overall screening status. Whilst the screening is in progress, the user will need to refresh the screen to see any responses received. Notifications are being considered to notify the user when the request has been completed.
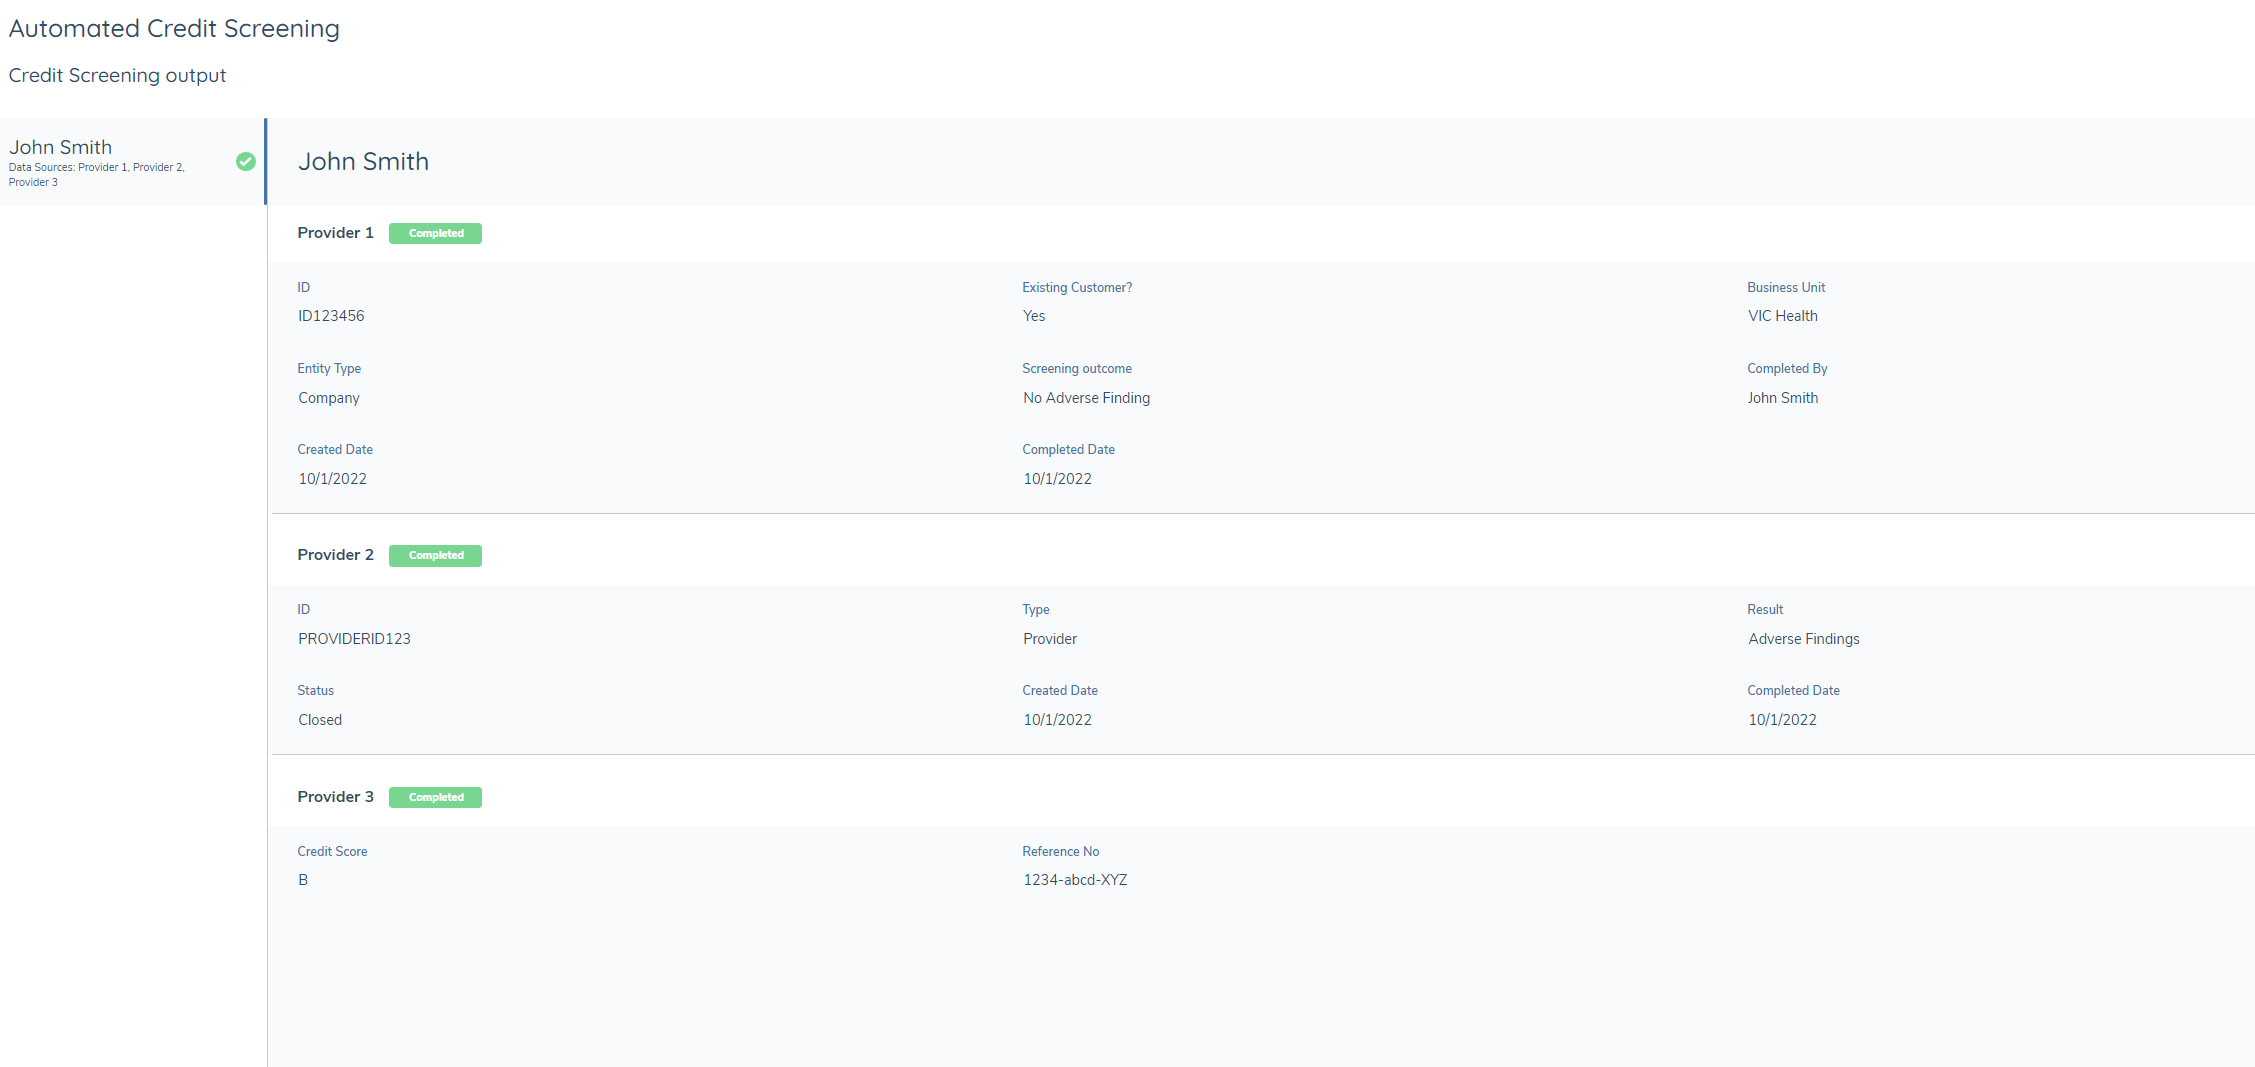
“Completed”
Credit screening requests to all providers have been completed successfully, therefore, the user will see a green check next to the entity’s name and individual provider. The responses are configured through API integrations with each provider.
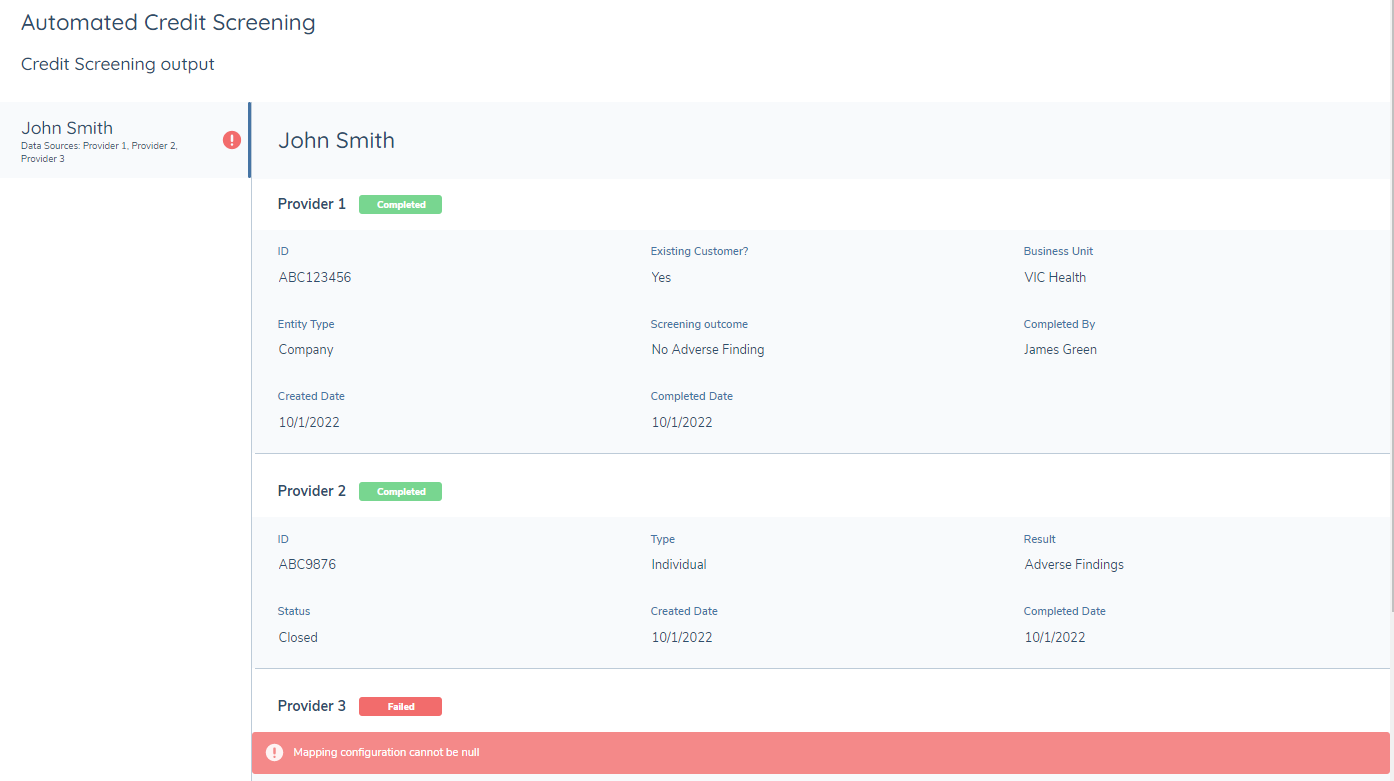
“Failed”
At least one request to a provider has failed, therefore the user will see a red warning icon next to the entity’s name for the overall screening status. When the screening request has failed, no response can be received until the error is fixed, error messages are displayed in the section below each provider. When an error returns, there is an automatic retry mechanism that will make up to 3 attempts to retrieve credit screening outputs. If the error persists after retries, then we will display the error messages in the section below each provider.
Troubleshooting
A failed credit screening request is usually caused by misconfiguration, below are some examples:
- Adapter schema cannot be null
- Failed to map search criteria with mapping configuration
- Adapter schema response does not match mapping configuration result – missing search criteria
- Failed to validate search criteria with adapter schema
- Credit screening enquiry has timed out and has been marked as failed. Note: A 30-minute time out period has been implemented. If no response received after 30mins, the task will be marked as completed so it will not block the user to complete following tasks.
We have outlined solutions for these common errors in our technical guide, and the user can follow the instructions to fix the configuration.
Manual Credit Screening
Credit Screening Task Conditions
Journey Builder has been extended to include Manual Credit Screening as a Source. Assignment and scoping conditions for a Stage, Process and Task can now be triggered using manual credit screening data alongside the existing Entity data.
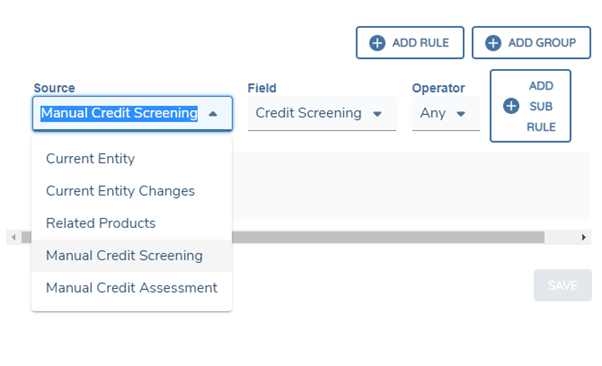
A new ‘Source’ value of ‘Manual Credit Screening has been introduced to the Stage, Process, Task and Task Assignment Scoping Conditions within the Journey Builder. When this ‘Manual Credit Screening’ value is selected from Source, and ‘Credit Screening’ from the associated Field dropdown, the Operator option will be available for selection. Given data groups and the Credit Screening Outcome fields are accepted in the Manual Credit Screening task, the additional Field option in the condition will present the user with all data groups configured in the latest published versions of Policy and the data field with datakey “creditScreeningOutcome”.
The source of “Manual Credit Screening” can be used to assign or trigger any task types in the journey.
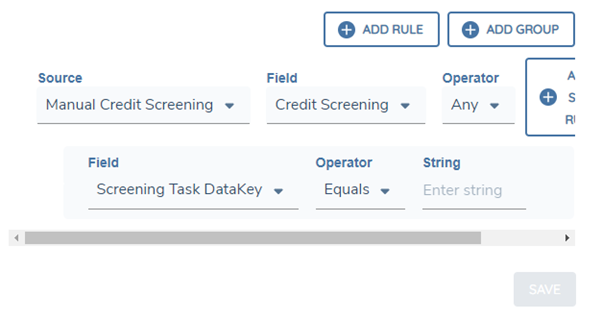
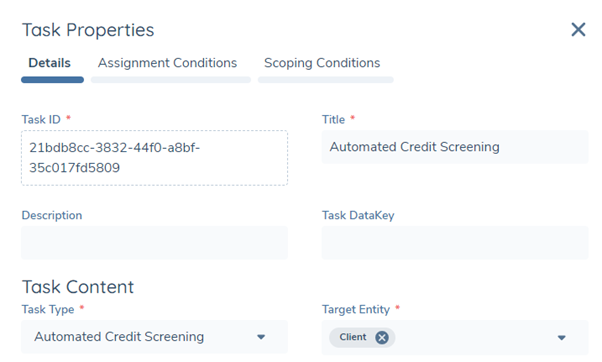
The option ‘Screening Task DataKey’ is dedicated for the source ‘Manual Credit Screening’. Task DataKey is an optional field under the Details tab, and each task can have one Task DataKey. User can specify the fields in the task with Credit Screening Task DataKey selected to be used to conditionally trigger rules. If a task datakey is entered, then the trigger condition will check the field value in the specific task.
If the data requirements for a manual credit screening task are configured in a non-global policy, the data requirements in that jurisdiction will only be triggered if the current entity data meets the policy scoping conditions. If the data requirements within the policy have any trigger conditions, then they will only be triggered if the data in the current manual credit screening task meets the conditions.
Credit Screening Legal Entity Secondary Identifiers
Within the Manual Crkedit Screening task a user can configure the task to display additional entity details as secondary identifiers. Fields configured as Secondary Identifiers (up to a maximum of twenty) will be displayed in the left-hand column in the Manual Credit Screening task under the Legal Entity.
To configure the Legal Entity Secondary Identifiers, create a new category in the Requirements Category Lookup e.g. “Entity Summary” and link this category to the task in Journey Builder through the “Legal Entity Secondary Identifiers – Policy Category” dropdown. Policy fields created against this category will be the secondary identifiers appearing in the Manual Credit Screening task. The user can define the field order of these fields to define the order in which it appears in the task. Furthermore, depending on the Target Entity of the field, this can determine if the secondary identifier appears based on the Entity Type e.g. a secondary identifier of a Business Number only appearing against the entity when it is a Company.
Journey Task: Manual Credit Screening
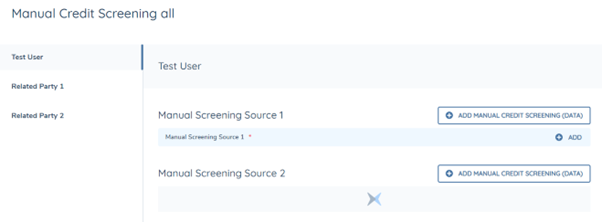
A user can use data groups in the Manual Credit Screening to capture credit information against the entity.
The left-hand navigation panel shows all the entities manually screened in this task, which may include the related parties in scope. The user can capture credit data of each entity individually. The data group is only in scope for this task if it is under the Policy Category selected in journey builder, and it’s entity type and target entity match with the entity screened in the task.
The data groups under the Policy Category selected in journey builder will appear in the Manual Credit Screening task. The data group validations configured in Policy are still applicable in the task and a user can only complete the task if all validations are passed.
As only data groups can be used to capture screening information manually, other field types under the same policy category will not appear here.
Once the manual screening task is completed, the information captured in data groups will be saved and can be used as an addition of the automated screening results.
Each manual credit screening task is designed to capture new information each time the task is created, the data between manual screening tasks is not shared. If the same data group was selected for any previous entity data task in the same journey, then user will see the data persisted from the entity data task to the current screening task and they can update the details if required.
The user can also spotlight a data field for credit screening purposes via the Policy Configuration. To achieve that, the user needs to create a data requirement with the database field name “creditScreeningOutcome”. The datakey is case sensitive and needs to be an exact match so that this field can be spotlighted. This field can be configured as any field types with relevant validations, except for data group.
Once the field has been configured in the Policy and the specific policy category is selected in the Journey Configuration, the user can see this field populated on top of other data fields. The value entered for this field is saved and displayed in the Credit Screening History tab for future reference.

Credit Screening History
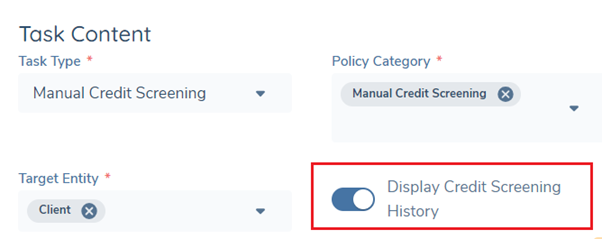
If the switch “Display Credit Screening History” is turned on in Journey Builder, then the user will see a second tab in the Manual Credit Screening task.
The Credit Screening History tab displays the previous screening records for all entities that are screened in the current manual screening task. The screening records including outputs from screening tasks in the current journey, and automated and verified manual screening tasks in the previous journeys.
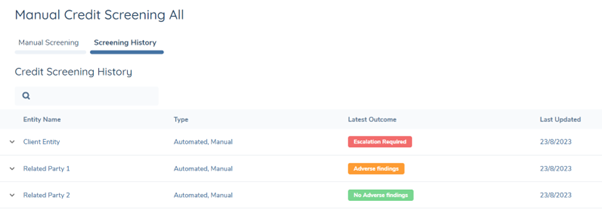
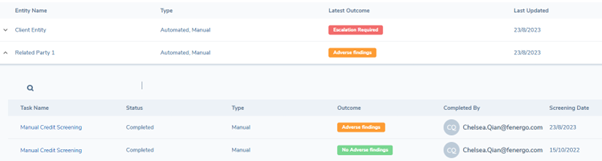
By clicking on the arrow next to the entity’s name to expand the table, the user will see all screening history for the specific entity, including when the requests were sent and what were the outcomes.
Credit Screening History Tab
If the switch “Display Credit Screening History” is turned on in Journey Builder, then the user will see a second tab in the Manual Credit Screening task.

The Credit Screening History tab displays the previous screening records for all entities that are screened in the current manual screening task. By clicking on the arrow next to the entity’s name to expand the table, the user will see all screening history for the specific entity, including when the requests were sent and what were the outcomes.
The user can also map a field with datakey “creditScreeningOutcome” in Automated Credit Screening Task to be displayed as the “Outcome” for each provider from the backend.
The Task Name in the expandable area has a clickable hyperlink. When the user clicks on the hyperlink, a modal will open up to show the screening details of the specific task.
Journey Task: Verify Manual Credit Screening
This automated service task must be configured sequentially after the “Manual Credit Screening” task. This task will verify all active Manual Credit Screening tasks that have not been previously verified.

Once a Manual Credit Screening task has been verified, it cannot be reopened, or the screening data be edited.
Considerations
- Credit Screening tasks currently only accept the field with trigger conditions or conditional value triggered by Current Entity Data Source in the Policy.
Configuring the Credit Screening Feature
Credit Screening Provider Configuration
The system supports the use of more than one Credit Screening Provider, which allows users configure any Custom Providers for use from Credit Screening Providers page.

Enabling/Disabling more than one provider can be configured from the main Provider screen by toggling the Active toggle switch. This can also be done from inside any of the Providers Screens through the Active toggle switch.

Automated Credit Screening Configuration
To enable automated credit screening, you must create an “Automated Credit Screening” task type in the journey builder.
The “Automated Credit Screening” task is an automated system task that orchestrates the credit screening requests to the screening provider(s) integrated. There is no user action required to initiate and complete credit screening. The credentials and provider-specific settings are defined via API integrations. Where more than one provider is integrated, the screening requests will be passed to each provider and returned asynchronously.
Manual Credit Screening Configuration
To enable manual credit screening, you must create a “Manual Credit Screening” task type in the journey builder. This task can be configured anywhere in a journey.
Policy Category in the Task Properties is used to connect the data group in Policy and Manual Credit Screening Task. The Policy Category selected here must be the same as the Requirement Category in Policy to enable the data groups to appear in the Credit Screening Task.
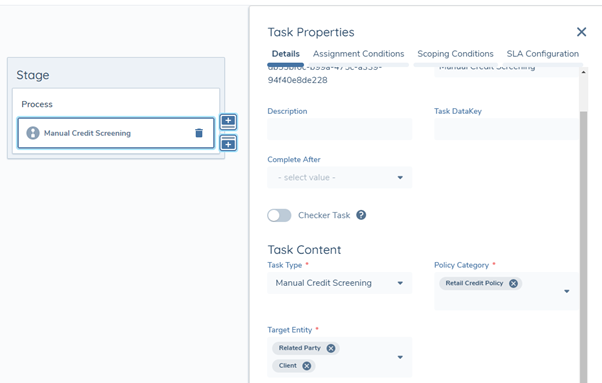
Configuration for Related Party Credit Screening
User has the option to request manual credit screening for Related Party, Client or both in the Target Entity Field.
If user selected Related Party as the Target Entity, then verified related parties from previous journeys and all related parties onboarded in the current journey will be screened in the automated credit screening task. If user selected both Related Party and Client as the Target Entity, then all entities will be screened in the same automated credit screening task.
Association Scoping Rules can be applied to automatically determine which entities should be in scope for credit screening.
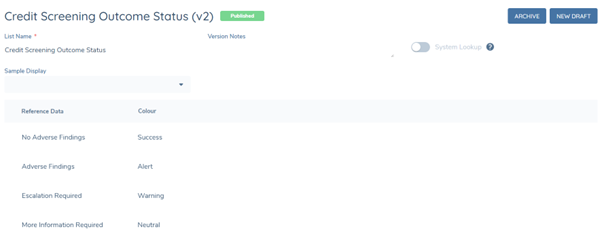
Screening Outcome Status Configuration
The outcome column in the history grid can be configured as a status chip with a selection of colours. In the Reference Editor, a lookup list named as “Credit Screening Outcome Status” is required. On the first column “Reference Data”, the user can configure any possible manual and/or automated credit screening outcome. Then, the second column can be used to map the outcomes to the status of the chip.
Four statuses of the chip are supported in credit screening task, and each of them is mapped to a specific colour:
- Success – Green
- Neutral – Blue
- Warning – Orange
- Alert – Red
By mapping the outcomes to the status, the user is also mapping the outcome to the colour implied. For example, if “Adverse Findings” is mapped to Alert, then it will be displayed in a red status chip in the credit screening history table.
To automated credit screening outcome in a status chip, the user will need to map one data field in the automated task to be displayed as the “Outcome” for Screening History grid first. The values of this field also need to be mapped to the status in the Reference Editor.
Please note that the lookup list name “Credit Screening Outcome Status” is case sensitive, if this lookup cannot be found, then the outcome will only be displayed in plain text. The status entered in the second column must be the exact match of one of the four status, no white space allowed but case insensitive.