Installing the Fenergo CLM for Salesforce App
This overview provides a step-by-step guide for integrating the Fenergo Salesforce application, including installation, configuration, and user setup. Reach out to the Project Team or Solution Archeitect for assistance with installation and configuration.
Requirements per each Installation
-
Project Team to submit a SaaS Service Request to the Forge team: https://fenergosupport.atlassian.net/servicedesk/customer/portal/23
Request the following for your Salesforce (SF) environment:
- Client ID/Secret
- MTLS Client ID
- Certificate (.jks file) and password
Each SF environment will require its own unique Client ID, MTLS Client ID, and certificate.
-
Enable webhooks on your tenant.
Installation
Once you've received all the required details, proceed with the Salesforce integration steps below.
-
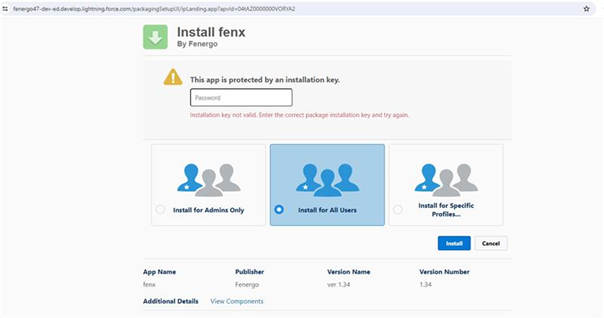
Install the Fenergo SaaS application using the provided install link
-
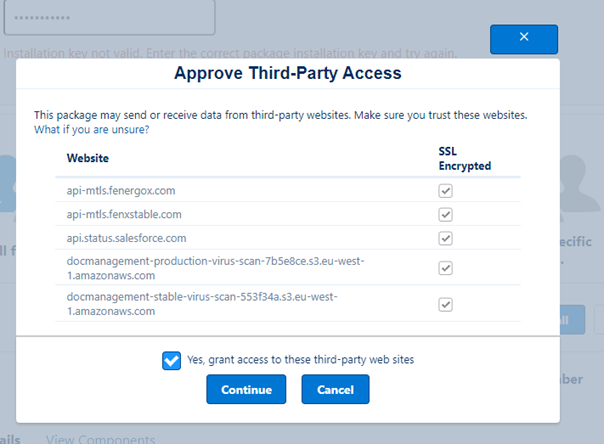
Reach out to a Fenergo representative to receive the password for the following:
-
Select All
Configure Authentication
-
Select your user profile and Settings.
-
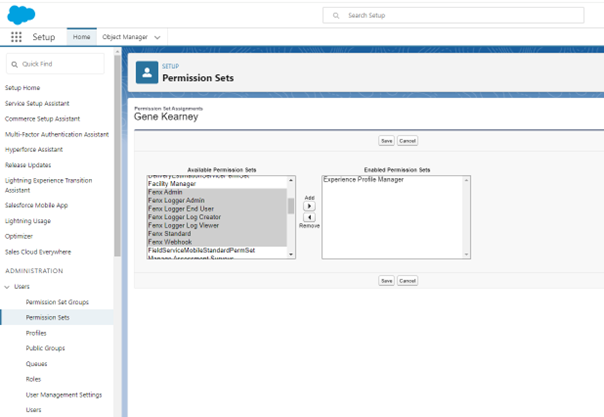
In the left-hand pane, under My Personal Information, click on Advanced User Details. Scroll down to Permissions Set Assignments and click Edit Assignments and assign the following to your account:
 info
infoEach user will require the standard Fenergo SaaS permission to use the Salesforce application.
Salesforce App Permissions
- FenX Admin: This controls access to Fenergo SaaS configuration area
- FenX Standard: This is the basic permission that all users need to use the Salesforce for Fenergo app.
- FenX Webhook: The site guest user requires this permission for webhooks to work
The following permissions are not required and can be ignored by clients:
- FenX Logger Admin
- FenX Logger End User
- FenX Logger Log Creator
- FenX Log Viewer
-
Click the gear on the top right and select "Setup".
-
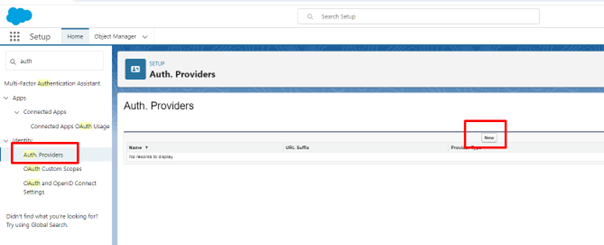
In the left-hand pane, search for Auth Providers and select "Auth. Providers".
-
In the centre page, click "New" to create a new provider.
-
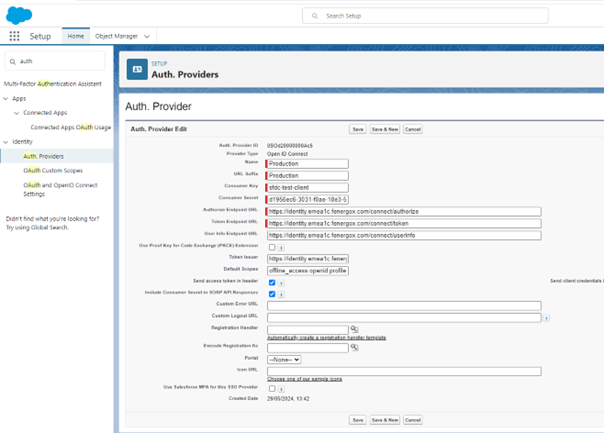
In the dropdown, select "Open Connect ID" and enter the following values:
- Name - Production
- URL Suffix - Production
- Consumer Key - sfdc-***********
- Consumer Secret - ********************************************
- Auth Endpoint URL -
https://identity.$DOMAIN$.com/connect/authorize - Token Endpoint URL -
https://identity.$DOMAIN$.com/connect/token - User Endpoint URL -
https://identity.$DOMAIN$.com/connect/userinfo - Uncheck Use Proof Key for Code Exchange (PKCE) Extension
- Token Issuer -
https://identity.$DOMAIN$.com - Default Scopes - offline_access openid profile tenant Fenergo.Nebula roles refresh_token
tipThe Fenergo
$DOMAIN$can be found by navigating to your Fenergo login page.
For the default EMEA tenant, no domain name is required as this will be:https://identity.fenergox.com/Account/Login.For other tenants, such as emea1b, the login URL will follow this format:
https://identity.$DOMAIN$.fenergox.com/Account/Login(e.g.,https://identity.emea1b.fenergox.com/Account/Login).Therefore my domain is emea1b.
-
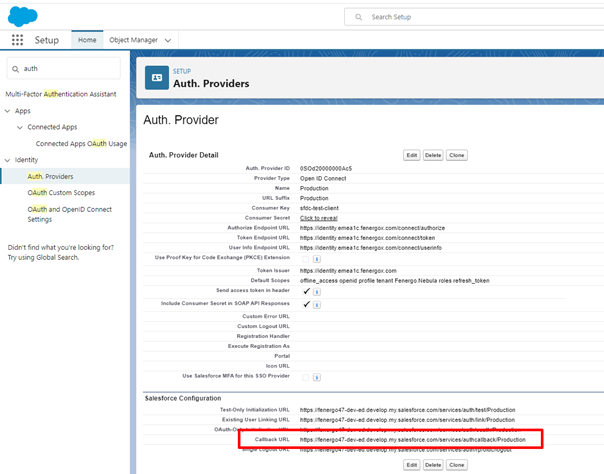
Once you have entered the above details, click Save.
-
Fenergo requires callback URL that was created once saved which is listed under "Salesforce Configuration" on the bottom of the page. (Please note that this needs to be updated on the Fenergo side prior to continuing).
-
Go back to settings and search for "Named Credentials" and click on it.
-
Go to Setup, search for Named Credentials and click on it
- Open External Credential Tab
- Click on New, fill in with the following data:
- Label: Production
- Name: Production
- Authentication Protocol: OAuth 2.0
- Authentication Flow Type: Browser Flow
- Scopes: offline_access openid profile tenant Fenergo.Nebula roles refresh_token
- Authentication Provider: Production
-
Open the external credential just created
- Scroll down to the Principals sections and click New
- Parameter Name: fenx
- Sequence Number: Do not change this
- Identity Type: Per User Principal
- Scope: offline_access openid profile tenant Fenergo.Nebula roles refresh_token
- Click Save
- Scroll down to the Principals sections and click New
Set Up Named Credentials
-
Create Named Credentials
- Go to Setup, search for "Named Credentials" and click on it
- Open Named Credentials Tab
-
Click on New, fill in with the following data:
- Label: Production
- Name: Production
- Url: (depends on the environment, example:
https://api.$DOMAIN$.fenergox.com) See step 6 from the Configure Authentication section for more detail on how to identify your domain. - Enable for Callouts: checked
- External Credential: Production
- Allowed Namespaces for Callouts: fenx
-
Create Permission Set and assign to users
-
Go to Setup, search for "Permission Sets" and click on it
-
Click on New and add the following data:
- Label: FenxConnection
- API Name: FenxConnection
-
In the FenxConnection Permission Set, Open Object Settings
- Open User External Credentials
- Ensure the following options are enabled and Save
- Read
- Create
- Edit
- Delete
-
-
Navigate to FenxConnection Permissions Set and Open External Credential Principal access
- Click Edit
- Under the available external credential principals, select the principal for Production fenx external credential and move it to the Enabled principals column
- Save
-
Navigate to FenxConnection Permissions Set and Open External Credential Principal access and Assign the FenxConnection permissions set to all users that will work with the Fenx App.
- In FenxConnection, click on Manage Assignments
- Click on Add Assignment
- Select the Users you want to assign
- Click Next and then Click Assign
Users will be assigned the permission now.
-
Go back to settings and search for "Named Credentials" and click on it. Go to Setup, search for Named Credentials and click on it
-
Open Named Credentials Tab
-
Click on New, fill in with the following data:
-
Label: Comments
-
Name: Comments
-
Url: (depends on the environment, example:
https://comments.$DOMAIN$.fenergox.com. See step 6 from the Configure Authentication section for more detail on how to identify your domain. -
Enable for Callouts: checked
-
External Credential: Production
-
Allowed Namespaces for Callouts: fenx
-
-
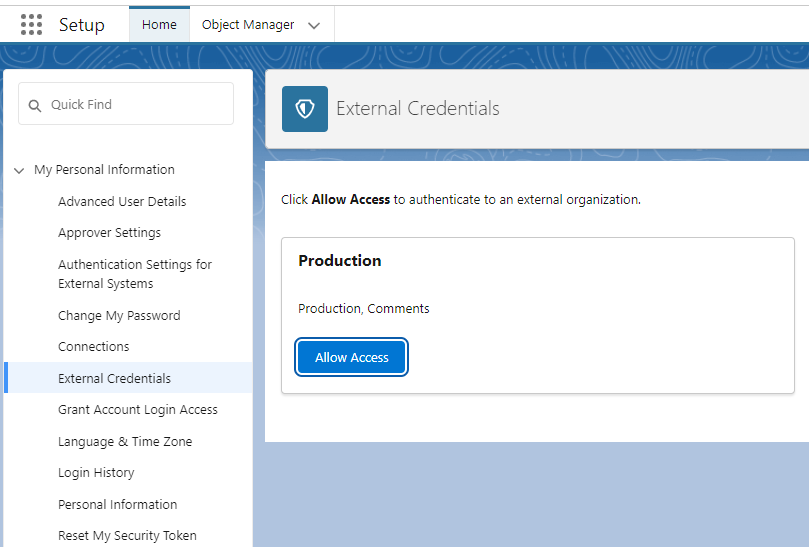
On the top right, select the Profile icon and select Settings (NB: This needs to be done on a user basis)
-
On the left-hand pane, select External Credentials
- Trigger the authentication flow for both Production and Comments
- Click "YES, ALLOW" on the following screen on Fen-X which will redirect back to Salesforce.
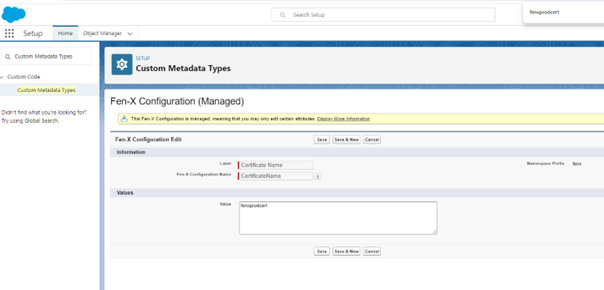
Configure FenX Environment
-
Navigate to Setup > Custom Metadata > Fen X Configuration. Update the following by clicking on the Edit Button on the left of the respective label:
- Certificate Name: fenxprodcert
- Is Pointing To Fenx Production: true
- MTLS Client Id: mtls-*****************
- Names Credential Api Name: Production
- TenantId: ***********************************************
- MtlsUrl:
https://api-mtls.$DOMAIN$.fenergox.comUpdate the URL here to include your domain. See step 9 for more detail on how to find your domain.
For more information on this please visit Data Model Mapping and Sync section of the Salesforce Functional User Guide
-
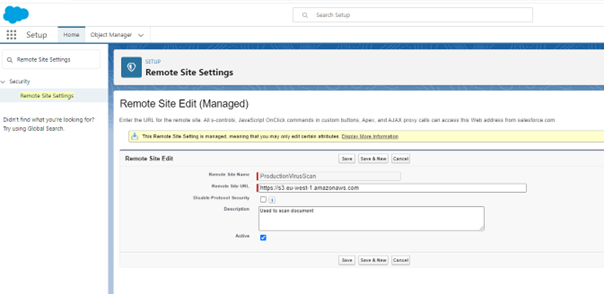
Navigate to Setup > Remote Site Settings > Production virus scan and select "Edit". Update the remote site URL to the following:
https://s3.$INSERTAWSREGION$.amazonaws.comtipPlease reach out to Project team if you are unsure of the AWS region. Examples are as follow up not exhaustive and Fenergo may add additional regions over time.
- APAC: ap-southeast-2
- CAN: ca-central-1
- EMEA: eu-west-1
- NAR: us-east-2
-
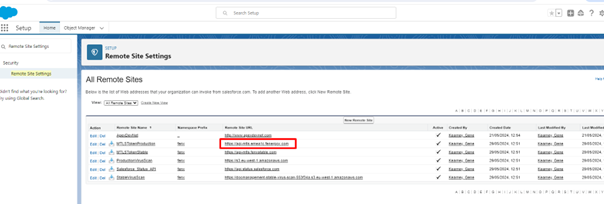
Update the remote site URL on both ExternalDataReceptorCallbackProduction & MTLSTokenProduction.
-
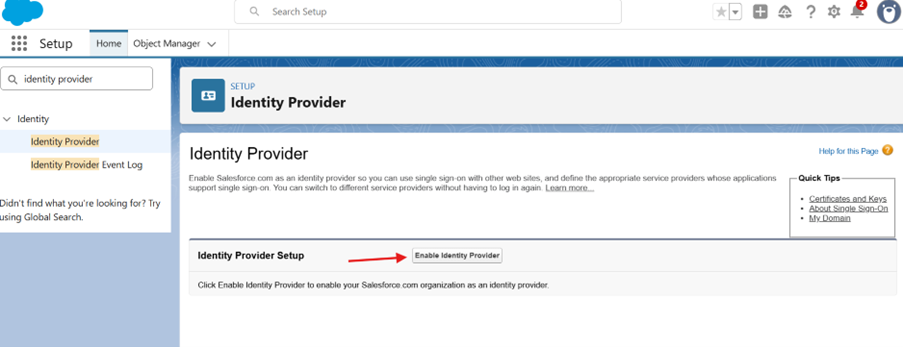
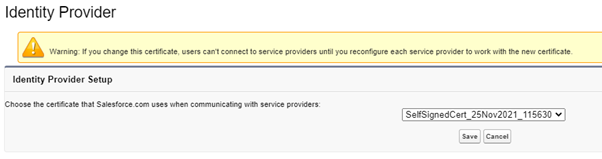
Within Setup, search for Identity Provider in the left-hand pane and select "Identity Provider", then click on "Enable Identity Provider". (You may need to click it twice).
-
The following will be displayed. Here, you will click Save.
tipThis step can be skipped if an Identity Provider is already set up by the client.
-
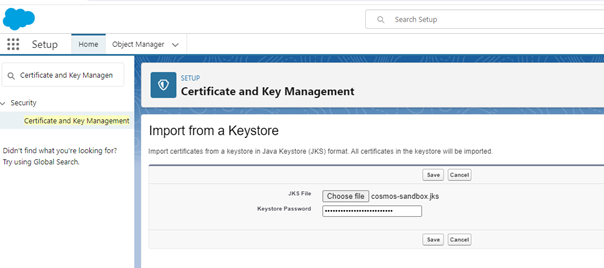
Search for "Certificate and Key Management" in the left-hand pane and select it. Then click the button "Import from Keystore".
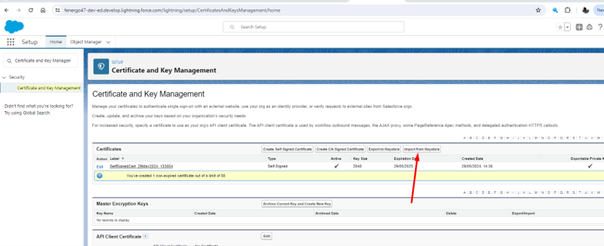
-
JKS file will be provided by the Project Team.
-
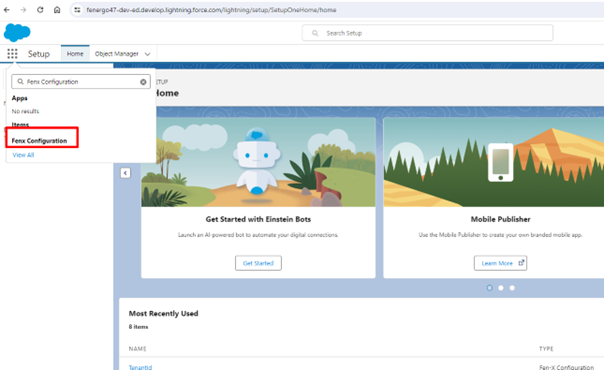
From the top menu, select "Fenx Configuration".
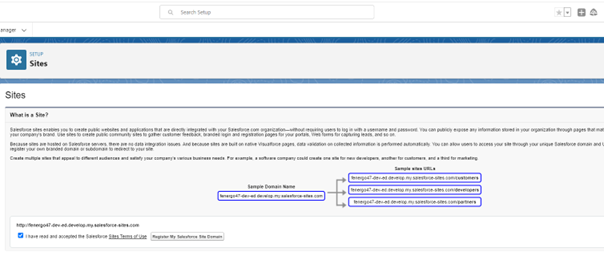
-
Enable the Site Domain.
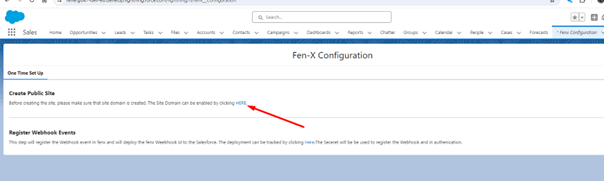
-
Verify the name of your Org and Register:
-
Once registered, return to the config screen and click on "Create".
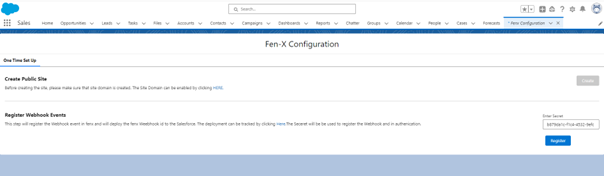
-
Once this completes, enter the Secret Key value to register the webhook.
dangerWebhook configuration once created should not be deleted. This is a one-time setup and cannot be recreated in the SF app.
Complete the Setup
-
Once completed, you will need to browse to the account page. (If no accounts are visible please click "New" and create an account).

-
Once on the page, click on the gear icon and "Edit Page".
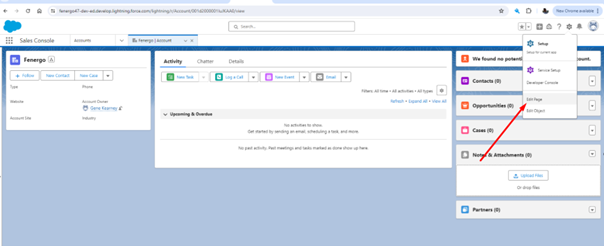
-
In the left-hand pane, search for Fen-X and drag the items to the page.
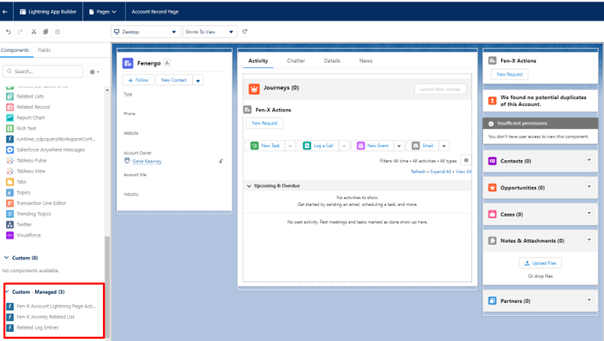
-
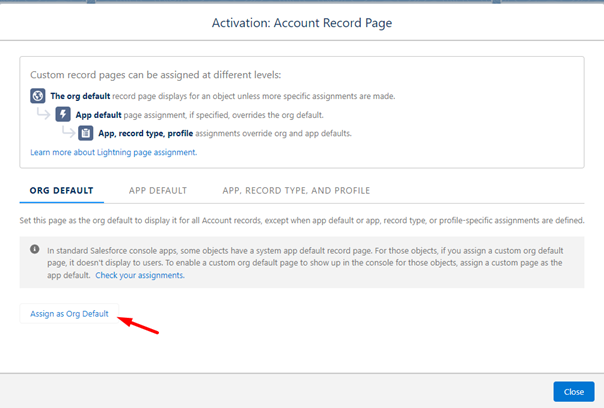
Click Save and select Assign as Org Default.
tipOnly assign as Org Default if this is required to be default accross the whole Salesforce Org.
 Error 401
If you receive an error 401: unauthorised message, follow steps 7-8 from the Set Up Named Credentials section.
Optional Configuration
Incease Document File Size:
-
Update the customer metadata file Increase file upload limit to increase the file size from false to true.
-
To enable this, the configurator needs to set one configuration in their Salesforce Org:
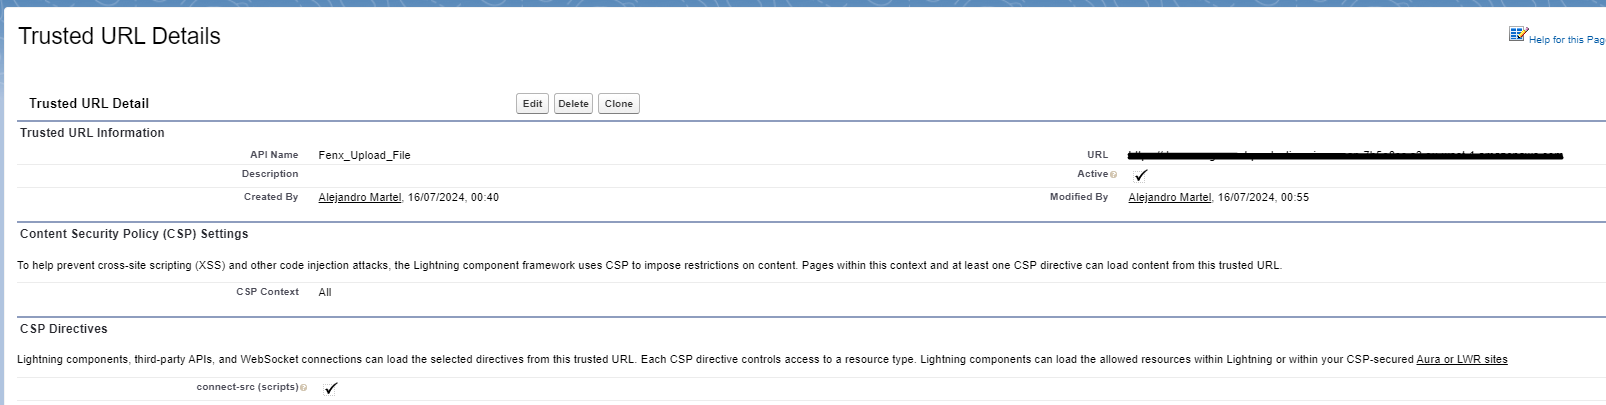
- Add a Trusted URL pointing to the antivirus scan URL.
- Find the URL in the remote site settings under ProductionVirusScan.
- Copy this URL and paste it as a new Trusted URL.
- Before saving, check the box labeled connect-src.
The file size upload limit is extended to 200mb.